Friday, January 4th, 2013:
This morning I did a light scuffing of the final, thinned Z-poxy coat, with a gray Scotchbrite pad, and then sprayed a couple of coats of Sealcoat shellac onto the guitar, using a Pre-val sprayer. (I get much smoother coats that way with the shellac.)
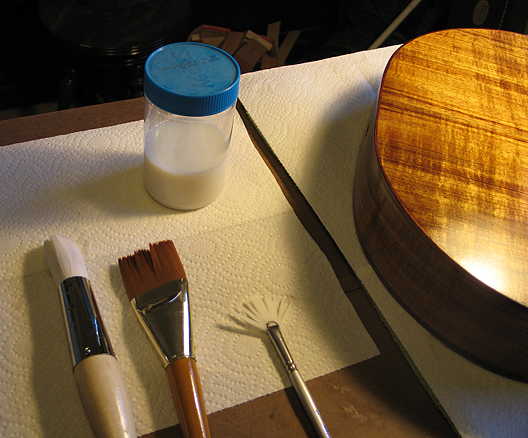
Then I began the brushing process. Since my last photo of the brushes I will be using, I had found another couple of brushes --- a 2" Taklon brush and a fan brush. I saw the fan brush and thought that it might help to feather out any streaks or bubbles that might occur as I brushed. As I brushed on my first coat of the EM6000 today, it turns out I was right! The brush I ended up primarily using was the big white round brush (it seemed to lay on the finish the most smoothly). If I had any streaking or dripping, I simply went over it with the fan brush, and that smoothed it all out.
Here are the brushes:
It's about 4:30 p.m. right now. I will probably do at least two more coats today.
|
|
The procedure I found that worked for me was this:
I first applied finish to the sides.
Then I worked on the back.
I let it sit (the top to the workbench) for around 30 minutes, until it was dry enough to lay on its back.
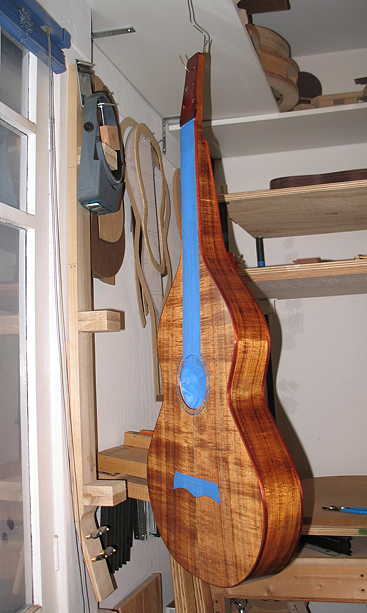
Then I brushed the finish on the top.
I then hung the guitar with a wire hanger to a hook I have on the bottom of my workroom shelf.
|
Sunday, January 6th, 2013:
No photos today, because there wouldn't be much you could really tell from them. All I've been doing is laying on more coats of the EM6000 finish.
Friday, I had applied the first 3 coats.
Saturday, I decided to try out adding a little SA5 retarder to the EM6000; I added about 10% retarder. I first lightly scuffed the 3rd coat from the previous day, before applying 4 more coats. As I previously explained, I would apply finish to the sides, then the back, wait at least 30 minutes for those coats to dry, before applying the finish to the top. I would then wait at least 30 minutes before repeating the process. The retarder did help to make the coats flow on a bit more smoothly, so I'm glad I decided to do that.
This afternoon, I level-sanded with 320 and 400 grit sandpaper. So, right now, I have the 8th coat applied to the sides and back, and am waiting to do the top. The finish level-sanded pretty easily, so I'm not sure yet exactly how many total coats I'll end up doing. I might go up to 12 coats, do another level-sanding, and see how that goes.
LATER THAT DAY . . . I have applied a total of 10 coats now.
|
|
Monday, January 7th, 2013:
I applied a total of 4 coats today, making a total of 14 coats so far. Tomorrow, I will do another level-sanding and will see whether it's good.
Tuesday, January 8th, 2013:
I level-sanded the 14th coat with 400-grit gold sandpaper; I think I'm about done. The finish sanded beautifully, and I didn't sand through anywhere!
I plan to put on just a couple more coats. The weather has improved, so I put regular-strength EM6000 (no retarder) into a Pre-val sprayer and took the guitar outside to spray (it's sunny and clear outside, about 63 degrees --- yesterday, it was a little rainy and cold, but it's cleared up nicely today).
So far I have sprayed the first full-strength coat with the Pre-val. I just discovered how to unclog the sprayer when it starts spitting and clogging --- you just stick your finger over the nozzle hole and spray --- that forces the air down the intake tube and unclogs it! Duh! I never knew that before. (Shows how much I know.) Anyway, even though it's still a little bit cold outside, I have been able to spray the finish, allowing the last couple of coats to lay on smoothly and level out nicely!
LATER (about 3:00 p.m.) . . . I am finished with the finish!!! I ended up putting on three more light coats. Now I will have to let it sit for a week, before I do the final rub-out and setting up. This is the hard part.
|