Thursday, January 17th, 2013:
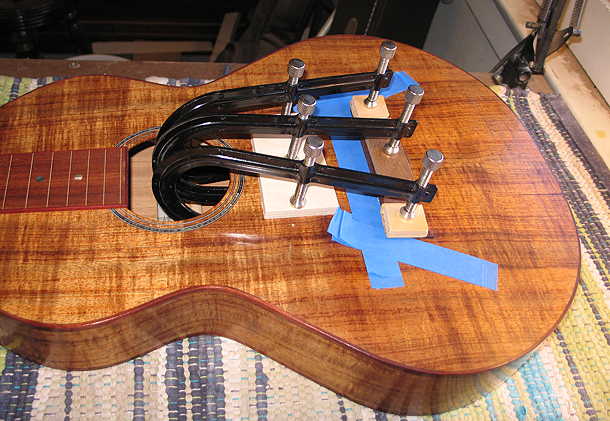
I just glued on the bridge. First I built up a few masking tape layers on three sides of the bridge, to help properly position it and to help stabilize it once the glue was applied and the clamps tightened. After I applied the glue, I held the bridge in place for a little while, until it was somewhat "set" in place. Then I applied the three clamps, with a caul underneath and cauls above, cleaning up the glue squeeze-out with a moistened paper towel and bamboo skewer (the pointy tip helped to wipe away the glue along the bottom edge of the bridge). In about 45 minutes or so, I'll remove the clamps and let it sit till tomorrow, before I apply any stress to the bridge (install the strings). Meanwhile, I will probably install the tuners.
|
|
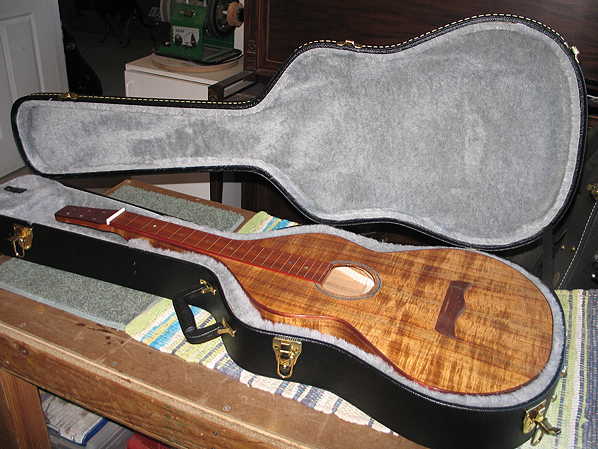
LATER . . . Went to lunch with some teacher friends. When I got back, what was on my porch but the GoldTone Weissenborn case I had ordered about a week ago!!! Cool!!! I immediately unpacked it, set my guitar into it, and was extremely pleased to find that it fits PERFECTLY!!! Yay!!! This is more and more becoming a reality!!!
|
|
|
|
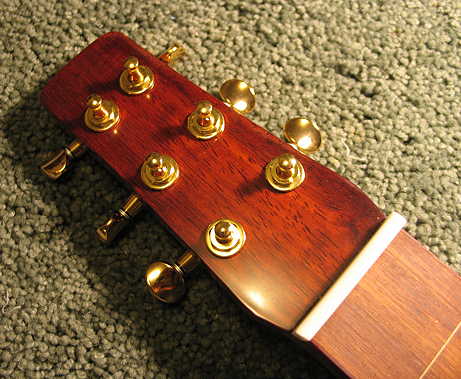
I installed the tuners; they're gold Gotoh mini-tuners.
|
|
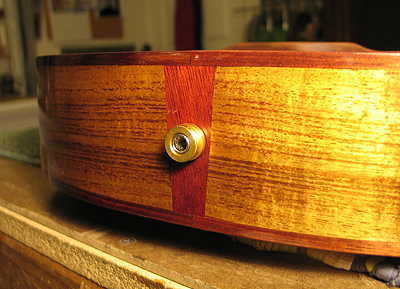
I figured I might as well install the endpin jack. This is the first time I've ever done this, so it took a couple of tries before I got it right. First I estimated where I should position the inner nut and washers, so that the jack would stick out around 5/16" on the outside of the body. (That's what took a couple of tries.) Then I threaded a guitar string through the hole at the end of the jack, with the ball end on the inside, so I could use the string to pull the jack through the hole from the inside. (It was a little bit tricky to locate the hole in the tail block from the inside of the guitar --- it's a much shallower body than a normal guitar, so I had hardly any wiggle room for my arm or hand in there. But, by trial and error, I was finally able to thread the string through the hole to the outside.) Then, I put the outer washer and nut onto the end of the jack and, holding the jack stationary with a small allen wrench through the holes at the end of the jack, I tightened the outside nut with a thin wrench. Finally, I screwed the strap pin onto the jack. Yay! I did it!
|
| |
|
|
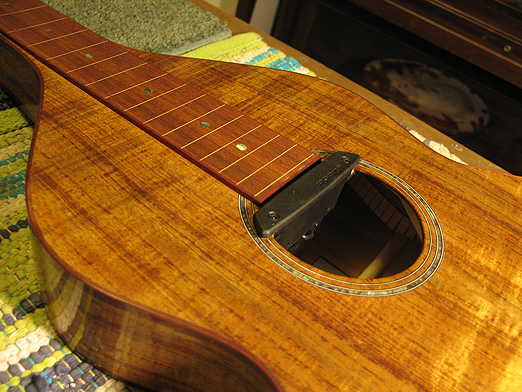
Next, I clamped the pickup (a Fishman Rare Earth Humbucking soundhole pickup) onto the soundhole, and attached the wiring to the side with Velcro in a couple of places. I had a small coil of wire to attach to the side, because I needed it to be a little bit longer to be able to pull the pickup out when I need to replace the battery.
|
|
TOMORROW . . . I will drill and chamfer the bridge pin holes, install the bridge pins, make the saddle, cut the nut slots, and string this baby up! Then we'll see if I did all this right. The moment of truth.
Friday, January 18th, 2013:
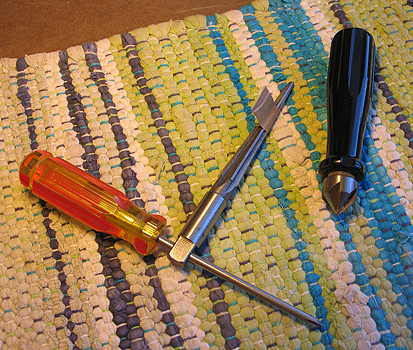
Got a little bit of a late start today (had an eye exam appointment for new glasses). It's about 1:00 p.m. right now. But, so far, I have managed to take care of fitting the bridge pins. I first drilled the 3/16" holes through the bridge plate and used these two tools (a regular hardware store reamer and a manual countersink tool) to ream and countersink the holes to fit the bloodwood bridge pins.
|
| |
|
|
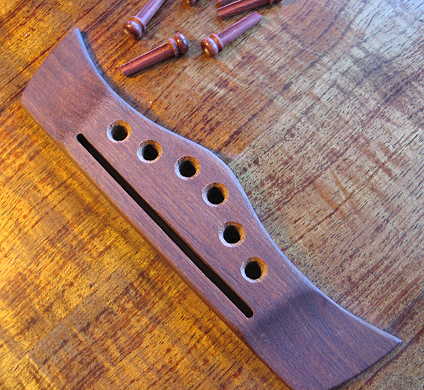
Here are the reamed, chamfered holes:
|
|
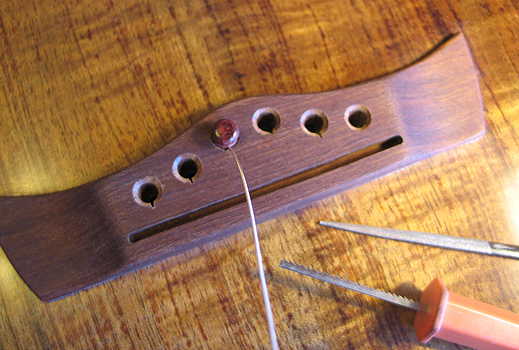
Finally, I sawed out the slots for the strings (a set of Martin phosphor bronze mediums I had on hand, ranging from .013" to .056"). I first use one of these pumpkin-carving thingies (I've had these ever since I started building!) to saw the slot, and then I use a needle file to enlarge and smooth it out:
NEXT UP . . . Fitting the saddle!!! |
| |
|
|
| |
|
|
|
|
|
|