Wednesday, July 13th, 2011: WELL, THERE'S GOOD NEWS . . . AND SOME BAD NEWS . . . WHICH, I THINK, HAS TURNED INTO GOOD NEWS AGAIN . . . Let me tell you all about it: GOOD NEWS #1:I found a case for this weirdly-shaped thing!!! (If I can get this instrument finished by next Tuesday, I can take it with me to Tacoma for the GAL Conference, and I need something to protect it.) Yesterday I spent a couple of hours looking, unsuccessfully, for some sort of gigbag that would fit this harp ukulele. Couldn't find anything, primarily because of the double-neck issue. I even looked into keyboard bags, since they were rectangular and might handle the double neck okay — but even the smallest ones were way too big. I started even considering looking into badminton cases! Today, I decided to try another local music store, and, lo and behold, they had in stock one baritone ukulele gigbag. I tried it out, and my harp ukulele just fit!!! (I just have to be a little careful whenever I zip it up, to make sure the zipper doesn't touch the instrument.) Yay!!!
|
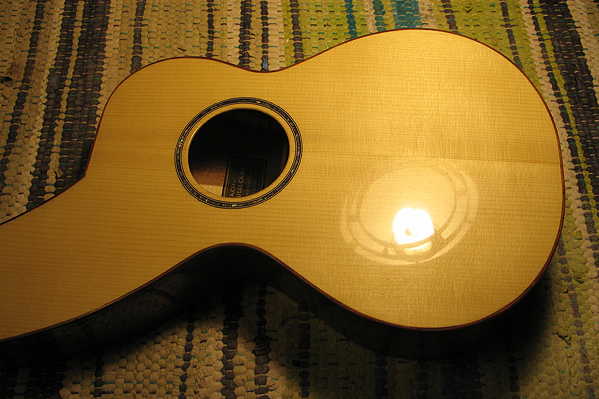
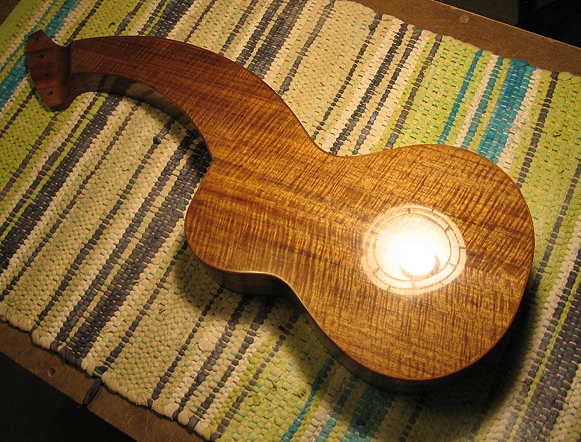
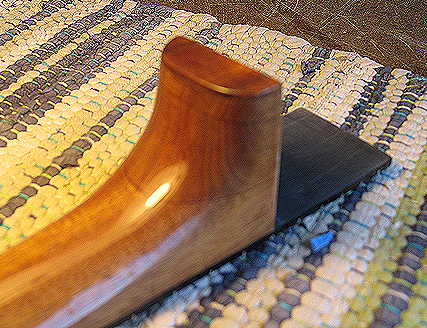
GOOD NEWS #2:I successfully dry-sanded (with Micromesh) the harp ukulele (and all those gaps you saw in the photo on the previous page were filled and leveled). Then I did the final polishing of the body on the buffing wheel. Here it is:
|
|

|
|
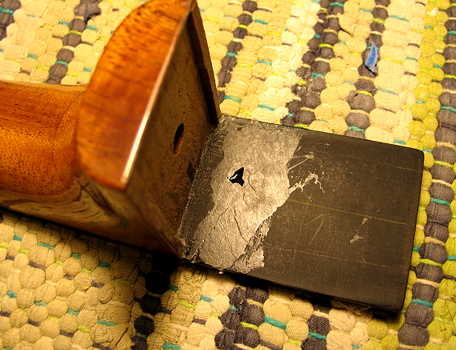
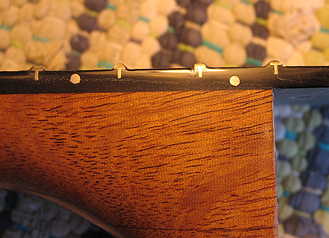
BAD NEWS #1 (and, hopefully, there won't be a #2):In buffing out the neck, somehow I managed to let the wheel catch the fingerboard extension (not quite sure how it happened, as I was being super-careful about how I did it), and it broke the extension off at the 12th fret (where it extends from the heel). YIKES!!!! I was, to put it mildly, a bit upset and heartbroken. After fussing and panicking for a few minutes, I finally calmed down enough to look at the damage. Luckily for me, the break was fairly clean. It was kind of an angled break, starting from the fret slot and angling down, which was probably better for gluing it all back together. I retrieved the fret, which had flown off to the side; it still had chips of the fingerboard stuck to one side. I thought for a while, and figured, this might be repairable. (I really, really, really did not want to have to either remove the damaged fingerboard from the neck and redo it, or have to make an entirely new neck and fingerboard!!!) The first thing I did was to hold the fret against the fingerboard, along its slot, fitting the tiny chips stuck to the fret into their tiny cavities in the fingerboard. As I held it there, I dropped some superglue along the fret, so it would wick into the break and hold the fret there. Then I mixed up some 5-minute epoxy, applied it to the broken-off fingerboard extension, and glued it back onto the fingerboard. I turned the neck upside-down, put some waxed paper and a wood block over the fingerboard extension, and clamped it down flat atop my workbench. After about an hour, here's how it came out. (In the picture to the right, it looks as if there's a chip out of the edge of the extension, but there isn't, thank goodness.)
|
GOOD NEWS #3:It looks as if it might hold just fine. (The neck will be bolted to the body, and the fingerboard extension glued to the top, so I don't think there'd be any problem, anyway.) I'm going to let it sit overnight, and then, tomorrow, I'll clean it up and redo the finish in that area. Then it will be on to the next steps, and completing this instrument!!! I can't wait to hear how it's going to sound. I knew I couldn't get away without any more mishaps on this instrument — little disasters seem to be inevitable, whenever I build an instrument. I wonder if I'll ever be able to build one with absolutely no mistakes or problems . . . that would be a miracle!!!
|
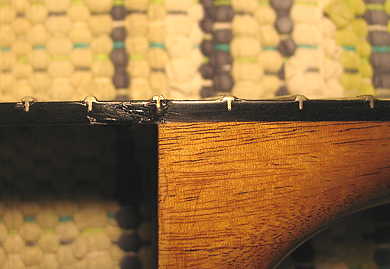
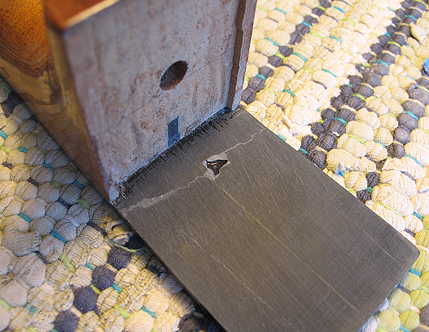
Thursday, July 14th, 2011: It's about 10:45 a.m. right now. Just spent around an hour cleaning up the heel/fingerboard area of epoxy and repairing the finish. I used some 600-grit sandpaper and Micromesh cloths to do this. It came out pretty well; there's just one spot on the other side where you can see a little epoxy underneath a fret tang, but, other than that, unless you looked closely, you can't really tell where the crack was. I'm so relieved! Also, I didn't sand through the finish anywhere; I'm glad about that, too. Here are the results:
Here's a better picture of where the crack was:
Now I'm ready to bolt on the neck to figure out where to remove the finish underneath the fingerboard extension, remove the finish (I use safe paint stripper), and then bolt on the neck again and glue the fingerboard extension to the top. |
|||||
Go to Previous Page |
Go to Next Page |