The Soundbox is Completed!!!
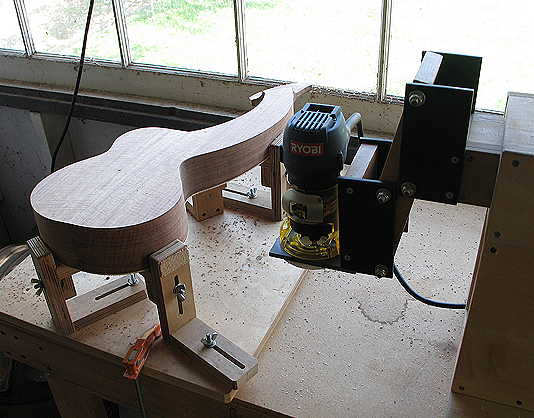
Still Saturday . . . . It's about 4:00 p.m. right now, and I've just finished trimming the overhang and flush-routing the soundbox. It took me longer than I expected! Before I used the binding router jig to flush-rout the overhang, I trimmed the bulk of it with my mini-drawknife. I love this tool! I bought it 14 years ago, and I've never had to sharpen it once! For some reason, it keeps its edge. I have both the straight one and the curved one, but I find I tend to use the curved one the most; it's somehow easier to use to get into all areas. Then, what took the longest time (even longer than the actual routing) was setting up the soundbox in the holding cradle that I use with the binding router jig. It's basically set up for guitars, and, when I started building ukuleles, I found I had to add a few holes in different locations to position the holders for the ukes. With the odd shape of this instrument, I had to add another hole and reverse the orientation of a couple of the holders, to be able to hold the harp ukulele securely. All that took a bit of time. Anyway, I was pretty lucky this time; all my sides were absolutely perpendicular to the soundboard, so all I had to do to set it up was to have the same measurement all around from the bottom of the cradle to the soundboard of the uke. Here's a photo of the set-up:
|
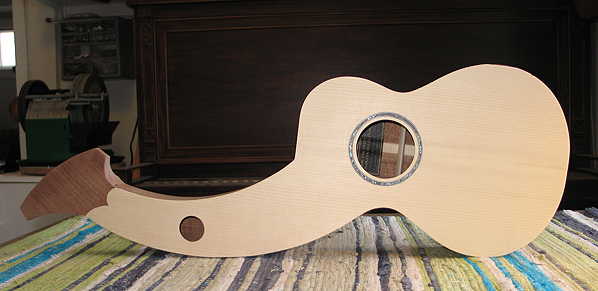
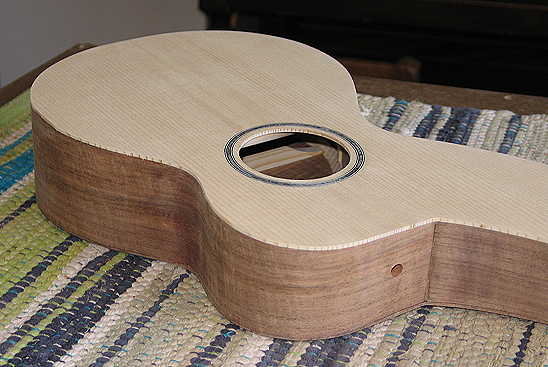
After I finished the flush-routing, I then used a sanding drum in the drill press to make the harpbox peghead curved sides flush with the peghead veneer (they were slightly misaligned), and I used the belt /disc sander to make the other edges flush. I also used the belt sander to make the harpbox peghead heel blend smoothly into the back. Here are a few photos of the results:
|
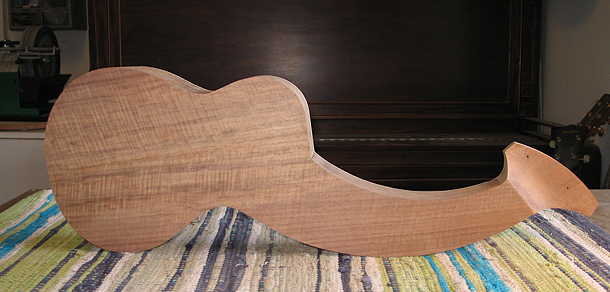
I've just dampened the back with some water, so you can see what it might look like under finish:
|
|
I am loving this little instrument — it's so unique and cute and dainty!!! I can't wait until it's finished, so I can see what it's like to play it!!!! Gotta quit now temporarily — it's time to take Hannah on her afternoon walk! Next up: the end wedge and binding!!!
|
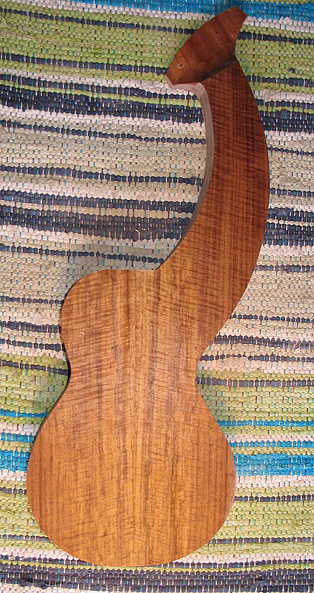
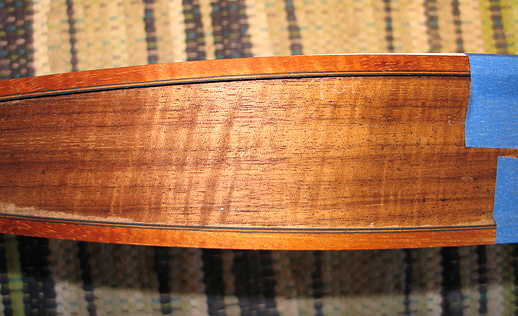
LATER THAT EVENING . . . . Binding Decisions . . . . After pulling out the black plastic binding, and laying it along the edges of the soundbox, I didn't like the stark contrast that it made. It just gave too heavy a look to the instrument, and it didn't really complement the colors of the wood. Next, I did the same with some tortoise shell binding I had; I didn't like that, either. Next, some bloodwood binding (with black/white purfling underneath); that looked really nice, but that would mean I'd have to order some more, which would take a while, and I really wanted to get on with the binding. Finally, I pulled out some curly koa binding (with a black/white/black purfling line underneath, also). That looked perfect!!! Understated, but provided some elegant contrast to the spruce top, and didn't clash with the Mayan walnut (which has a very koa-like look, anyway). And, I happen to have a lot of strips of this koa binding, plenty to work with in case I mess up while bending it! So...that's what I will use. My initial plan to use the plastic binding was partly because of the ease of installing plastic, and the fact that I happened to have plenty on hand. But now that the soundbox has turned out so nicely, I, more and more, wanted to have really nice wood binding to go along with it. (And, I'd like to avoid the possible future problem of shrinking plastic bindings, as well.) Also, it should be a relatively easy installation, as I'm not going to add purfling to the top — on such a small instrument, the simpler the better. Below is a photo of the bindings against the side (I've dampened both):
|
