The Soundbox
Thursday, June 16th, 2011: I only have one photo today, despite the fact that I actually accomplished quite a few little tasks today. Here's what I have at the moment, after all those tasks were completed:
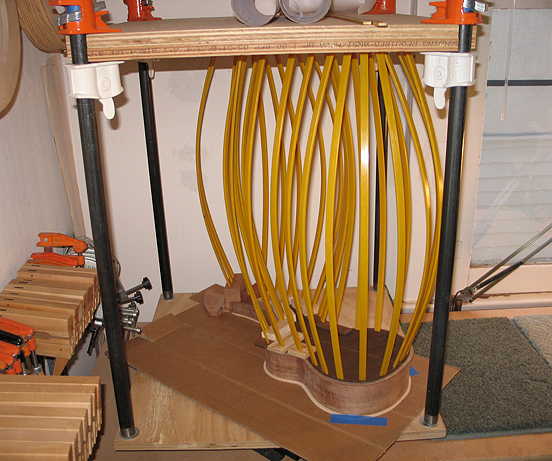
This messy contraption of go-bar sticks and all sorts of blocks is how I am gluing on the top. HERE'S WHAT I DID TODAY:
|
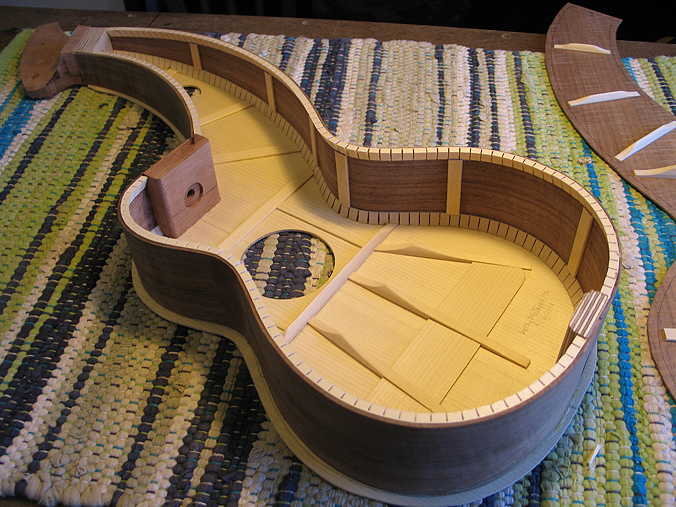
Stay tuned . . . to see how it all came out!!! Okay, I'm back . . . It's around 4 p.m. now, and I've just taken the mold out of the go-bar deck. It came out well!!! (This is always a big relief to me . . . that nothing got terribly misaligned or out of place.)
I'm going to call it a day. In an hour or so, I have to take Hannah to our second puppy class, so there's not much time to do anything else today. I might work on the label for the inside of the back. The next thing I have to do is to sand the 15-foot radius onto the back kerfing and fit the back (trim braces to fit into the kerfing). Then I can glue on the back — and we'll have a soundbox!!!!! (Finally.)
|
|
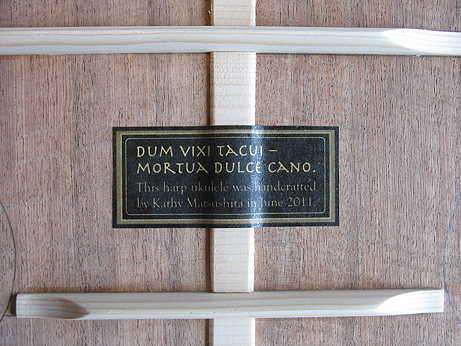
Friday, June 17th, 2011: I have two photos for you today. The first is of the label I made this morning for the harp ukulele. I printed it on my inkjet printer, on some nice linen paper. Then I sprayed some shellac on it to protect it. When that was dry, I glued it onto the back with some of that spray adhesive.
A confession: This is actually the first label I've made where I have the quotation correctly worded! A few months ago, an Internet friend kindly informed me that I had a word in there that actually belongs to a previous verse of the little poem; I first saw this quote in the beginning of William Cumpiano's guitarmaking book, and I just assumed the line, "Securi dum vixi tacui," was correctly written. It wasn't. "Securi" means "axe" — the first two lines said something like "I was alive in the woods, I was cut down by the cruel axe." So . . . .what a bummer to discover that all my previous labels were worded incorrectly!!! ANYWAY . . . what the two lines above (the third and fourth lines of the poem) mean is this: "In life I was silent — in death I sweetly sing." |
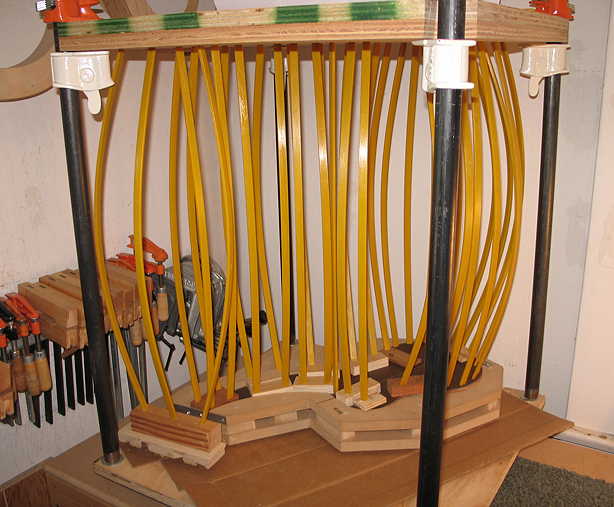
What took me the most time today was getting everything ready for gluing on the back. I first sanded the radius onto the side set. Next, I cut the ends of the back center reinforcement strip to fit to the blocks. Finally, I cut out the notches for the back braces to fit into the kerfing. Then I did a dry run of clamping the back in the go-bar deck, to figure out exactly what blocks I need to use for the lower parts of the body. When that was figured out, I took another deep breath (gluing on tops and backs always makes me nervous), ran a bead of glue along the kerfing and blocks, set my hardboard templates on top of the back, and started go-barring (I just made up a word) the thing!!! The procedure was much the same as when I did the top yesterday. Here it is right now:
|
The more I use my modified go-bar deck, with the 360-degree TV swivel, the more I appreciate it!!! It really makes doing something like this super-easy. . . .
Go to the next page to see the soundbox after I have removed the go-bar sticks!!!!(This is getting exciting . . . . ) |