More Bending!!!
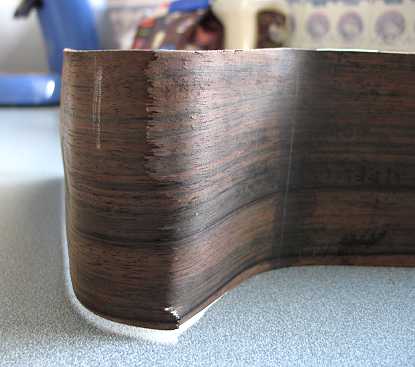
Monday, June 26th, 2006: Okay, scratch Friday's work....Here's what happened: Never having used Malaysian blackwood before, and only having done one cutaway before (my "Weird Classical"), I had kind of a problem trying to bend the tight cutaway on this guitar by hand. I didn't know that this wood, being much denser than East Indian rosewood, would be a bit tougher to bend. I did thin the wood in the cutaway section, as I had seen suggested in various lutherie forums, but, for some reason, the wood just would not bend for me!!!! Here's a photo of what happened (a pretty much irreparable fracture):
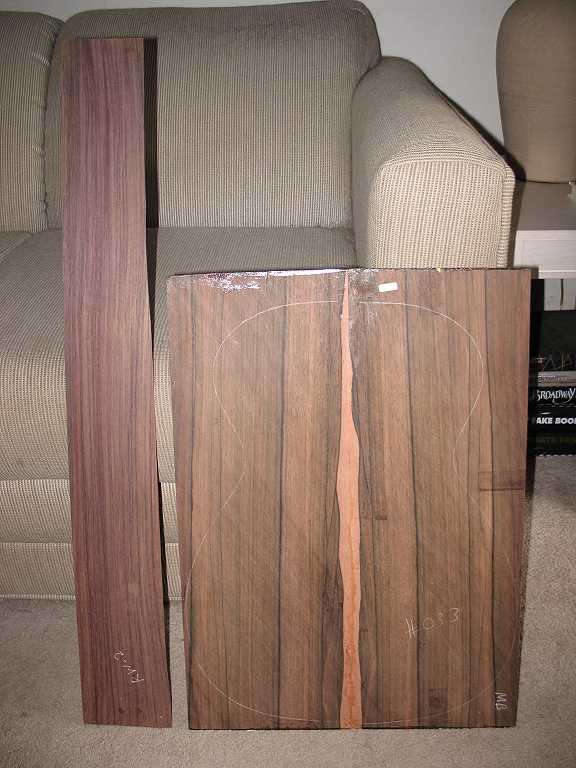
Well, what to do, what to do now????? I really wanted to still use the beautiful Malaysian blackwood back, but I couldn't really afford to buy another side set — since I bought this set two years ago, the price of this wood has really gone up! And I really didn't want to risk cracking another expensive blackwood side. So, it just so happened that, in my modest wood stash, I had only one East Indian rosewood side set. I thought, well, it's fairly close in color (though it doesn't have the wider, more dramatic striping of the Malaysian blackwood) — maybe I could use that! And the rosewood would be so much more easy to bend (I'm more confident with it, as I've used it quite a bit). I checked with various lutherie users' groups, asking whether it would be a problem to mix two different woods for the sides and back of a guitar; pretty much, people told me there would be no structural problems. In fact, it might even be kind of interesting to see what the guitar's sound would be like, with the two different woods! |
So, that's what I've decided to do. Above is how the two woods compare. |
|||
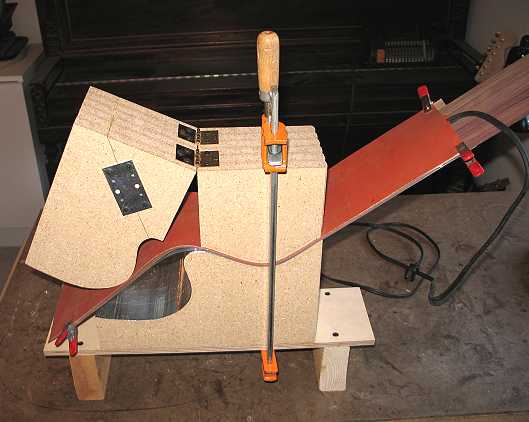
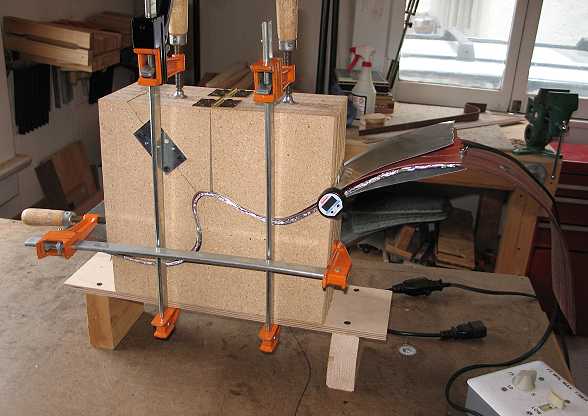
Still being a bit nervous about bending even the rosewood cutaway by hand, I made up this jig which I had seen on one of the users' forums. This photo is just to show how it goes together — I'm not actually bending yet! I traced the waist and cutaway section onto a 4" thick stack of particleboard, cut it out into three sections on my bandsaw, and hinged the top two sections. I stuck aluminum tape onto the mating sides. The heating blanket is a 25" one that I have used for my ukuleles, just right for this job. The intent is to use the blanket to relax the wood, and then slowly ease it into the cutaway shape by slowly clamping the pieces of the jig together. |
|
|