Thursday, August 17th:
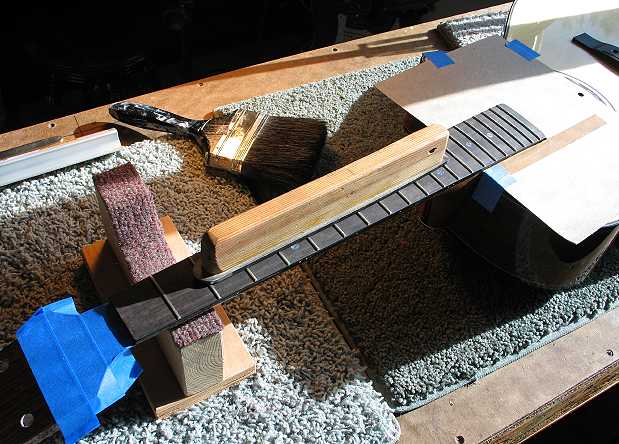
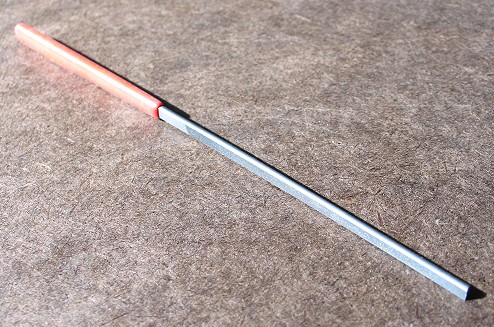
The first thing I did today was to level and dress the frets. I first adjusted the truss rod to get the neck absolutely straight. Then, after taping off the peghead and putting a protective cardboard mask on the soundboard, I leveled the frets with my fret mill file (seen in the photo below).
|
|
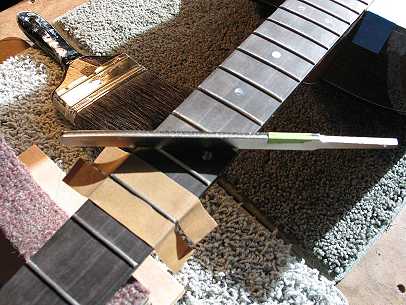
Then, taping off each fret with masking tape as I worked, I used the fret-crowning file (seen in the photo to the right) to round off the tops of the leveled frets. Finally, I rounded off the fret ends with my little fret end file (it has a rounded, smooth edge, so you won't damage the fingerboard surface as you use it).
After this was done, I used 220, 320, 400, and 600 grits sandpaper to sand and polish up the frets and fingerboard. Finally, I applied lemon oil to the fingerboard. |
|
|
|
Time to string her up . . . . . FINALLY!!!!
Now was the exciting part....stringing her up and seeing what she would sound like!!!!
After installing the tuners (nice gold Schallers with ebony buttons), I set about making the nut and saddle. I first fit the nut to the nut slot and filed the six nut slots. I strung it up and, putting a capo on the first fret, measured for the low action I wanted. To do this, you measure the space between the string and the fret at the 12th fret. I went with 5/64" at the high-E string and 7/64" at the low-E string. You then lower your saddle by twice the amount you need to lower the string at the 12th fret. Anyway, I did that, and had my saddle at its approximate height.
Next I worked on the nut slots. To do this, you fret the string at the 3rd fret (between the 2nd and 3rd fret); what you want to see is barely any space between the string and the first fret. You file down the nut slot little by little until you get that tiny, tiny space. I also just kind of do it by how it feels when I fret at the first fret; if it still feels too high (hard to press down), I file the nut slot down some more.
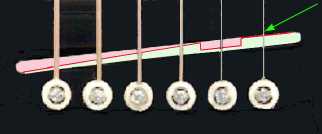
When I had that pretty much done, I set about compensating the saddle. This was the first time I have ever compensated a saddle. Even though it was just a 3/32" saddle, it still would benefit from compensating for each string. I did it by placing a tiny bit of B-string underneath the string on top of the saddle and moving it back and forth until the tones of the open string and the 12th fret position were exactly the same (if the tone is flat, then you will move the tiny string piece more towards the nut-end of the guitar; if it is sharp, more towards the tail-end of the guitar). Then I filed the saddle to those six points. In the end, mine ended up pretty much like a photo I had seen on Paul Hostetter's site:
|
|
Well, she's all strung up now . . . .
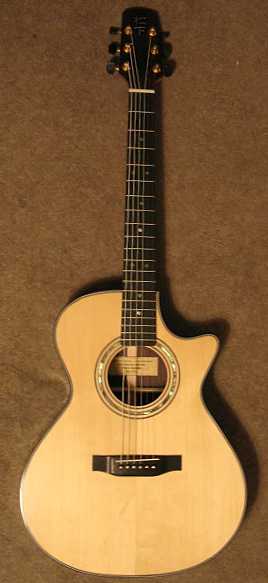
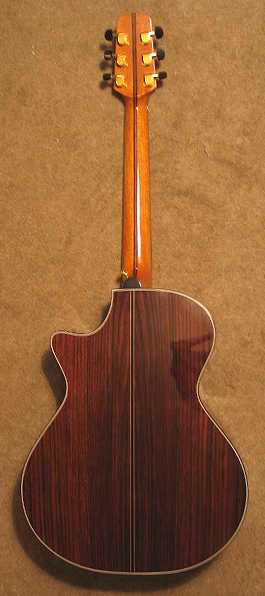
The verdict???? It really sounds GOOD!!! It has a nice, big, clear sound, much better than any of my other guitars. I don't know if the difference is in the different top wood I used this time (Carpathian spruce), or in my improved building skills, or in the deeper body depth (it's 4-3/8" deep at the tail end, and 3-3/4" deep at the neck end), or whatever.... I just love the look and sound of this guitar!!!!
I really haven't played guitar for quite a while (I've mainly been playing my ukuleles lately), so my fingers aren't quite used yet to steel strings again (gotta build up those calluses!!!). But, despite that, and the fact that I'm not really an expert player, I can still tell that this guitar sounds very good!!! (I would love to have some expert player play it, so I could hear what it really COULD sound like!!!) The action still could be lowered a bit (or maybe it just feels that way because of my tender fingers), but I think I'm going to wait to work on it some more until the guitar has a chance to "settle in" and loosen up a bit.
Well, here are some photos of the final product:
|
|