INDEX:

Return to HOME PAGE

  1. Bending
  2. And More Bending!
  3. Neck Block & Kerfing
  4. Top, Back, & Kerfed Side Set
  5. Side Reinforcements & Rosette Channel
  6. Braces
  7. Even More Braces!
  8. The Soundbox
  9. Binding & Neck
  10. The Neck, Continued
  11. Finish Carving the Neck
  12. Peghead Inlay
  13. Finishing!!!
  14. Rubbing Out the Finish & Gluing the Neck and Bridge
  15. Leveling Frets, Nut & Saddle Work, and Stringing Her Up!!!
  16. The Final Product!!!

(last updated 8/19/06)


Hey . . . I can finally "finish" the finish . . .

Monday, August 14th:

Well, I WAS a very, very good girl (though it just 'bout killed me) — I did manage to wait until Monday evening (after my CLAD class had been completed) to get back to the guitar. So, here's how I spent Monday through Thursday:

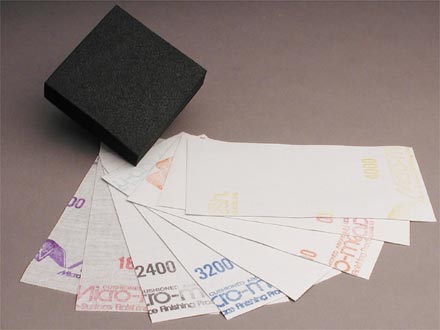
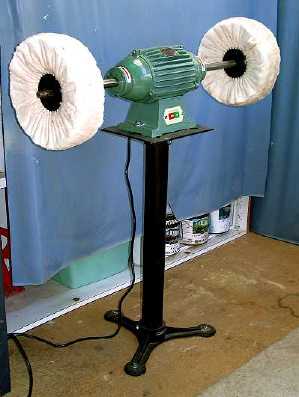
Monday evening, I leveled and rubbed out the finish on the soundbox by wet-sanding (a drop of dishwashing liquid in a bowl of water) with the full gamut of Micromesh sanding cloths (grits 1500-12000, of which 1500 is kind of similar to 400 grit regular sandpaper). I then buffed it out using extra-fine Menzerna compound on my Caswell buffer.

Tuesday, August 15th:

Today I leveled and rubbed out the neck finish. This took me longer, because I had a bit of a problem with the neck in a couple of places. I had a little spot of sand-through on the peghead and then some witness lines. What I ended up doing was to sand it down a little bit and spray on (with the Preval canister sprayer) a few thin coats of the USL finish. I sped up the cure time by placing the peghead under a heat lamp for a little while, and then I carefully wet-sanded the finish again. Success!!!

Then it was time to bolt and glue on the neck. The first thing I did was to bolt on the neck, then, with an Exacto knife and a fresh blade, carefully score the finish around the fingerboard extension. I removed the neck, then removed the finish in that area with paint stripper. What I do is carefully, with an acid brush trimmed to make a finer brush point, apply paint stripper just barely up to the scored lines. By the time I have applied all the stripper, the finish has wrinkled up, ready to be carefully removed with a 1/2" chisel. Then I wipe the surface with a paper towel dampened with water, to neutralize any stripper residue.

After that was done, I let the stripped surface dry for a half hour, then bolted on the neck, gluing on the fingerboard extension only (with Titebond glue). Here it is, after the neck has been glued:
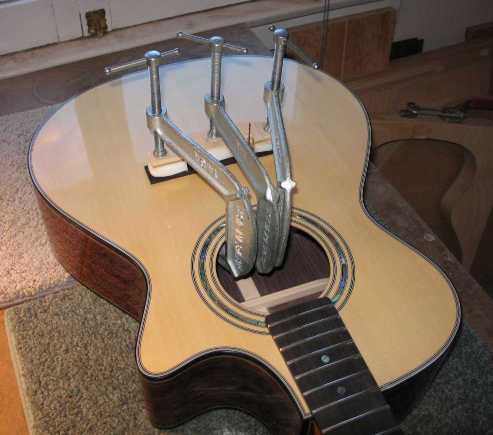
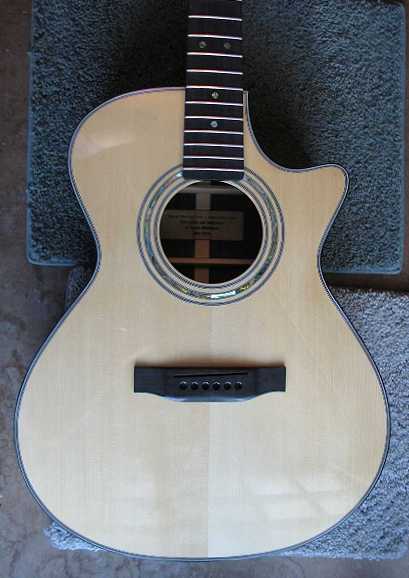


Wednesday, August 16th:

Now it was time to position and glue on the bridge. This is always a bit of a nerve-wracking time for me, because it is a critical step for proper intonation. I had never built a short-scale (24.9"scale) guitar before, so I wasn't exactly sure of how much saddle compensation to give it. (Compensation is how much beyond the scale length you should place the saddle, to compensate for the string stretching as you press down on it.) I consulted various Internet friends for their suggestions, and finally decided to go with a compensation of 0.10" (that is, placing the front end of the saddle at the high-E string at the scale length plus 0.10"). That way, even though I have a very narrow (3/32") saddle, I still have room to make compensation adjustments for each string.

I made my compensation measurements, centering the bridge as well and making sure its front edge was parallel to the frets. I taped a few layers of blue masking tape at the front corners of the bridge. Holding the bridge at that position (the tape helps hold it steady at the correct position), I scored the finish around the bridge and did the same finish-stripping routine as I did when removing the finish underneath the fingerboard extension. When the surface was dry, I once again held the bridge in its position and drilled two 1/16" holes at the ends of the saddle slot, for positioning pins (the two drill bits). These positioning pins ensure that the bridge will not slide around as it's being clamped down for gluing — I did not want to experience the same disaster that happened when I was building Patrick's dreadnought guitar two summers ago!!! Taking a deep breath, I applied the Titebond glue to the bridge, positioned it with the pins, and clamped it down, with my bridge-plate caul I had made before I closed the soundbox up. Oh, yeah....and I had made a caul for the top of the bridge with some "Friendly Plastic" and a strip of wood.


Previous Page

Next Page