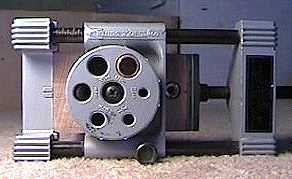
The photos to the left show how I use a doweling jig to drill the two holes for my threaded inserts. This jig ensures that the holes will end up perpendicular to the heel face. I just choose the correct drill bit guide in the wheel, line up the guide with the hole location, and drill the hole with my portable drill.
I forgot again to take the pictures as I was actually using the jig, so you see here the heel with the inserts and heelcap already completed. I just wanted to show you how I actually place the heel into the jig.
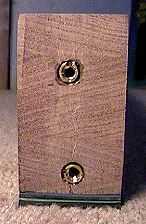
Here's the heel with the threaded inserts. I put a few drops of superglue on the insert threads, then screw the inserts in.
When I drill the hole, I actually drill it a tiny bit deeper than the length of the insert, to allow for the slight coving I do of the middle portion of the heel face (for a better fit to the body).
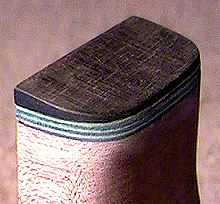
Here's the heelcap. The final green layer of veneer (immediately next to the ebony) will line up with the green side purfling line. The ebony heelcap is cut on a slant, to be in line with the arch of the back.
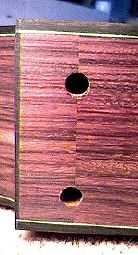
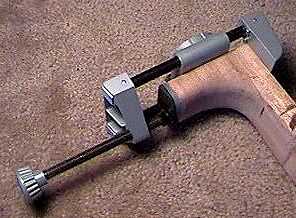
Here are the two holes that go through the neckblock, for the 1/4"-20 hex bolts to pass through.
I know, I know...the bottom hole is not on the centerline!!! But not to worry --- when I figured out where to drill the holes in the heel, I figured that mistake in. (If you look back at the picture above, you'll see that the two threaded inserts are not aligned properly, either!!!)