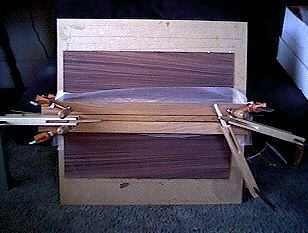
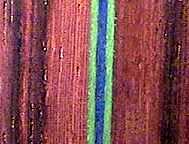
 Gluing the back. In the same way I joined the top, here I am joining the two halves of the back. I first jointed the center seam of the two halves of Indian rosewood, using my hand jointer. Then I made a thin green/blue/green inlay strip (from the veneers shown on the "Planning" page) to use as the back center inlay. I glued the two rosewood halves and center inlay strip together, clamping them together with nails placed on both sides of the rosewood halves. Straight wood strips over waxed paper hold it all flat.
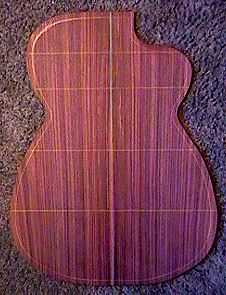
To the right is the back, after I have drawn the guitar outline, figured out and drawn in the brace locations, and cut about 1/2" outside of the outline. |
|
||
|
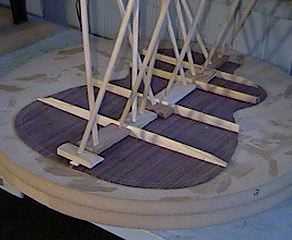
Here I'm making use of my new go-bar deck, which is actually just made up of my counter and the shelf up above. I'm gluing the four back braces here. I didn't raise the hollow radius dish up quite high enough (and I didn't realize it until after I had begun gluing braces), so I had to place blocks between some of the now-too-short dowels and the shelf, so that I had enough clamping pressure. (Next time I'll just place the other radius dish below this one.) |
And now the center strip of 1/2" wide spruce is being glued. The blocks covering the strip are there to protect the delicate spruce. Later, I will sand and scallop the ends of the braces. |
||
|
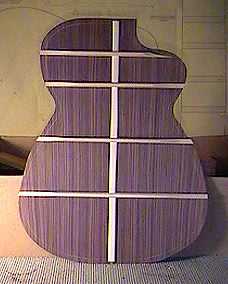
The fully-braced back. I have scalloped the ends of the four braces and sanded everything.
Next....on to bending the sides! |
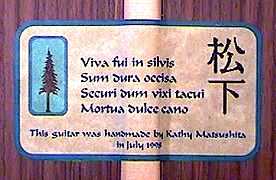
The label for my weird classical (I always liked this quote from the beginning of Cumpiano's book).
Return to Projects Home Page |