Bracing the Top

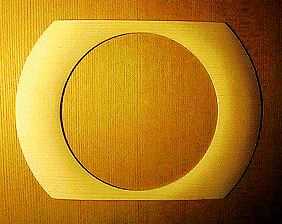
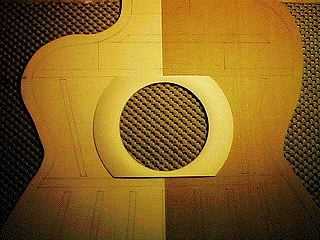
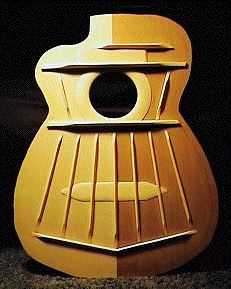
Above is the soundboard, cut with the bandsaw to its rough outline, after I have finished the rosette and cut the soundhole.

Top right: the soundhole reinforcement patch, which I have made from a piece of scrap spruce left over from a previous soundboard. I used a chisel and sandpaper to shape the patch. The grain runs perpendicular to the soundboard grain.

Bottom right: the soundhole reinforcement patch glued in place.


Above, my go-bar deck is already in use to glue the backstrip reinforcement strip for the dreadnought, yet I also need to glue the bridge graft on my weird classical. So, here I have clamped the hollow radius form to my worktable, and I'm using cam clamps to do the job. I have placed a clamping caul over the spruce graft, to spread the clamping pressure.


Above, the fan and finger braces glued (unshaped). The fan braces have been shaped to fit over the bridge graft.


Below is the caul I have made out of scrap plywood, to place inside the body when gluing on the fingerboard extension.

To the left I'm gluing the two cross braces, the upper transverse brace, and the V-fan braces. I have slightly arched the bottom (gluing) edge of the lower cross brace.

Below, the finished braced top.


Here's the bridge gluing caul. The slots are for the fan braces.


Finally, here's how both cauls are placed on the top.

Go to :

  1. Planning & Mold
  2. Joining the Top & Making the Rosette
  3. Bracing the Top
  4. The Back
  5. The Sides
  6. The Soundbox
  7. The Neck
  8. Binding
  9. Shaping the Neck
  10. The Bridge
  11. The Finishing
  12. It's Finished!!!

(last updated 9/7/98)

Return to Projects Home Page