|
It's been a good two days. DAY ONE:While I was waiting for the pore filler to dry on the dreadnought, I had some time to get back to the weird classical. I decided to start working on the neck. I first started by cutting the fingerboard. I had bought a 640 mm scale slotted classical fingerboard. I cut it off at the first fret, for the shorter scale of my weird classical. I then sanded the top surface of the fingerboard, to make it taper slightly down from the nut end to the soundhole end. I also made the bass side of the fingerboard a bit lower still. Next, I made the neck blank. It's much the same process as doing the dreadnought neck blank: I cut a 15-degree angle on the 3-1/2" mahogany board, flipped the 8" angled piece over, and glued it to the bottom of the other piece. This formed the peghead. I also glued four 4" pieces of the same board together, to form the stacked heel. I will glue that on later. DAY TWO:Below are photos of what I did today. |
|
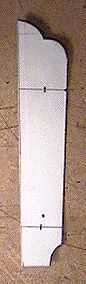
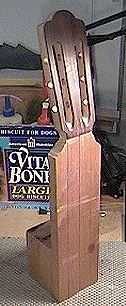
This is the template I made for the peghead of my weird classical. I wanted something simple. |
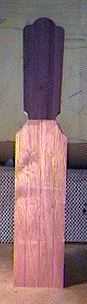
I glued a rosewood veneer, with green and blue veneers underneath, to the neck blank, and then cut out the peghead shape. |
||
|
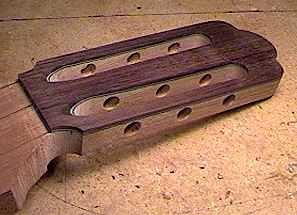
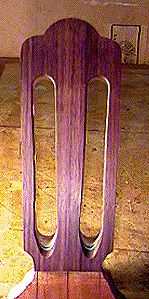
Here's the peghead, after I have drilled the tuner peg holes (I used the same dowel jig I used to drill the holes for my threaded inserts on the dreadnought heel). I have also cut the two long slots in the peghead. After all that was done, I ramped the lower ends of the two slots. |
 |
||
|
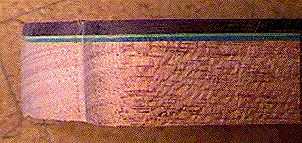
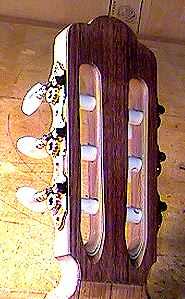
Here's a close-up of the green/blue veneers I've sandwiched underneath the rosewood veneer of the peghead. To the right is a view of the peghead, with the tuners temporarily placed into position to check their fit. All in all, I really enjoyed making the classical peghead! It was an enjoyable new experience, and not as difficult as I had thought it would be..... |
 |
||
|
Return to Projects Home Page |