FRIDAY AND SATURDAY.....Well, I applied the finish (Luthiers Mercantile FSM water-based urethane) last Friday and Saturday. I put on 9 coats on Friday, and the remaining 2 on Saturday. That was the easy part. I had made a chart (so I wouldn't lose track of what coat I was on). Then I just followed that chart:
And so on...... Towards the end of the process, I was doing more vigorous sanding and almost leveled the surface before the last two coats. Now the hard part came. I had to wait for at least 3 days for the finish to really cure. (I waited till Wednesday.) |
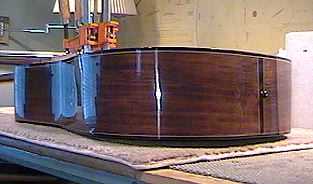
THE FOLLOWING WEDNESDAY.....Well, it just about killed me to wait (luckily, I had the weird classical to work on in the interim), but I managed to withhold myself from touching the dreadnought until today, Wednesday. Today I wet-sanded the finish. I used Micro-Mesh cloth abrasives to rub down the finish. I started with their 2400 grit (probably equivalent to an 800 or so grit sandpaper), wet-sanding the finish with water and a little dish detergent. I used that grit till the finish was totally dull (no shiny spots). Then I used each successive grit of the Micro-Mesh (3200, 3600, 4000, 6000, 8000, 12000). By the time I got to the 12000 grit, the guitar's surface was just about mirror-like! I then used Finesse-It II, Meguiar's #9, and Meguiar's #10 polishing compounds to polish it up. I decided to do it all by hand this time; I didn't want to run the risk of melting any of the corners or anything this time with the electric polisher I've used in the past. It took more elbow-grease, but it still gave nice results. It took me about 3 hours, I think, to do the soundbox, and an hour to do the neck. After I did that, I removed the finish underneath the fingerboard extension (that's the only part that gets glued with my bolt-on neck system) with some paint-stripper, and glued on the neck. Tomorrow I'll figure out where to place the bridge, remove the finish at that location, and glue on the bridge.... |
|
|
|
 |
|
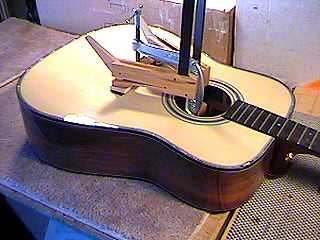 |
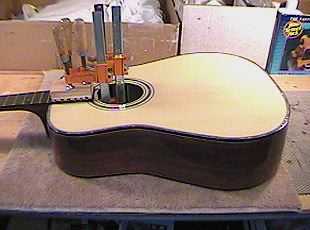
Above, I'm gluing the fingerboard extension of the neck to the soundbox. To the left, I'm gluing the bridge. I have three cauls shaped to fit the top of the bridge, and backed with sandpaper so they don't slip around. Underneath the bridge, I have placed the bridge caul I made to fit over the soundboard braces and maple bridgeplate. To determine the placement of the bridge, I used Cumpiano's method. I measured from the nut to the 12th fret, then used that measurement plus .15" compensation, as my measurement from the 12th fret to the middle of the saddle. I also centered the bridge and made sure it was parallel to the frets. |