|
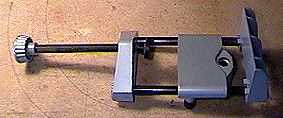
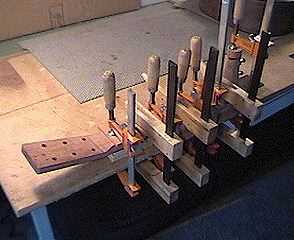
My very first step in finishing the neck was to check and adjust the neck angle and alignment. I did this by clamping the neck (no inserts yet) to the soundbox, with the top neck surface flush to the soundbox top. I then set my 36" straightedge on the neck surface and measured the space between the straightedge and the soundbox top, at the saddle location. Different books tell you different things about what this measurement should be. Most say that airspace should be around 1/16". If the airspace is too much or too little, you must then remove wood off the appropriate area of the neck heel. In my case, as I use a flat butt joint instead of a dovetail, that adjustment is easily done -- all I have to do is sand the surface so that the neck angle is corrected. Luckily, though, this time I had to make no adjustments; my airspace measurement was right at 1/16"! I then used the doweling jig pictured below, to drill the 3/8" holes for the threaded inserts into the heel. This jig was perfect for the job! I just placed the flat heel surface against the flat surface you see in the left-hand picture, with the neckshaft top butted against the right end of the jig and the heelcap end against the left-hand screw clamp. I flipped it over and slid the 3/8" drillguide hole to the correct spot on the heel for the threaded insert hole. Then I used my portable drill to drill the hole! Easy as pie. The jig kept everything perpendicular. |
 |
 |
|
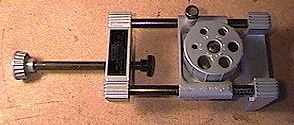
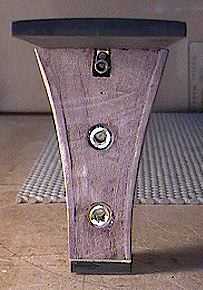
In this photo, you can see the two threaded inserts. After drilling the two holes, I slightly chamfered the top edge of the hole (to avoid chipping), put some superglue on the insert threads, and screwed the inserts in. I then bolted the neck to the soundbox and checked the alignment and neck angle again. The neck alignment was a tiny bit off center (angled a little bit to the right), so I just filed a tiny bit off the left edge of the heel. |
Almost forgot to tell you about the heelcap! I've sandwiched a thin piece of basswood veneer in between the ebony heelcap and glued both with superglue. The ebony heelcap was made from some scrap ebony left over from the fingerboard. |
|
Here I'm gluing the fingerboard to the neck, after having installed the Hot Rod truss rod. (Forgot to take a picture of that!) To install the truss rod, I placed a dab of silicone sealer to the places where the double nuts will lie. Next, I used a staple gun to shoot a couple of staples into the gluing surface of the fingerboard and clipped off the top of the staples, leaving two little nubs of staple sticking out. I then positioned the fingerboard on the neck surface and pressed down. The staple nubs puncture the neck surface. This way, when I glue the fingerboard on, it will not slip around, being anchored by those staple nubs. |
I then applied Titebond glue to the neck surface (making sure not to put too much near the truss rod slot edges) and clamped it all down. In the photo above, you can see the neck is clamped against a piece of plywood which has slots at the fret positions. |
|
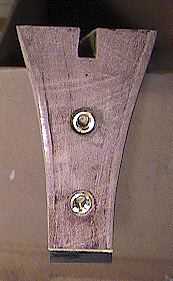
To the right, I have bolted the neck to the soundbox, for a test fit. Because I cove out the middle portion of the heel (I did this before I glued in the threaded inserts), the heel fits more tightly against the body. |
Next comes the carving of the neckshaft and more refining of the heel and heelcap area. That's today's job! Stay tuned. |
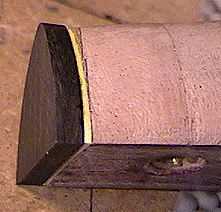

 Here's the heel end of the neck, after
the fingerboard has been glued on. You can see the truss
rod sitting in its slot.
Here's the heel end of the neck, after
the fingerboard has been glued on. You can see the truss
rod sitting in its slot.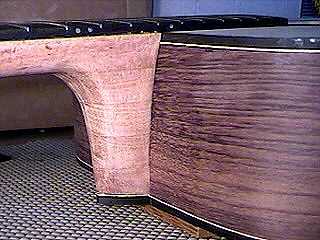
|
|