|
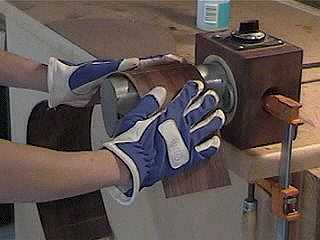
I am bending the rosewood sides on my electric bending iron. I'm wearing gloves, because it can get quite hot! To the left of the bending iron, on the workbench, I have nailed my guitar template. As I bend, I will keep checking the bends against the template. I also have a spray bottle handy, so I can spritz the wood with water as it dries out from the bending, to provide more steam and to keep it from scorching. |
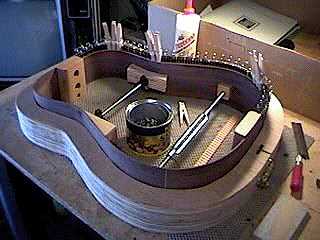
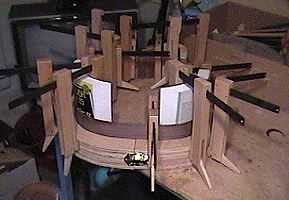
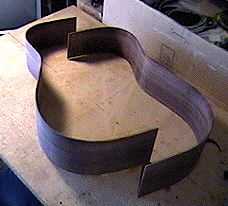
Here I'm temporarily clamping the bent sides in the mold to hold their shape as they dry. I found that books work well as clamps for the curved sections. (I remembered seeing something in Stew-Mac's "Trade Secrets" about someone using a telephone book as a clamping caul under the neck when gluing on the fingerboard!) |
|||
|
Here are the bent sides.
The next step will be making the neck block and the end block....
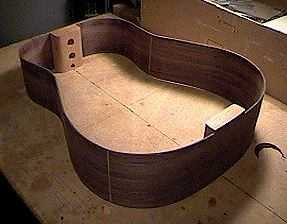
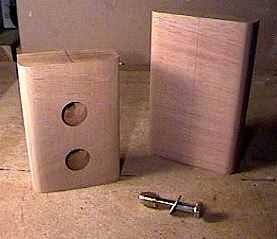
Okay, I have just spent a couple of hours making these two blocks out of mahogany. You can see them in the picture to the right. The one on the left is the neck block; it measures 1-3/8" by 2-3/4" by 4". I have drilled the 1/4" holes for the bolts at 1-1/2" and 3" from the top. I've countersunk the holes with a 3/4" Forstner bit, so the bolthead and washer will be below the surface of the block. |
The block on the right is the tail (or end) block. It is taller, because the guitar body slopes downward from the tail end to the neck end; the tail block measures 1" by 3-1/8" by 5". The grain on both runs horizontally. I've rounded the edges and also slightly curved the gluing sides, to match the very slight curvature of the body. |
|||
|
|
 |
|||
 |
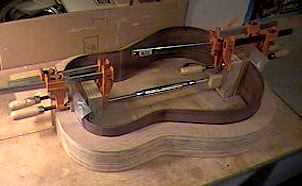
Above, I am gluing the neck and end blocks to the sides. I'm using a single toggle-bolt clamp to press against both blocks at once. I have covered the neck and end blocks with scrap blocks as cauls. I have also placed clamping cauls on the outside of the sides where they project above the mold.
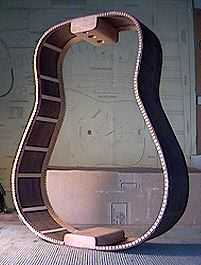
To the left are the sides, with the neck block and end block glued. The assembly is positioned with the top side down. In addition to the two bolt holes, I have also drilled a 1/2" access hole for truss rod adjustment in the neck block. |
|||
|
I'm using stationery clips and clothespins as clamps to glue the kerfing onto the sides here. I leave about 1/32" of the kerfing above the edge of the side, to allow for the sanding of the arch into the kerfing later. (My sides already have the basic arch designed into them .) |
|
|||
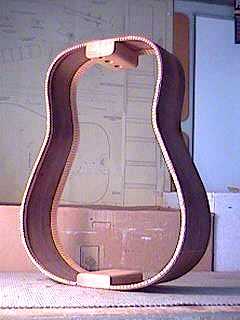 This is the fully kerfed side set. It's beginning to look like a guitar now!!!!
|
Here I have glued on the side reinforcement braces (I use popsicle craft sticks).
|
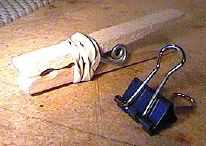
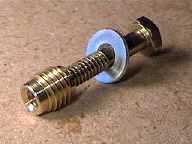 This is a close-up
of the bolting system I now use on my guitars. I buy brass
threaded inserts with an inside thread of 1/4"-20. Then
I buy 1/4"-20 hex bolts that are 1-1/2" long. The threaded
inserts will go in the heel, and the bolts pass through the neckblock
into the inserts.
This is a close-up
of the bolting system I now use on my guitars. I buy brass
threaded inserts with an inside thread of 1/4"-20. Then
I buy 1/4"-20 hex bolts that are 1-1/2" long. The threaded
inserts will go in the heel, and the bolts pass through the neckblock
into the inserts.