The Fingerboard

This is how the fret press caul is used. It has the same radius in its surface as the fretboard. Before I press the fret in, I run a line of Titebond glue along the fret tang. Then I place the fret ends as straight as I can into the fret slot, position the fret press caul directly over the fret, and press! You know you've positioned the fret correctly, if you can hear the fret kind of "pop" into place as you press. The advantage of using the fret press are that there are no dents or dings from hammering the frets in, and there is consistent pressure all along the fret.

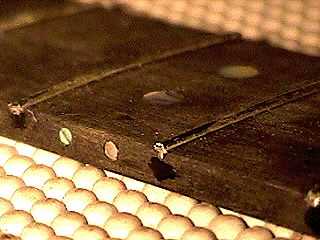
Before I press the frets in, I have already drilled the holes for the abalone fingerboard position dots and the abalone side dots, glued the dots in with superglue, and sanded them flush.

Go To...
 
  1. Beginning the Neck
  2. Making the Rosette
  3. Bracing the Top
  4. Bracing the Back
  5. The Sides
  6. Making the Soundbox
  7. Binding
  8. Shaping the Neck
  9. What's Left To Do?
  10. The Fingerboard
  11. The Peghead Inlay
  12. Finishing the Neck
  13. Finishing
 

Return to Projects Home Page

This is a close-up of the fingerboard, after I have inlaid the dots and pressed the frets in. I have not yet filed or beveled the fret ends --- that's why they still look kind of jagged here. The black dabs you see beneath the fret ends are dabs of white glue mixed with a little black acrylic paint, to fill the tiny gaps under the fret ends.

Here it is, below, all filed and sanded smooth. The ends of the frets have a slight bevel filed into them.
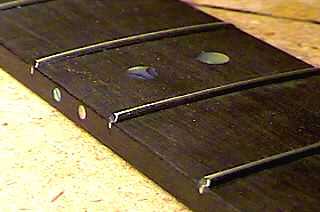