|
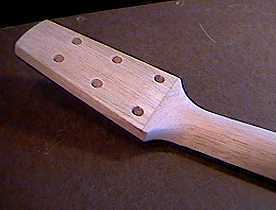
July 26, 1999 . . . . Before gluing the fingerboard, I put a few staples (with a staple gun) in the bottom of the fingerboard and then clipped off the tops of the staples, leaving only a few staple nubs in the fingerboard. Then I position the fingerboard on the neck, press the fingerboard down, and the staple nubs puncture the neck surface. This way, when I glue the fingerboard on, it will not move out of its proper position. Here I've clamped the fingerboard, placing a slotted clamping caul underneath the fingerboard for support.
|
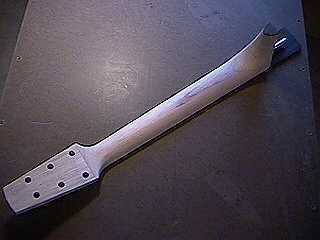
July 27, 1999 . . . . I shaped the neckshaft today, again using the micro drawknife, primarily. After I had most of it shaped, I also used a mill file and sandpaper to further refine the shape. |
|
 |
 |
|
 |
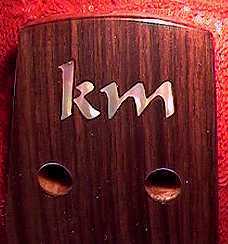
July 29, 1999 . . . . Yesterday I cut the abalone inlay initials for the peghead and inlaid them, using epoxy mixed with a little rosewood dust. |
|
|
August 7, 1999 . . . . This is what the peghead inlay looks like after the guitar has been finished, wet-sanded, and rubbed out. You can't tell in this photo, but the initials actually have some pink, green, and blue highlights in the abalone. |
|