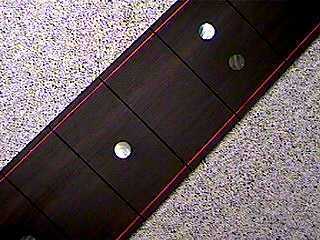
 July 9, 1999 . . . . I then drilled the 6mm and 5mm cavities for the abalone fingerboard dots and glued the dots in with epoxy. You can't quite tell the colors here, but the thin red line really looks rich against the ebony!!! (I did it to go along with the white/red/white side purfling lines I plan to have under my rosewood binding.)
|
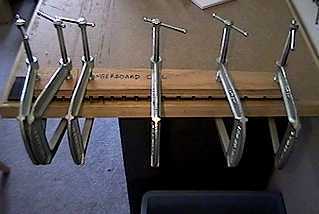
July 8, 1999 . . . . I have inlaid a thin red purfling line at the edges of the ebony fingerboard. I used Stew-Mac's purfling channel attachment, with a 1/32" bit, for one side. But then the bit broke when I had done about an inch of the second side!!! Not being able to find another bit quite the right size (I did find one in a hobby store, but its shaft was too thin to handle the ebony -- the bit wandered on my test piece), I finally ended up using the LMI side purfling cutter to do the other side. I just clamped the fingerboard edge flush with a couple of boards, to give my Dremel router base enough room to sit on, and it worked out fine (although, I admit, I was a bit nervous). July 13, 1999 . . . . I fretted the fingerboard, using my fret press arbor in the drill press. I run a bead of Titebond along the fret tang, then press the fret in, wiping away any excess glue as I go. The fretting process makes the fretboard a bit bowed back, so here I have clamped the fingerboard flat, to try to make it as straight as possible.
|