BENDING THE SIDES

PRACTICING BENDING SIDES:

July 1, 1999......I went to the hobby shop and bought 18" pieces of 3/32" thick walnut and mahogany, to get a feel for how to use the side bending form. I soaked the walnut piece in water for about five minutes. Then I put the heating blanket on top of the form (atop the aluminum sheet), laid the walnut on top of that, and placed the second aluminum sheet over that. At this point, I turned on the heating blanket for two minutes (it has a timer). I set the waist caul over the aluminum sheet, and slowly started clamping it down. Once the waist was clamped down (it didn't take long at all --- the wood became pliable almost immediately!), I slowly started pressing the ends of the sides down. I turned on the heater timer once again to two minutes. Once the ends were close enough, I inserted the eyebolts holding the ends of the top aluminum sheet into the slots in the base of the form, and tightened them with the wingnuts. That done, I placed the 6" aluminum bars over the ends of the top sheet and clamped those down.

 Here's a close-up of the waist area. This shows how the different materials are sandwiched together. On the bottom is the first aluminum sheet which is screwed into the form. Next is the silicone heating blanket. On top of that is the walnut side. Finally, the second aluminum sheet.

The eyebolt passes through a slot in the waist caul, which is tightened down with a clamping knob .

That square piece you see through the top of the eyebolt is a 1/4" square aluminum bar, sitting in a slot and spanning both sides of the form. It is there for additional support as the waist is clamped down.

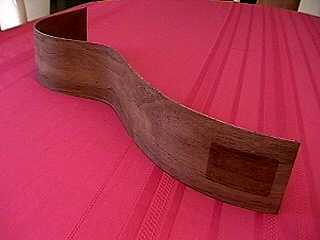
Well, here's the practice walnut side (actually, only a portion of a side, as the walnut piece was only 18" long). I LOVE USING THE HEATING BLANKET!!! The wood bent so easily and quickly, there was no scorching (that dark area you see was just where the store label was peeled off), no ripples -- just a nice, smooth, even bend.

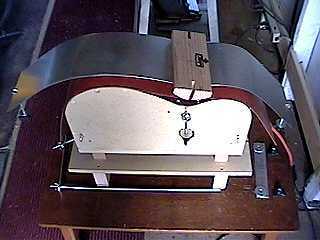
Here's the whole set-up, after I have removed the bent side from the form.

Now I'm going to try out the mahogany practice piece....


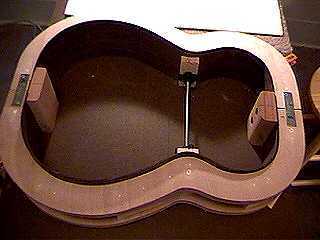
To the right, you see the tail and neck blocks are glued to the sides. I have drilled the two holes for my bolts which will attach the neck.

 GO TO.....

  1. Intro Page
  2. Making the Mold
  3. Making a Side Bending Form
  4. Side Bending!
  5. The Side Set
  6. Beginning the Neck
  7. Top
  8. Back
  9. Soundbox
  10. Binding
  11. Fingerboard
  12. Finishing the Neck
  13. Finishing
  14. Nearing the End...
  15. Stringing 'er Up!!!

 THE REAL THING:

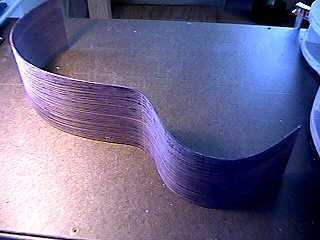
July 3, 1999.....Well, I bent the rosewood sides yesterday. It went really well. To the left you see one of the sides, after I have let it sit clamped in the mold overnight. I took the side out of the bender as soon as it had all cooled down --- it didn't take long. It only took about an hour. I must have made the bending form the right size (I made it slightly smaller than the guitar template, to account for the thickness of the heating blanket and the side), because it fit the mold just about perfectly!

Today I trimmed the ends of the sides to fit inside the mold and then made my neck and tail blocks. Right now they're all glued and clamped up to the sides in the mold.


Return to Projects Home Page