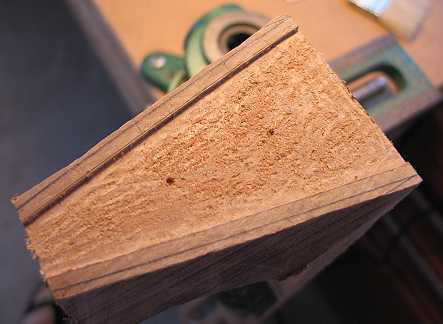
Monday, August 13th, 2007: It's now about 2:00 p.m., and I feel so GOOD right now, I just had to stop and update the site!!! SUCCESS!!!! My neck is now set correctly!!!!! This is always a somewhat tedious, sometimes tricky job for me. Getting the neck centerline to line up accurately with the soundbox's centerline this time took a long two hours or so!!! But my patience paid off, and I finally got it right! First, I drilled the two insert locations a bit deeper into the heel, so I wouldn't lose those locations when I coved out the center of the heel. I then used my Dremel to rout out about 1/16" out of the center of the heel, leaving 1/8" strips on the sides. I do this so that all I have to sand, to fit the heel to the soundbox, are those two strips. Here's a photo of the coved heel:
|
|
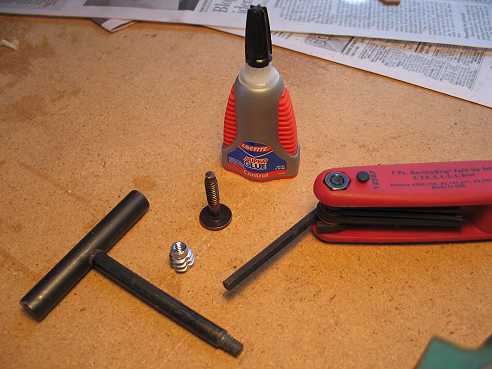
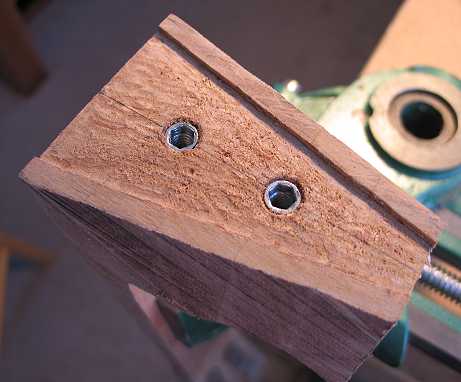
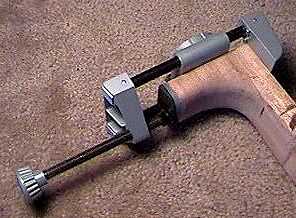
Now I could finally put the threaded inserts in. This is one of the first times I haven't had any trouble with inserting these things --- I guess I must be getting a bit better at this as I go along! Here's what I use. I use a 1/4-20 threaded insert I get at any Ace Hardware store, together with a 1/4-20 bolt. The insert is 1/2" long and needs a 5/16" hole; it is tightened with a 6mm hex wrench. I first used my doweling jig to drill the 5/16" holes. The jig is a great help in getting the holes drilled perpendicularly to the heel face. Then I chamfered the top of the hole a tiny bit, so the insert would go in more easily. Next, I used that T-handled thing you see below, threaded into the insert, to screw in the insert, being very careful to stay perpendicular to the heel face. (I like using the T-handle wrench, because sometimes I have stripped the insert using the allen wrench.) I then used the 6mm allen wrench to remove the insert, being careful not to disturb any of the threads in the mahogany. I did this so I could then drip some superglue onto the threads of the hole. Then I re-inserted the insert, and all was snug!
|
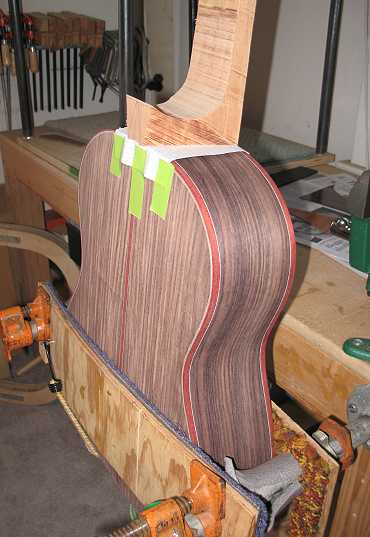
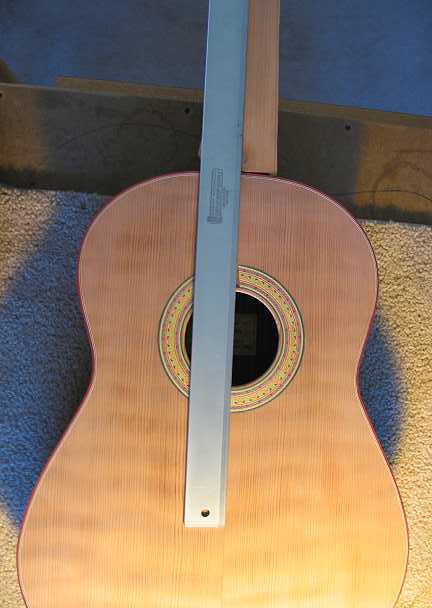
The reason the superglue is in the photo to the left, is that I have finally found a superglue bottle that doesn't clog up. I would waste so many bottles of the former Loctite superglue (I get it at any hardware store), because the tip would always clog up. They redesigned the bottle, so now it doesn't clog --- I think there's a tiny needle in the cap. Also, to dispense the glue, you squeeze on the orange tabs on the side of the bottle. To the right is my moment of success --- I bolted the neck up, checked the alignment, and was happy to see it was all centered!!!! I'm feelin' good........ Now it's time to fret the fingerboard. |
|
Previous Page |