Friday and Saturday, August 3rd & 4th: WHAT AN "INTERESTING" TWO DAYS I'VE HAD..... But I've recovered. Here's what happened: FRIDAY: It was time to do the binding. My first plan was to do the bloodwood binding with a white/black purfling inside, on both the top and the back. I figured all the measurements out, then started routing the binding channels with my binding router jig. Problem was, my sides had gotten a little out of parallel because I had glued the back on without the spreaders in the mold. Thus, it was very difficult (tedious, really) to keep setting up the soundbox in the holding carriage each time I needed to make a little pass with the router. I decided, then, to use my Dremel and the Stew-Mac binding attachment, instead. It is easy to follow the side's angle with this, because you guide the roller against the side as you rout the channel. With a carbide router bit, it cuts cleanly. I felt a little bit more in control with this, this time. The routing of the binding channels and purfling channels went smoothly. BUT....a little problem. Some of my purfling channels ended up a little too wide, and some were too shallow. What to do, what to do? This was at the end of Friday, and I felt a bit disheartened. I stopped working for the day, and watched "Top Chef" instead. |
SATURDAY: Okay, it's a new day. Time to figure this out. The first thing I figured, was, I was going to have to do some work on the binding and purfling channels. Actually, the binding channels were okay; it was the purfling channels that needed work. I got out some of my chisels, and discovered that they direly needed sharpening. So....I spent the morning sharpening all my chisels (a Marple's set of around 7 chisels and another small chisel) with my wonderful Tormek sharpening system. It's been a while since I've used it, and I had forgotten how wonderful it was to have nice, charp chisels! Once that was done, I spent the afternoon going over all of my purfling channels, cleaning them up, making them all square and widening those that needed it, so that all the purfling channels were the same width. I had to change my game plan to have the bloodwood binding with white/black/white purfling instead. It was tedious work, doing all that adjusting, but I felt so relieved afterwards! My guitar was saved! The last thing I did was to install my end graft (the same bloodwood binding I had used for my backstrip, with white/black purfling on both sides). I'm going to attempt the mitered end graft and bindings on this one. I cut the miters on the end graft purfling and glued it in. That's enough drama for today.....I'm calling it a day. Tomorrow I'll glue the purfling in first, separately from the bindings. Then I'll bend the bindings, check them against the purfling, adjust things if I need to, and glue the binding in. |
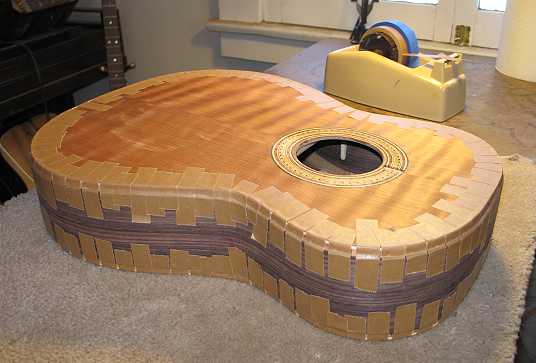
Sunday, August 5th, 2007: Today I first glued the white/black fiber purfling on both the top and back.
|
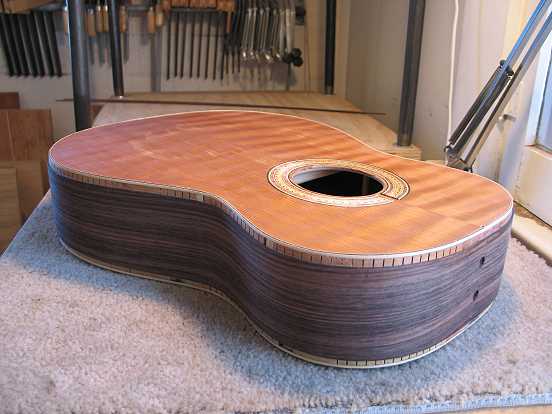
Here it is after I've removed the tape:
|
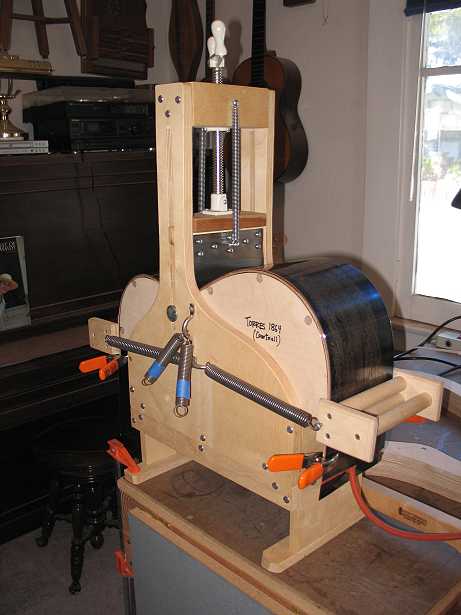
Then I bent the bloodwood binding for the top and the back, using my Fox-style bender (made by John Hall):
|
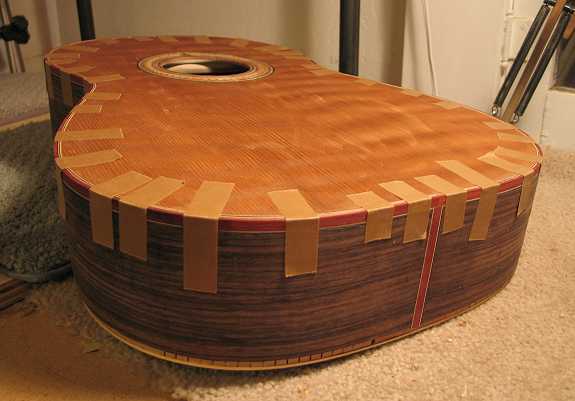
Then I spent a few hours fitting the bindings (I had to touch up some spots on the bending iron, and do some adjusting of the binding channels, using a 1/4" chisel and a flat needle file). Here I am dry-fitting the binding. Notice I have done the mitering of the binding and tail strip purflings.
|