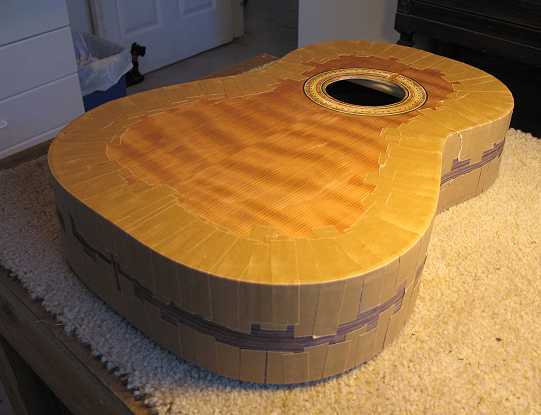
Monday, August 6th, 2007: Today I glued on the bindings, using Titebond and the Stew-Mac binding tape.
|
After a few hours, I removed the binding tape from the top, to let the binding cure in the open air. I'll do the same later tonight with the back binding. Tomorrow, I will scrape down the binding and purfling. I had a few gaps between the binding and the purfling, so I'll deal with those tomorrow. I'll probably just fill the gaps with bloodwood dust and glue.
|
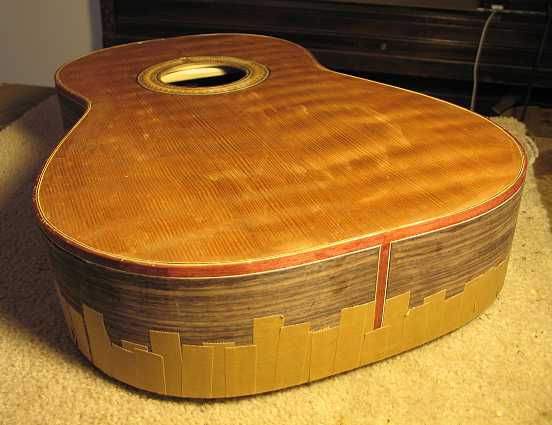
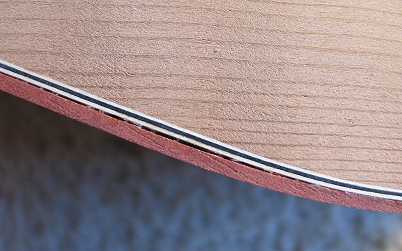
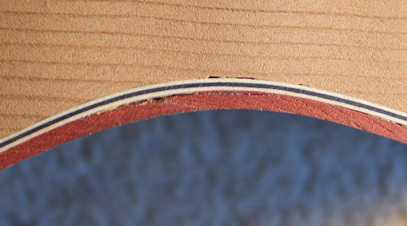
Tuesday, August 7th, 2007: I am happy to say, I had a very successful day today! I learned a lot. The first thing I did was remove all the rest of the binding tape from the back. Then I used a scraper to scrape down all the bindings and purflings flush to the body. I then could see various gaps between the binding and purfling, and between the side purfling and the rosewood. There weren't TOO many --- probably around six or so places --- so that was good. Here are some examples of the kinds of gaps I had:
|
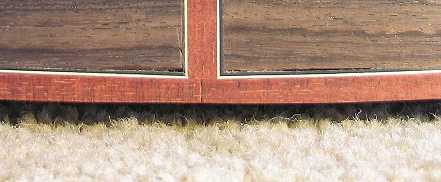
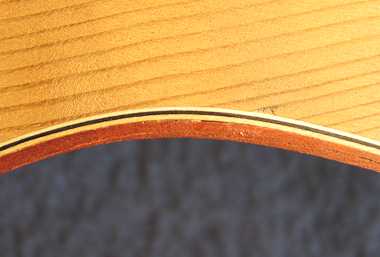
To get rid of those gaps, the first thing I did was to use an Exacto knife to pick out the dried Titebond glue from those gaps. Then, for the gaps such as this one below, between the binding and the purfling on the top, I first put Titebond glue into the gap, stuffed the gap with bloodwood binding shavings, and then sanded the area (with the grain) with 120-grit sandpaper. The sanding filled the area not totally filled with my bloodwood shavings, with more bloodwood dust, and the Titebond held it all together. This......
became this:
|
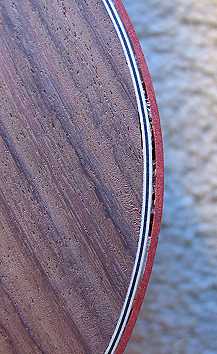
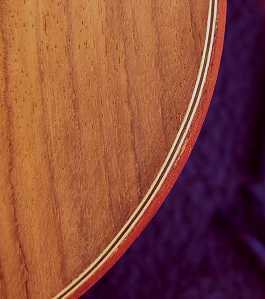
I did basically the same thing for the gaps on the back, and for the gaps on the sides underneath the side purfling. Here's one....
and its fix:
|
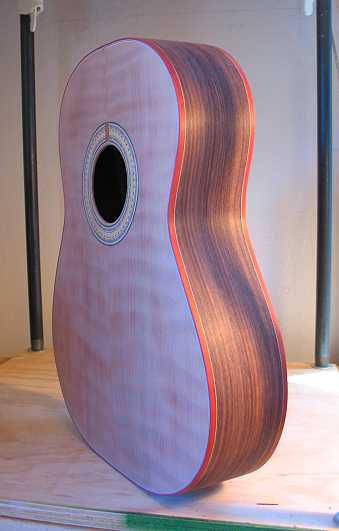
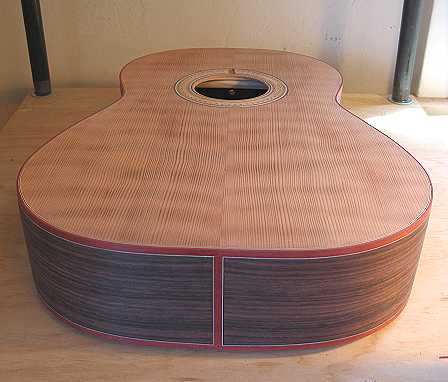
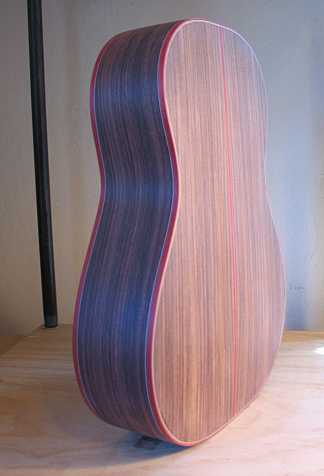
I now have a soundbox with no gaps!!!!! I am so relieved that I was able to get rid of those gaps. I gained some new knowledge today.
|
Here are some photos of how it all came out:
Now it thumps with a "G" note. |
|
Previous Page |