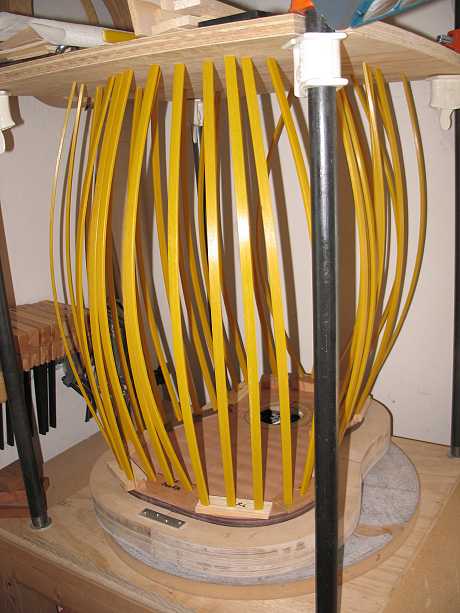
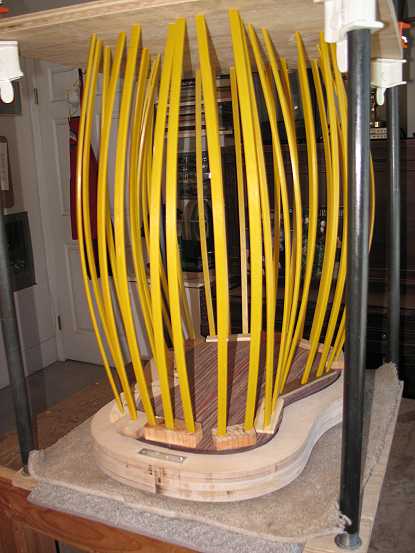
Next, I laid the whole thing over the top, to see where I'd have to remove kerfing to allow for the upper and lower cross braces. I removed the kerfing. After I glue on the top, I will make side "struts" at the ends of those two braces. Oh, yeah, and I remembered to drill the bolt holes (already drilled in the neck block) through the sides --- I've forgotten before, and it's kind of awkward to try to drill them once you've glued either the top or the back onto the sides! Finally, I prepared to glue on the top. I first drilled a 3/32" hole through the top at the neck block, as an indexing pin, so that everything lines up correctly when it's time to glue. I'll just put the top on, using that indexing pin (a tiny dowel), and then look to make sure my centerlines of the top and the tail end of the sides match up. I set my rim-set on the back radius dish in the go-bar deck, laid out all my little blocks of wood (for clamping cauls) and go-bar sticks, took a deep breath, and proceeded to apply the glue to the kerfing and blocks. Then I set the top onto the kerfing, using the indexing pin (which had been cut flush to the top), adjusted the tail end so the centerlines matched, and go-barred (is that a verb?) the top to the sides!!!! I'll wait at least a half-hour before I remove the go-bar sticks to see how it came out.
|
|
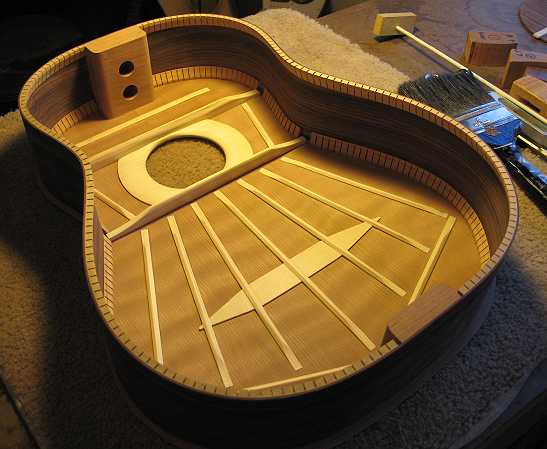
Success!!! Here's the result; the top is now glued to the sides! I have half a box!
Hey! I've been tapping the top again ---- now it seems to be an "A" note. (When I tapped it previously --- alone, not glued to the sides--- it was a "D" note.) I wonder what note it will be after I glue on the back?????
|
And here are the side struts. I had made my first error in this project, in that I had cut the ends of the cross braces to the length specified on the plans, instead of keeping them long and waiting to cut them to reach all the way to the sides. Thus, they were a bit short at the ends. So, instead of just making a side strut that sits on top of the end of the brace, I had to make a notched strut, to fill the gap left between the end of the brace and the side, as well as sit on top of the brace. I used scrap spruce brace material. It was a bit tedious making these, because you have to fit the strut to the curve of the side, as well as fit it accurately in the notching. But it came out well.
|
|
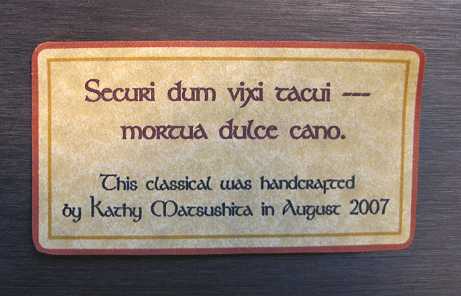
Thursday, August 2nd, 2007: Well, it's now about 4:40 p.m. and I've just finished gluing the back onto the box. The first thing I did today was to make up my label and glue it onto the back. I just make a label using AppleWorks and print it in my inkjet printer onto some yellow parchment paper. After I printed it, I put a couple of coats of shellac over it, let it dry, and then glued it on the back. Here what it looks like (right after I'd put the shellac on):
(The Latin inscription is something I've put on nearly all my labels, because I like it so much; it means something like "In life I was silent --- in death I sweetly sing." I've always liked that quote ever since I read it in William Cumpiano's book.)
|
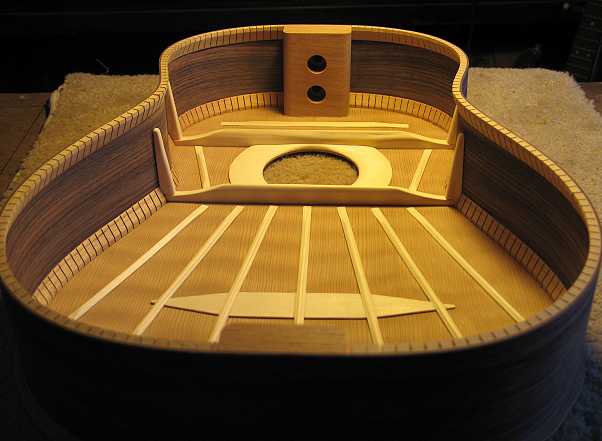
Then, after that was finished, I spent quite a few hours preparing the sides to receive the back. This always takes me a long time. I had to figure out where the back's braces meet the sides, and then chisel out the kerfing sections that have to be removed. Then I had to figure out exactly how short to trim the braces to meet the sides. It's kind of trial-and-error work; my goal is to have it fit snugly, and have the centerlines of both the neck end and the tail end of the side and back meet. I also had to figure out exactly where to trim the back center reinforcement strip, so that it snugly butts up against the neck and tail blocks. When I finally had that all done, I did a final sanding of the top and back insides, and got the go-bar deck ready. Because it's pretty crucial that I make sure the centerlines of the neck and tail blocks meet the centerline of the back, I had to be able to easily access those areas as I used the go-bar deck. Therefore, I moved the go-bar deck away from its usual position (in the corner against the wall) to my center workbench, so I could have the neck block at one side of the bench and the tail block on the other side of the bench. I laid out all my cauls and go-bar sticks, set my side-set, back side up, on top of some carpet scraps (to protect the top), and ran glue along the kerfing and blocks. I lined up and clamped the neck and tail blocks first, and then clamped up the rest. Now it's sitting there, waiting for me to return to it in about an hour..... I can't wait to finally have a completed box I can thump on!!!! |
|
Previous Page |