Bracing (Continued)

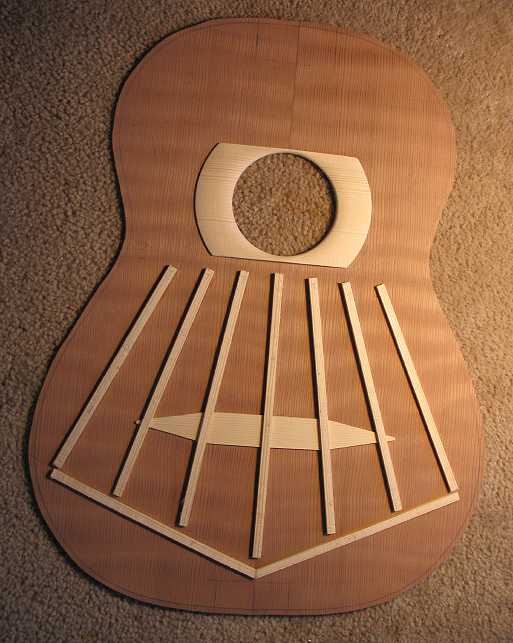
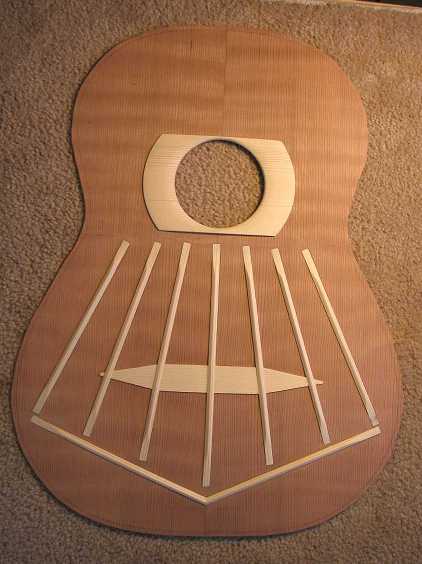
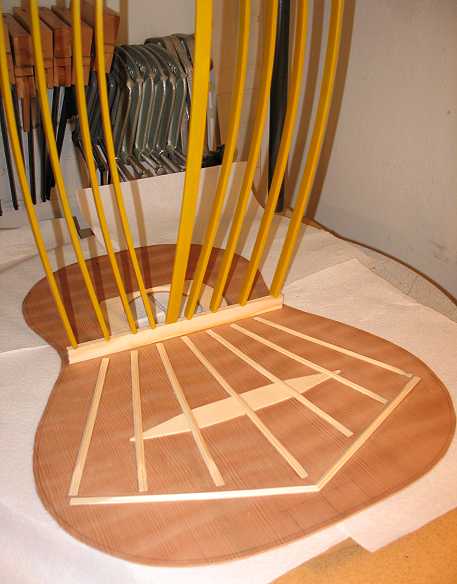
After I'd finished shaping and sanding the back braces, I removed the top from the go-bar deck. Here it is, with the fan braces all glued:


I'd say that's enough for today! Tomorrow, I will first use the go-bar deck to glue in the back center reinforcement strip (I fit each section separately, instead of gluing the whole strip in and then having to notch it out for the back braces).

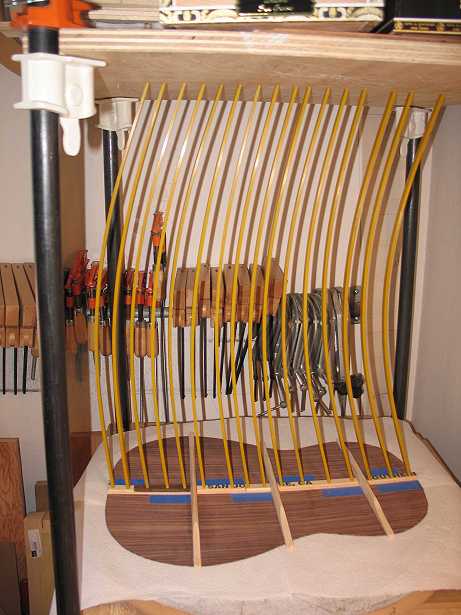
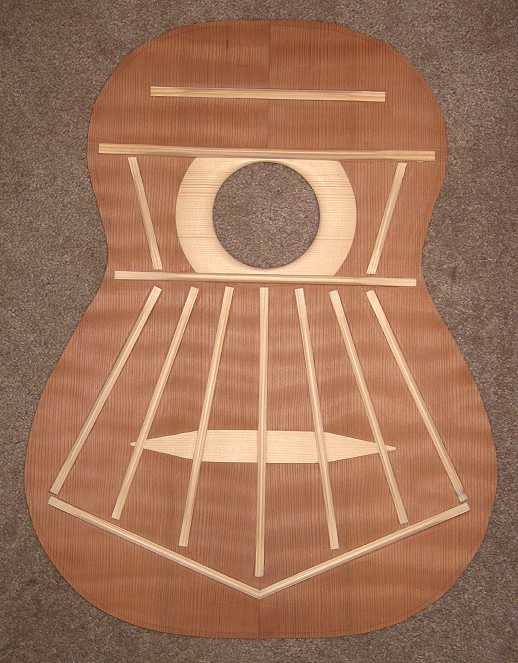
While that's in the go-bar deck, I will shape the fan braces. Then, when that's done, I'll glue in the lower cross brace, using the radius dish and some clamps. After that, it will be time to glue in (flat) the rest of the braces for the top (the upper cross brace, two finger braces, and the brace that goes above the upper cross brace --- I don't know what it's called!).

After all that's done, I probably should make a bridge-gluing support caul (what goes inside, notched for the fan braces), so that I don't forget to do it later!!!

Time to relax now....


INDEX:

Return to HOME PAGE


Friday, July 27th, 2007:

Well, I fit the four strips of back joint reinforcement spruce, and here they are being glued in the go-bar deck:


While that was in the deck, I spent about an hour shaping the fan braces on the top. I used a combination of tools: my Schneider glue-clearing chisel (which is great to use for carving, too, as its curved shape makes it easier to use), and my two finger planes. I basically needed to carve a peak on each fan brace, and then scallop and feather the ends of the braces down, then some sanding with 120-grit sandpaper to smooth it all up.


Here's the back, with all the braces and the back joint reinforcement strip all shaped and sanded down:

Now, with the go-bar deck freed up again, I can glue on the lower cross brace (also radiused, as are the fan braces):


FINAL PHOTO OF THE DAY....it's about time for me to quit! After I had shaped the lower cross brace, I could now glue up the final braces ---- all four braces which are above that lower cross brace. They are all glued flat. Once I shape these four braces, my top and back are finally DONE, and I can move on to bending the sides!!!!


O.K. ---- I lied. I couldn't resist finishing it up. Here's the final product --- the top all braced, braces shaped and sanded. I tapped the top, and it seems to have the tone of "D". Does that mean anything significant? I don't know. But it is kind of nice that it seems to have a definite "tune"....

Tomorrow, I think I'll start on the sides.


Previous Page