GS Mini 9

Still Wednesday:

A couple of hours later, I removed the side from the bender:


I am relieved . . . . no cracking or scorching at all! I did, however, need to touch up the waist area on the electric bending iron, because it wasn't a sharp enough bend at the waist. I guess in the future, I might cut the bending form a bit deeper at the waist, to compensate for the tendency for some "springback" in the waist area.


After I touched up the waist on the bender, I spritzed the side with water, and clamped it in the mold. I find that, as the side dries while it's clamped to the mold, this helps to "set" the side into the desired shape.


To bend the second side, I decided to move the bender to my dining room table. As I was bending the first side (with the bender clamped to my workroom workbench), I found it was a little too high for me to handle the clamping cauls easily (I'm short). So, while the dining room table is not as sturdy as my workbench, it is a few inches shorter, so that made it easier to work with.

Here I have bent the second side:

Later tonight we'll see how this one went!!!

I think this is all the drama I can handle for today.


I lied . . . Still Wednesday . . . About 7:00 p.m.

I couldn't resist. After a couple of hours, I have removed the second side from the bender. It came out better, and I only had to touch up the waist a tiny bit.

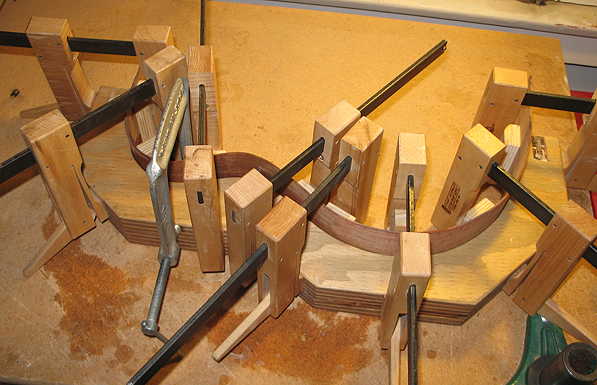
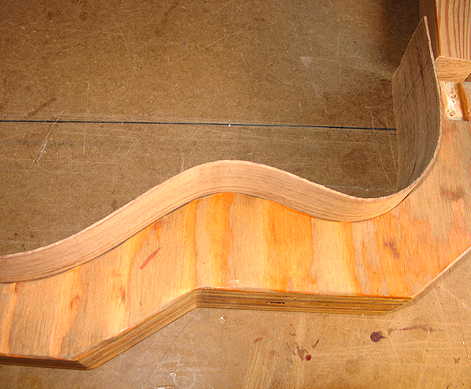
Here's the second side, clamped into the mold:

Now I am REALLY, REALLY, REALLY finished for the day. Time for dinner.


Thursday, February 27th, 2014:

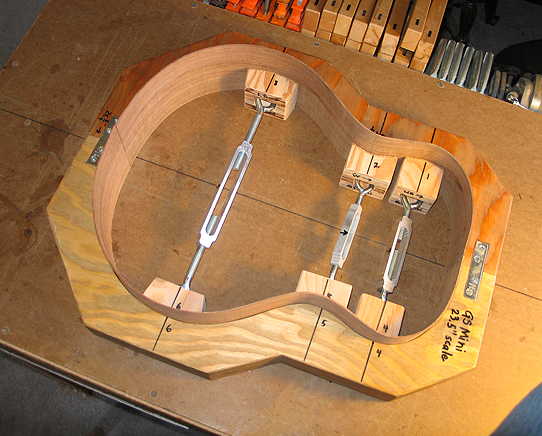
SUCCESS!!!!! I just removed the clamps from the sides which I had bent yesterday, and the sides have conformed to the mold perfectly!!! Yay!!!

What I had been concerned about was the fit of the upper bout, right above the waist, since that section had kind of pulled away from the mold a bit. I guess my dampening the wood and clamping it tightly against the mold, and then letting it sit overnight, worked its magic!!!

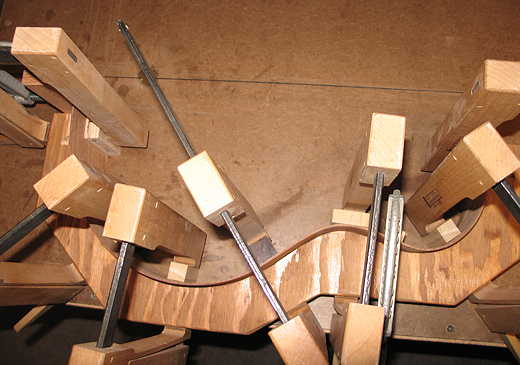
Here's the bass side (the top's edge is flat against the table):


And here's the treble side:

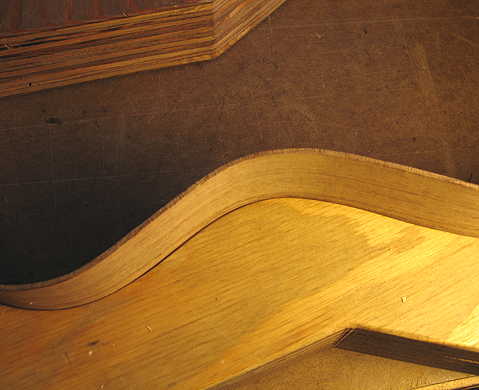
Next, I will trim the ends of the sides to fit, and will hold the sides in the mold with the spreaders I had made earlier.


I have trimmed the ends of the sides, and here they are in the mold:


NOW IT'S TIME TO GET STARTED ON PLANNING AND MOVING ON WITH THE BEVEL CONSTRUCTION!!!!

Here's where I start (according to my "Next Steps" plan a few pages back):

BEVEL BLOCK 1: 16. Mark bevel shape onto bass side lower bout.

This is the absolutely "new territory" for me on this build. Maybe it's time to look at Kent's DVD again, before I proceed, just so it's all clear in my mind . . . . Never hurts to be too careful!