GS Mini 20

Saturday, March 15, 2014

Beware the Ides of March . . .

I didn't heed the warning; today I moved on to one of the most nerve-wracking parts of any guitar build --- routing for the binding!

It's now around 12:30 p.m. I spent the morning doing what you see below. First, I determined what size bearings to use with my router bit (to use with the same binding router jig I used to flush-cut the overhanging top and back), to rout, first, the purfling ledge and, then, the binding ledge. My back black/white/black purfling is .040" thick and the bloodwood binding is .080" thick.

I did test cuts first on some scrap wood.

I first routed the purfling ledge, so the purfling would sit just about flush with the back plate:


Next, I routed the binding ledge:


And here's how the binding and purfling fits. (The binding has a .040" black/white/black purfling strip on the bottom.)


I can breathe now --- but not for long.

Next up: Routing the binding and purfling channels for the more challenging part --- the top!!! (The main challenge here will be making sure to stay clear of the arm bevel area!)

After that is done, I can work on my end wedge.


Still Saturday, about 4:30 p.m. . . .

Top Binding Ledges

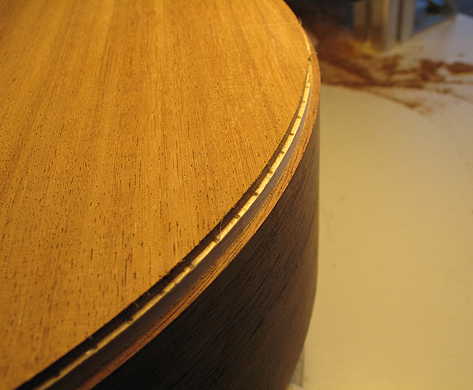
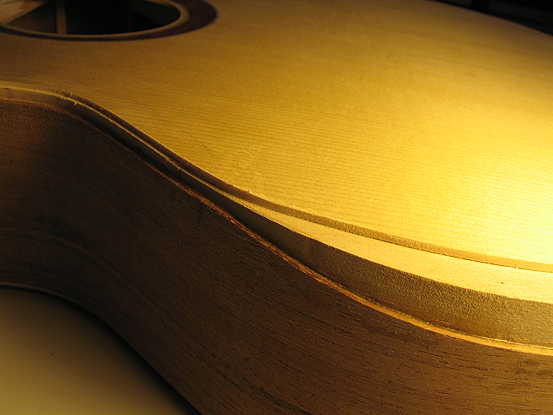
After a little break, I routed the top binding/purfling ledges. Since I had just routed the binding channel on the back, my router was already set up for the binding; thus, I started by routing out the top's binding ledge. I routed only up to the beginning and ending points of the arm bevel.

Then I followed that by routing the purfling ledge, which, unlike the back purfling, was a little bit thicker at .060".

I actually prefer routing the binding ledge first, as it gives you more area for the router jig's plastic "donut" to ride upon.


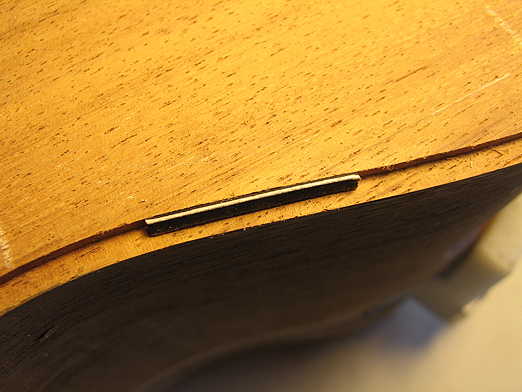
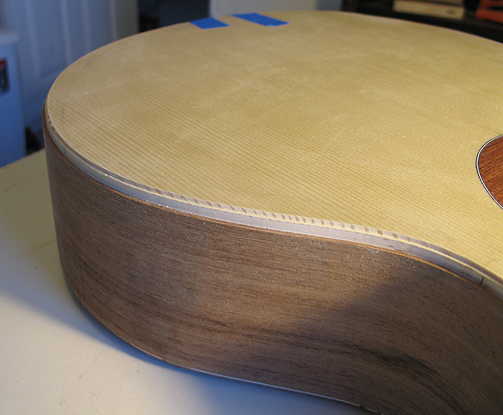
After the ledges were routed out, I used a file to smooth out the transitional areas between where the regular binding strip will be and where the arm bevel veneer and purflings will be.

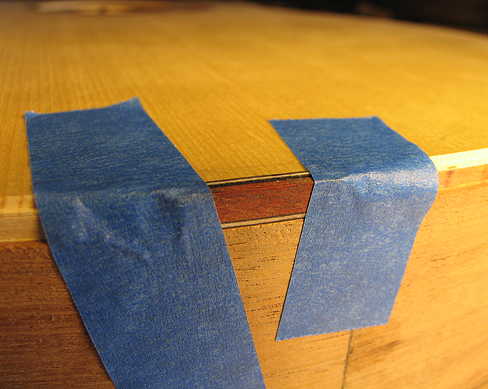
Here's how the binding and purfling fits on the top:

I think that's it for today --- my brain and nerves are shot. Time to eat some dinner and watch me some Netflix!!!


Sunday, March 16th, 2014:

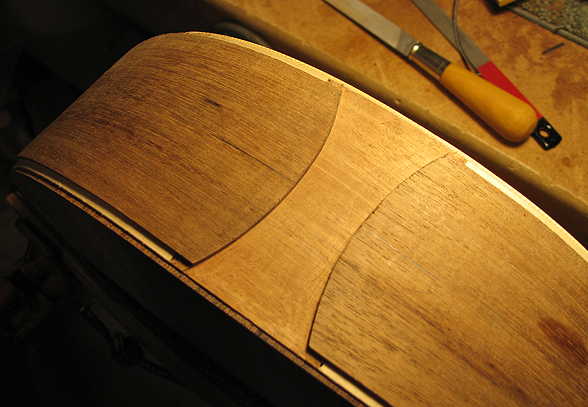
The End Wedge (Or Whatever This Shape Is)

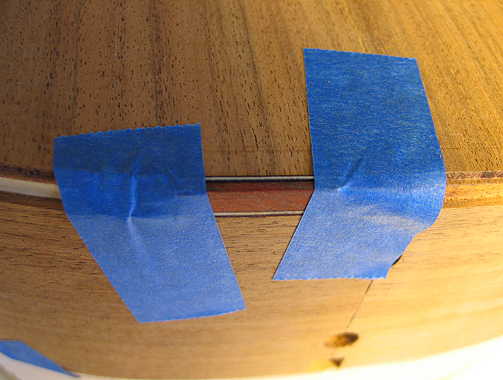
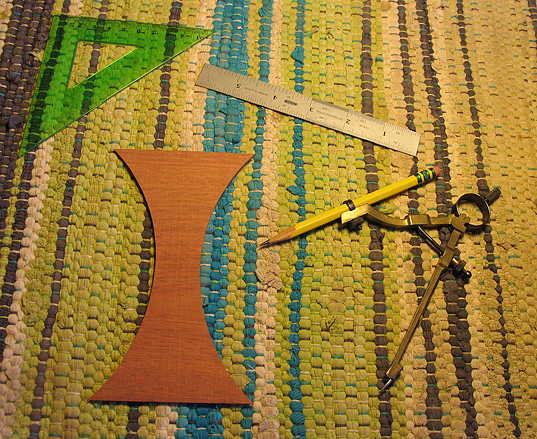
Instead of a regular end wedge shape, I decided to do a kind of flared-out shape, to repeat the theme of the various curves in this guitar (the curved arm bevel and the eccentric rosette).

Here I have made a paper cutout to see how it would look and what size it should be:

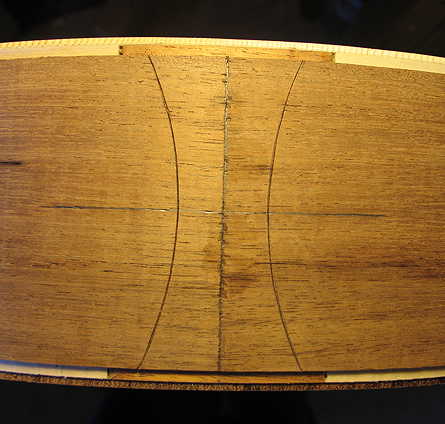
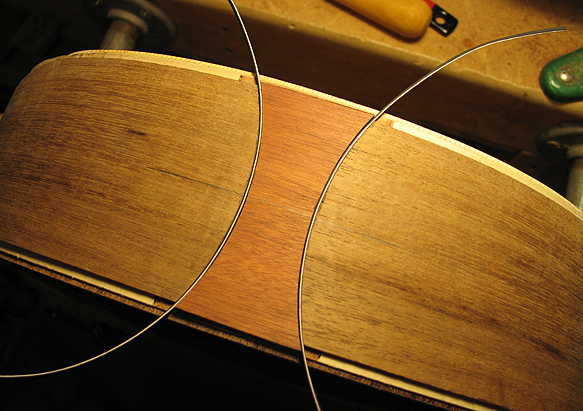
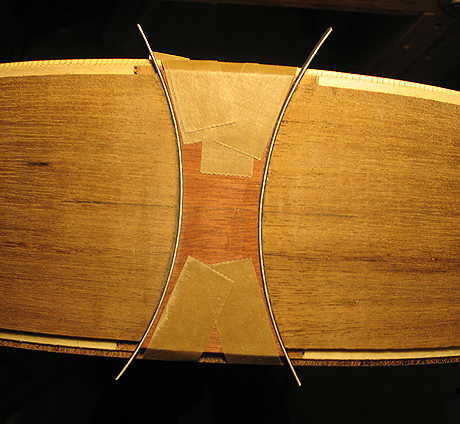
To create the shape, I drew a centerline on my bloodwood blank and used a compass (with its pivot point on that centerline) to draw two opposing curves with a circle radius of about 4-1/4". I drew the two curves so that there was 1" between them in the middle. Then I cut it out close to the lines on my bandsaw and used my spindle sander to sand right up to the lines:


I then used the bloodwood piece to score the shape onto my guitar's tail end with an Exacto knife:


Next, I used the Dremel in the router base to rout out the cavity for the end wedge:


I then used a file --- actually, it was a nut-seating file, which was good for this job because it has file teeth on its 1/8" edges and is smooth on its faces --- to slowly widen the sides of the routed cavity to accept the .040" black/white/black purfling strips on both sides of the wedge. My wedge juts into the binding channel because I plan to miter the purfling to meet the binding purfling.

Below I am test-fitting the pieces (after having trimmed the top and bottom of the piece so that it would extend above the ledge the height of the black/white/black purfling strip):

And here I have glued the pieces in with Titebond: