Friday, March 14th, 2014 --- HAPPY PI DAY!!!!
Trimming the Overhang
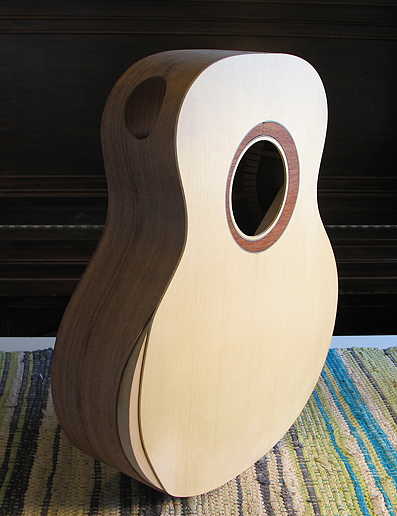
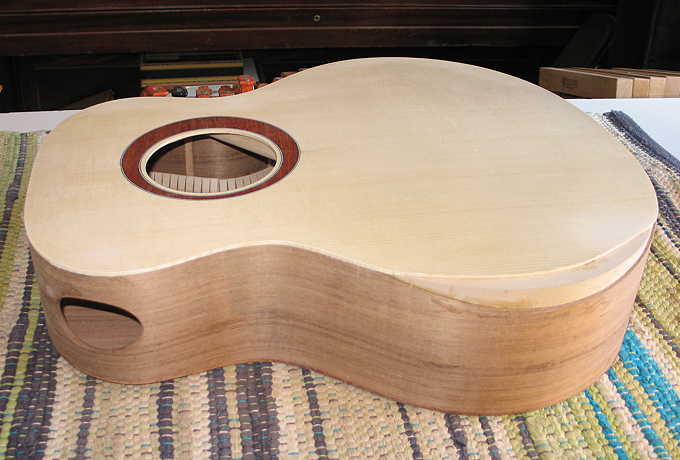
What I needed to do next was to trim the overhanging edges of the top and back; they extended about 3/16" beyond the sides and needed to be routed flush to the sides.
(1) This morning, I was ready to go. Before I began, I used a small plane to reduce the overhang to about 1/8" from the sides, to make it easier on the router.
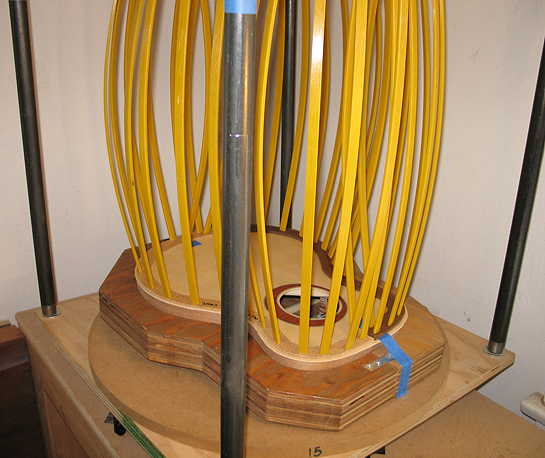
To do the routing (and to rout the binding channels later), I have decided to use my Stew-Mac "TrueChannel" binding router jig, which I just purchased last year. Before I used it on this guitar, though, I needed to make a larger body cradle (the guitar-shaped platform with adjustable support blocks). That was easy enough, as all I had to do was cut out a form slightly smaller than my GS Mini and drill some holes in it for the support blocks. I did this last night.
The first thing I needed to do was to set the guitar soundbox in the cradle and adjust the blocks up or down, so that the sides were perpendicular to the worktable. Because of the taper of the body (taller at the tail end than at the neck end), you have to set the blocks to different heights, in order to do this.
Here my neck end is perpendicular . . . .
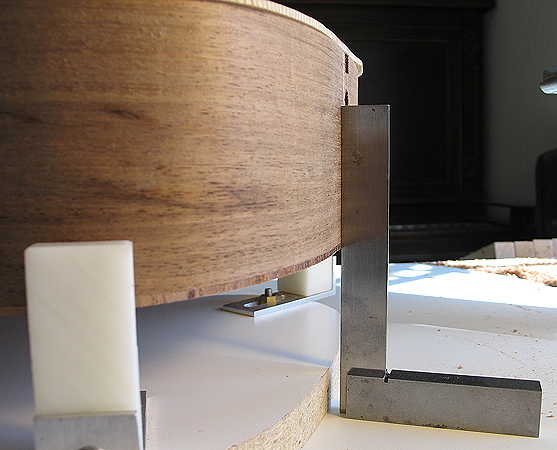
and so is the tail end . . . .

|
|
(2) Next, I marked on the back (and later on the top) the direction of cut for the router. This is important so the routing doesn't catch the grain and tear out the wood. Basically, you start at the top of a "hill" and travel down to the "valley"; that way you aren't cutting into the grain.
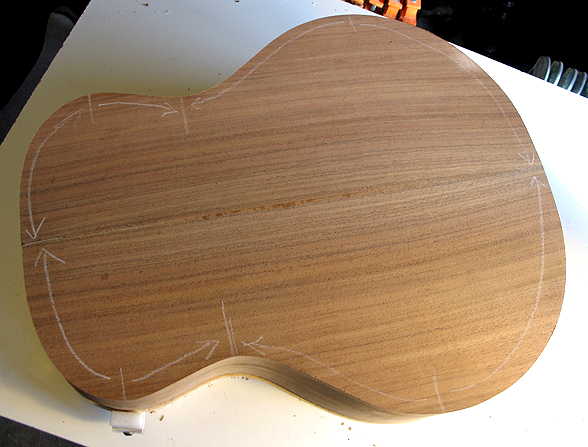
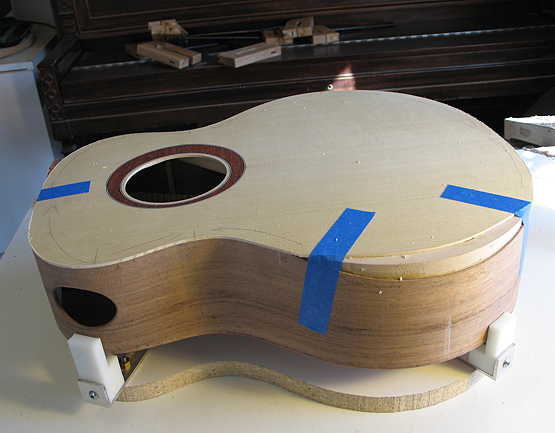
(3) When it was time to do the top, I also had to be careful not to rout in the area of the arm bevel and where I had the truss rod cutout in the side; to mark those areas to avoid, I used masking tape.
|
|
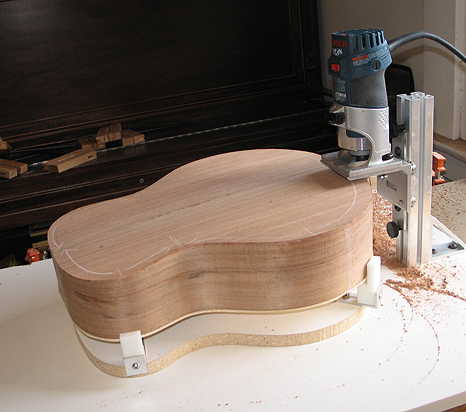
(4) Here is how the router jig is used in action. I'm not actually routing here, of course --- when I do the routing, I am simply holding the guitar box in the cradle and moving it into and along the flush-cutting router bit with the bearing. The router carriage holds the router perpendicular to the table (and, thus, to the guitar body) and glides smoothly up and down on the post (so it can adjust to the taper of the body).
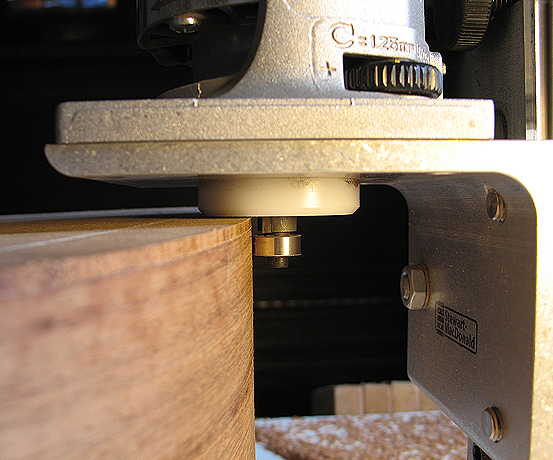
(5) Here is a closeup view of the router and flush-cutting bit and bearing. The white plastic you see rides along the top of the guitar body, and the router bearing registers along the guitar side. Thus, the router bit cuts the overhang flush to the side.
|