Monday, July 13th, 2015:
FITTING THE NECK!!!!
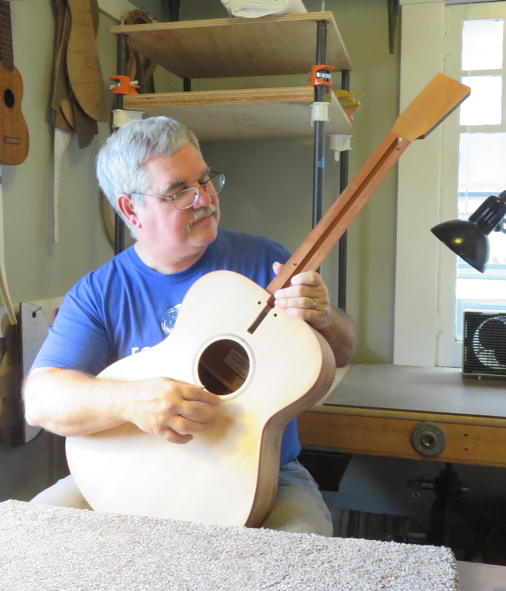
Tonight was a pretty important task of Randall's build --- doing the preliminary neck-setting (that is, making sure the neck's back and side-to-side angles are correct). What you basically want is that the straightedge, when placed on the fretted fingerboard, just "kisses" the top of the bridge at the saddle position, or is, at the most, around 1/32" above the bridge. As well, you want the neck to be in a nice, straight line down the center of the soundboard (that is, not angled more to one side than the other).
The first thing we did was to bolt the neck to the soundbox, clamp the fretted fingerboard onto the neck, lay a straightedge on top of the frets, and measure the distance that that straightedge is from the top of the bridge (placed in its approximate position on the soundboard). When we started, there was around 1/8" airspace between the straightedge and the bridge. So...we had some "flossing" to do!!!
To reduce that airspace (in other words, to reduce the back angle of the neck), we needed to remove more wood from the top of the heel than from the bottom. The easiest (and safest) way to do that is to use a technique called "flossing" --- what you do, while holding the heel firmly against the body (unbolted), is pull a piece of sandpaper from the bottom of the heel to the top. After the sandpaper has left the bottom of the heel, it is still continuing to sand the top section of the heel, until the sandpaper strip is pulled all the way out of the joint; thus, you slowly are changing the back angle of the heel. As you change that angle, the neck back angle is gradually reduced. Because you are doing this while firmly holding the heel against the side, you are not changing the fit of the heel against the side. Also, while you're doing this, you need to be careful to use the same number of pulls on each side, so you don't change the side-to-side angle of the neck. You do the "flossing" in stages, constantly stopping to bolt up the neck again to check your back angle, until you finally reach your goal of around 1/32" airspace or less between the straightedge and bridge.
TO THE RIGHT AND BELOW are a couple of videos. The first is of Randall doing some "flossing" of the heel. The second video is one of an earlier time we were checking the back angle, after a few flossing sessions. It took quite a while to get this all done. What Randall discovered, about halfway in, was that the fingerboard extension shouldn't have been clamped down, because what that did was to cause the center of the fingerboard (which wasn't clamped) to flex upwards, thus creating an inaccurate reading of the airspace. We then removed the clamps from the extension and made sure to firmly clamp down on the center section of the fingerboard, and we got more accurate readings.
After finally getting the back angle correct, we only had to remove a little from the treble side of the heel, to correct the side-to-side angle. We did this by putting some stick-on sandpaper on that side of the mortise and moving the heel back-and-forth over that sandpaper until the side-to-side angle was correct.
After around 3 hours, all was completed successfully!!! |
|
|
|
|