My 2015 Taylor-style Guitar

Tuesday, May 5th, 2015

SHE'S B-A-A-A-C-K!!!!!

Well, the bulk of my house remodeling is FINALLY done, and I have my guitarmaking room back (it was basically my remodeling storage room for the longest time). I haven't built anything since last May (my still-barely-begun second violin), and I've been itching to get back to the building!!!

Actually, I will have two building projects going on --- one, my own personal project (which I'll chronicle on these pages), another Taylor Grand Concert style guitar, this time without a cutaway or soundport or arm bevel --- just a basic guitar, but one which showcases this beautiful sinker redwood top I had bought a while ago, with a lovely set of East Indian rosewood sides and back. (I currently don't have my Taylor cutaway guitar I had built in 2008, because I gave it to my church's worship leader.) And the second project will be a Martin kit guitar a church friend will be building alongside me; I got two OM kits from Bluescreek Guitars, and I will build one kit as my friend builds his. Should be fun!

I will, however, be starting these two projects at the same time as my FINAL remodeling project is being done --- a total remodel of my downstairs bathroom. So, this guitar project might be moving along a bit more slowly than usual. But at least I'm building again. YAY!!! It feels good to finally be able to work in my "new" guitarmaking room (look HERE to see what I've done to the room).

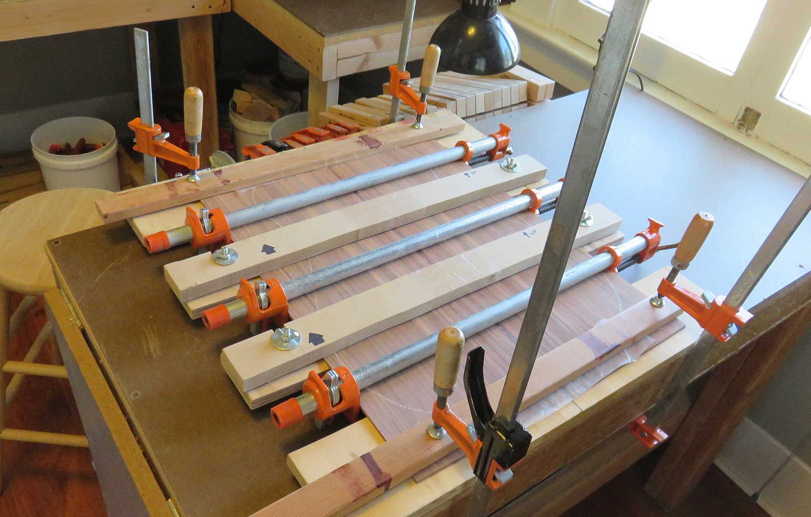
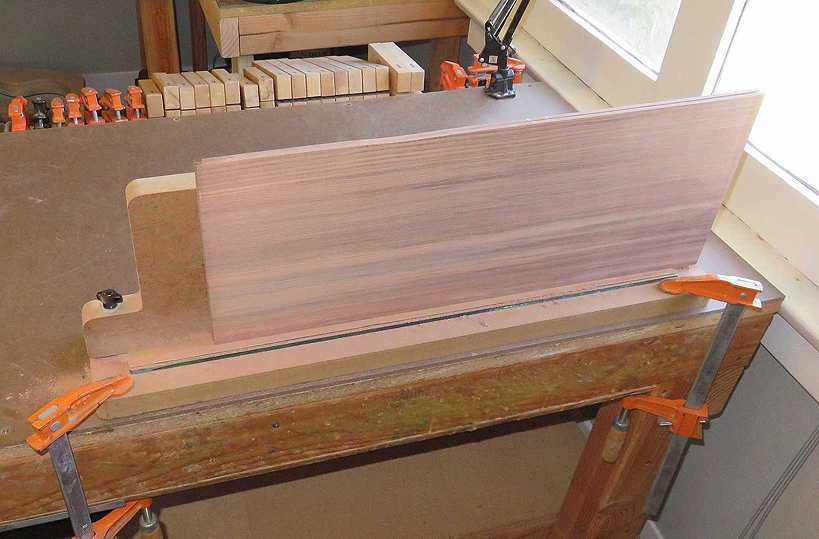
What I did today was to joint and join the sinker redwood top.

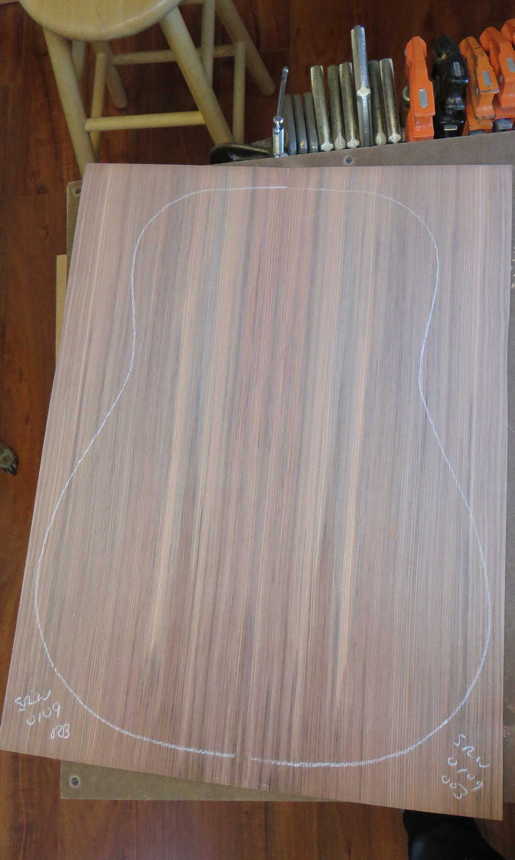
Here's what the top looks like (before jointing and joining):


Here's how I joint the center edges, with my Luthier Supplier "Easy Jointer":


TABLE OF CONTENTS:

Return to AMATEUR LUTHIER HOME PAGE

  1. I've Changed My Mind!!! Choosing Materials for Classical Instead / Rosette / Bending Sides
  2. Cutting Side for Bevel / Neck & Tail Blocks / Bevel Block / Kerfing / Trim Top for Bevel / Shape Inside of Bevel
  3. Soundport / Side Braces / Bridge Patch / Fan Braces
  4. Soundhole Reinforcement Donut/ Transverse Braces / Fingerboard Patches / Clamping Cauls / Cut Back Braces
  5. Back Braces /Center Reinforcement Strip / Label / Glue Back & Top / Trim Overhang
  6. Bend Bindings / Preparing to Rout for Bindings / Routing the Binding Channels / Tail Wedge Ideas /Smoothing the Bevel Transitions / Making and Gluing in the Tail Wedge / Bindings Fitted / Gluing the Bindings
  7. Continuing to Glue Bindings / Bindings Scraped / Buffer Zone / Filing the Bevel / A Test Glue-up / Making the Veneer Template / Glue Applied to Veneer and Bevel Surface / Veneer Ironed On!! / A Little Hiccup / Another Dumb Moment / The Second Bevel Veneer
  8. Neck Tasks List / Peghead Angle, Heel Dowel / Carbon Fiber Rod Slot / Threaded Inserts / Peghead Overlay / Cutting Out Neck Profile / Peghead Template / Gluing on Peghead "Ears" / Gluing on the Peghead Overlay / Backstrap / Carbon Fiber Rod / Fingerboard Tapering / Peghead Shape / Peghead Crest / Tuner Post Holes / Peghead Slots / Trim Neck / Relieve Heel Face
  9. Centering Neck Blank / Sanding Bridge Gluing Surface / Installing Frets / Fingerboard Gluing Caul / Clipping Frets / Filing Frets / Side Dots / Filling Fret Tang Gaps / Gluing on the Fingerboard / Neck Carving
  10. Preparation for Finishing / The French-Polishing Begins!
  11. More French Polishing!!! / Preparing to Attach the Neck / Gluing the Fingerboard Extension / Fretwork / Gluing the Bridge
  12. Installing the Tuners / Fitting and Shaping the Nut / Dings in my Finish! / Stringing It Up / The Initial Sound (A Video)!!! / Neck Reset!!! / FINAL RECAP VIDEO / Quest for a Case!!! / A Couple of Tunes!!! / French Polish Repair


And here's how I join the center edges:


Wednesday, May 6th, 2015:

Today I jointed and joined the East Indian rosewood back:

Friday, May 8th, 2015:

Today, while John2 (the two guys working on my bathroom are both named John) are installing my tub and plumbing fixtures, I went out to the back shed and used my Performax 10-20 sander to thickness-sand the top (just enough so that it is smooth from the joining) and the back (to around 2.4mm thick).

Here's the lovely sinker redwood top:


And the nice, East Indian rosewood back:


Table of Contents

Next Page