July 26th, 2004. . . .

After sanding the neck angle, I proceeded to drill the 5/16" holes for the threaded inserts for my bolt-on neck. I put tracing paper over my body neckblock holes, rubbed pencil over the holes, and proceeded to flip the paper over to transfer the hole placements to my heel. So far, so good....

Only trouble was. . . . I somehow managed to flip the tracing paper over, so that the "top" edge of the tracing paper was placed where the "back" edge should be. FIRST MAJOR STUPID MISTAKE! (I always manage to make some dumb mistake on every guitar.) I didn't notice my mistake until later, after I had put the threaded inserts in the heel and attempted to bolt up the neck. OOPS.

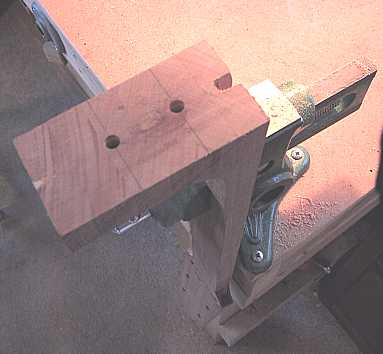
Not wanting to totally remake the neck, I pondered my various options for recovering from this mistake. I finally decided to 
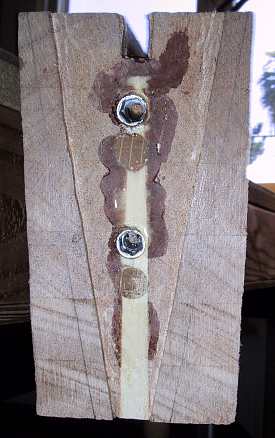
remove the threaded inserts, redrill those holes with a slightly larger (3/8") hole, and plug them with 3/8"
oak dowels. I remeasured for the PROPER holes, inserted the threaded inserts, and all was well . . . . .Oh, yeah. . . I have also slightly coved out the inner portion of the heel, for a better fit to the body.

July 27-29th. . . .

Now it was time to work on the peghead inlay. TO THE LEFT: I copied my patterns on both clear transparency film and white whole-page label paper. The transparency film was helpful for deciding what portions of my white and black pearl, and pink "reconstituted stone", to use for the inlays. I used the white label paper to stick on top of my inlay pieces for cutting. BELOW: For pieces that will fit together, I have glued white pearl, black pearl, and a thin piece of hobby aircraft plywood, together; this will make sawing the interlocking pieces more accurate and will ensure less breakage of the pearl. After sawing, I just dropped the stack into hot water, which released the glue and separated the pieces.

After I used a Dremel with a 1/16" spiral bit to rout out the inlay cavities, I set the inlays into the cavities. (I had previously superglued the eleven malamute pieces together.)

BELOW: There are inevitably gaps, so I need to fill those gaps with epoxy tinted or filled with rosewood dust. I decided to give this malamute blue eyes (I thought it would add a punch of color), so I added some blue tint to the epoxy for the eyes.

Tomorrow I will scrape and sand down the epoxy.

Friday, July 30, 2004 . . . .

Well, today I scraped and sanded the epoxy-filled peghead inlay. I think it came out kind of nicely! For the photo to the right, I have dampened the surface of the peghead, so you can see what it will probably look like when the finish is applied.

Now, it's on to carving the neck!!!

Previous Page