I'm Back ! ! ! (after my two-week trip)

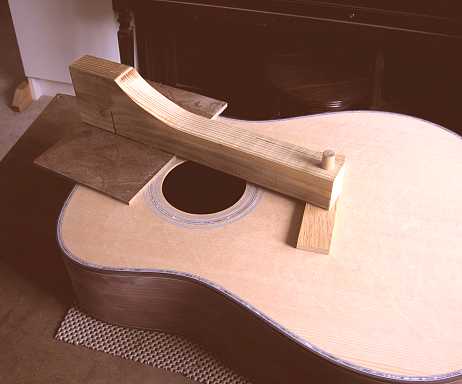
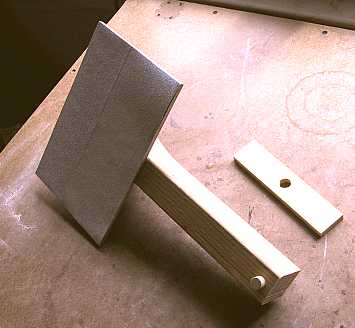
July 21st, 2004. . . .Well, after a day or so recuperating from my trip, and dealing with a DSL modem that went on the fritz, I got back to Pat's guitar! The first thing I did was to make the jig you see below, to sand flat the 25' radius dome on the top above the soundhole. That way, the fingerboard extension will lie flat upon the top. I decided to make a jig like the one posted on the MIMForum by Terence Kennedy, in which the sanding plate is the thickness of the fingerboard with frets, and the pivot board is the thickness of the bridge.

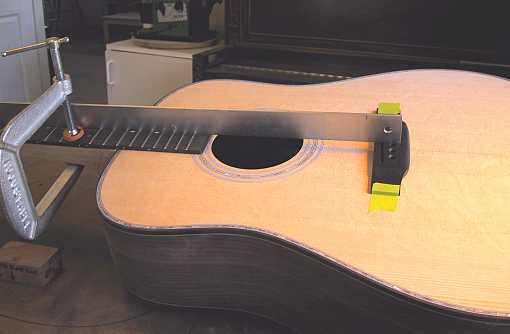
It worked well. Later, when I checked out the neck angle and clamped the fingerboard on top of the neck, there was no problem in how the fingerboard extension lay on the top. It transitioned very smoothly from the neck blank surface to the surface of the top.

Saturday, July 24, 2004. . . .

Well, I took off a few days from working on the guitar, for a couple of reasons. The primary reason was that I thought I should take care of putting my vacation trip photos on my website, while everything was still fresh in my mind. That took a couple of days.

Also, to be honest, the second reason was that I was somewhat deliberately postponing working on the next step --- setting and sanding the neck angle --- because that always makes me super-nervous. I hate those steps in guitarmaking where it is a pretty critical procedure, and if you mess up, you've lost all the work you did on that piece up to that point! (In other words, I would hate to have to remake my neck!)

I kept changing my mind, too, on what order I wanted to do the various steps --- whether to sand the neck angle first, then shape the heel, or to do it the other way around, for example. I decided to sand the angle first, as having the bigger heel area might make it easier to handle (clamping, for example) when I have to drill the holes for the two threaded inserts in the heel.

To the right is how I sanded the neck angle (of course, I'm holding the neck solidly to the table with both hands when I actually sand it!). On my first try, I ended up sanding too much of a back-set in the heel (even though I thought I had set the sander table up at the proper angle), so I had to readjust it and resand it. The second time it came out just right. I ended up having about a 1-degree neck angle.

To check the neck angle, I clamped the neck to the body, clamped the fretted fingerboard to the neck, and taped the bridge to its location on the top. What I was looking for was the straightedge placed atop the frets meeting the top of the bridge. Success!!! (That's a load off my mind...)

Previous Page

Next Page