|
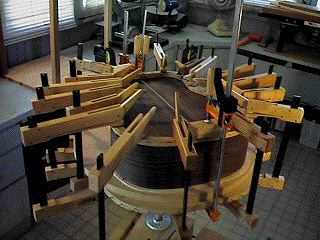
Above is the method I now use for gluing both the back and the top to the sides. I used to use a roping method, but this is much faster and easier. I place the sides atop the 25' radius top arching dish and glue the back on first, using cam clamps and clamping cauls cut to the outline of the guitar. When I glue the top on, I use the same set-up (in fact, the photo above was taken when I was gluing the top). By the way, in case you're wondering, the set-up above is made of two guitar-shaped pieces of particle board, joined in the middle with a 36" pipe and two pipe flanges, to make a standing platform. That way it's easy for me to clamp the body all the way around. |
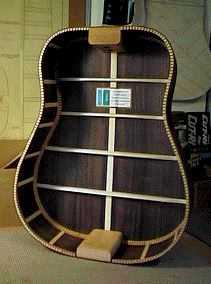
Here is the soundbox, after I have glued the back onto the sides. I have also glued reinforcement strips onto the sides (they're just popsicle sticks, actually -- available in huge boxes in craft stores). I have also glued my label (printed on my inkjet printer) onto the back. |
|
|
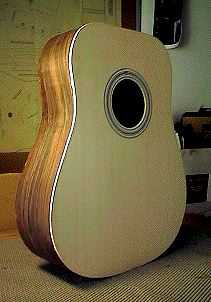
Above, is the completed soundbox!!! Once the top and back are glued to the sides, it is amazing how much stronger the whole assembly is! After gluing the top and back, I then trim the overhanging top and back wood so it's even with the sides. I use both a coping saw and my mini-drawknife for this task. |
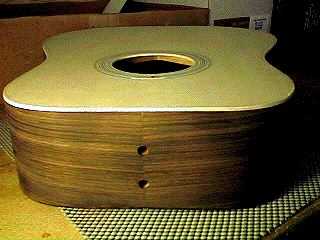
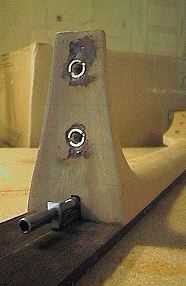
Here is the soundbox at the neck block end. Those two holes are the holes that the two hex bolts will pass through from the neck block. The hex bolts will attach to threaded inserts set in the flat heel of the neck. The two holes are drilled a tiny bit bigger than the bolts, to allow a little room for adjustment of the neck.
The next step is the more difficult one --- routing out the binding channels and gluing on the binding. . . . . |
| Return to Previous Page |
|