|
After completing the soundbox, I bent the ebony binding on the bending iron. Then I used my Dremel binding attachment to rout out the binding and purfling ledges. I used an Exacto razor saw and chisel to cut out a channel for this ebony wedge (with space on both sides for the thin white/green/white purfling strips). Actually, I didn't have a piece of ebony large enough, so I made the wedge by gluing together about four pieces of leftover ebony binding with superglue; you can't even tell it's not one solid piece. |
The next step was to glue in all the ebony bindings and top and back purflings. On the top and back, I had different combinations of white/black holly purfling strips, with abalone purfling around the top edge. Then I used my Dremel, with a special cutter from LMI, to rout out the very thin channel for the side purfling at the bottom of the ebony binding. I routed out that thin channel after the binding was all glued in. I then glued in all the thin purflings. |
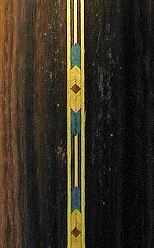
Above is the back inlay strip I used for the customer's guitar. He had told me he wanted "lots of green" on the guitar, and I found this inlay strip at a local lumber store. |
|
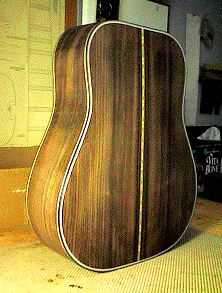
The back, with all the finished bindings and purflings. |
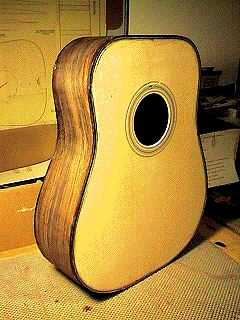
The top, just after I have glued the bindings and purflings. It is quite messy, until you clean it up by scraping and sanding. |
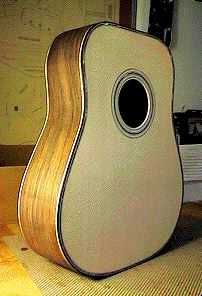
The top, after I have cleaned the purflings and bindings, and after I have also finished the side purflings. |


|
|
|