Wednesday, March 26th, 2014:
Two Cool Tools
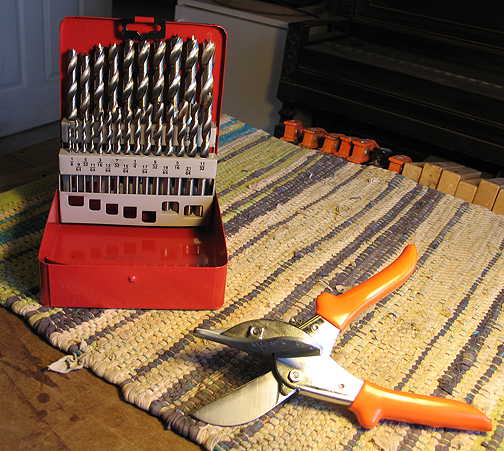
Before I forget, I wanted to show you a couple of tools that I recently bought, which I am really jazzed about.
The first is a set of brad-pointed drill bits. You can't believe how much easier and more accurate this makes things!!! Prior to this, I just had a small set of Dewalt "pilot-pointed" drill bits. Even though those drill bits had a kind of "nub" on the tip, they still weren't as precise as these brad-point bits. And, I have a much wider assortment of drill bit sizes with this set. Cool.
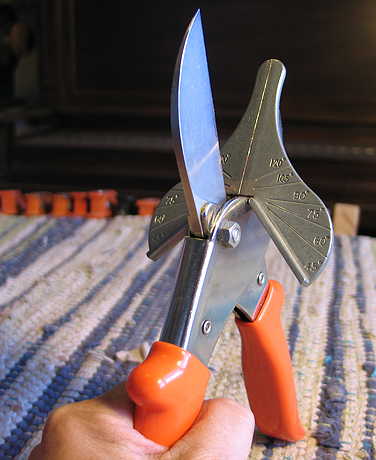
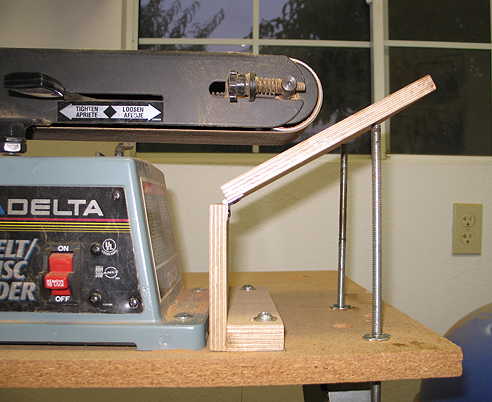
The second tool is seen below --- the thing that kind of looks like a flying fish with fins. This is called the "Miter Master" --- its sharp blade easily cuts miters and straight cuts in wood or plastic. I use it now to cut binding and purflings. I first heard about it when I was watching Kent Everett's DVD on the arm bevel; he used one, so I looked it up on the MicroMark website, and purchased one. It really works so much better than the saws or chisels I had been using in the past, to cut bindings! A cool tool.
|
|
Making the Bridge
Yesterday and today I worked on making my bridge. At first, as I had mentioned before in my video, I was considering making a kind of "Kasha"-shaped bridge. But when I sat down to try to design it and figure out how that would work, I just couldn't see a way to make it work.
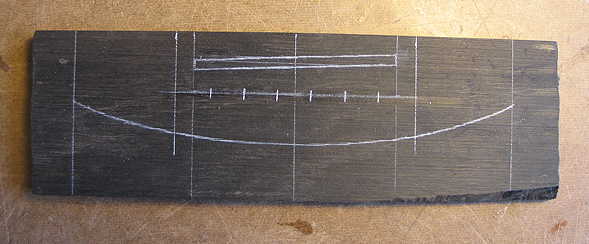
I didn't want to just do a standard Martin-style belly bridge, so I decided to just make a bridge with a simple curve on the bottom. I thought this would kind of complement the curve of the tail end of the guitar.
So, I first thickness-sanded my ebony bridge blank to 3/8" thick. Then I drew the saddle slot position and angle onto the blank, and the bridge pin locations. I used my Stew-Mac saddle-slotting jig with the Dremel to rout the 1/8" saddle slot.
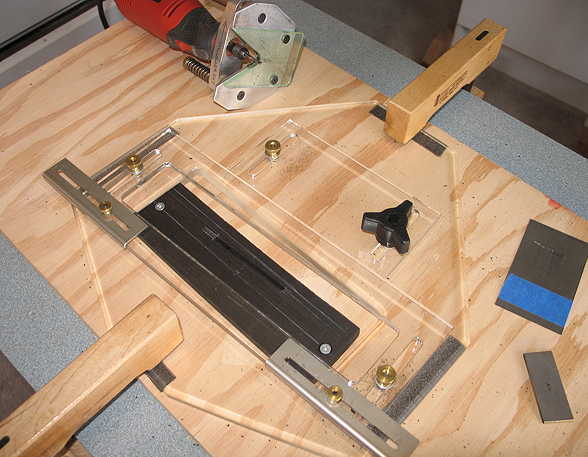
Then, following the GS Mini-style plans I had purchased, I drilled the 3/16" holes for the bridge pins and used a countersink bit in the drill press to bevel the holes.
I then cut out the bridge shape on the bandsaw and used my belt sander thicknessing jig to shape the wings of the bridge.
|
|
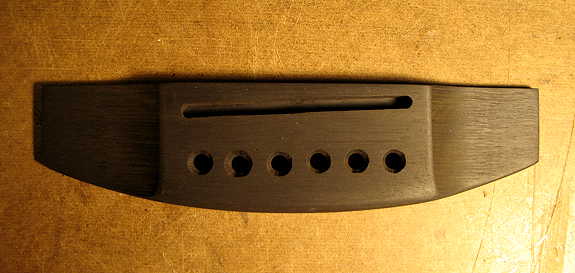
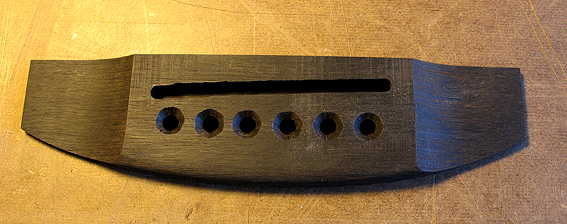
However, the more I looked at the bridge, the more it seemed too chunky to me; also, I didn't particularly like how far the bridge pin holes were from the saddle. It seemed that there wouldn't be that much of a "break angle" for the strings with this first bridge.
So...today I redesigned the bridge. I made it 5/16" thick, instead of the original 3/8". I moved the saddle slot a little lower down (so the center of the slot at the treble end was 5/16" from the top of the bridge). And, I moved the bridge pin holes a little further up, so that the bridge pin line was 1/2" below the treble end of the saddle.
When I routed the slot, it didn't go as smoothly as my first bridge; you can see a little jaggedness on the left-hand side of the slot.
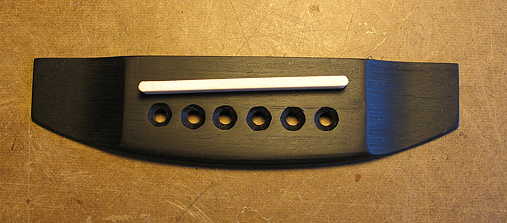
However, the 1/8" saddle fits in nice and snugly, and, when the saddle is inserted, you can't really see the jaggedness, so I think I'm good.
Below, you can see that I have sanded and polished up the bridge with some lemon oil.
|
|
|