GS Mini 24

Friday, March 21st, 2014

Peghead Design & Template

Now that the soundbox and bevel are done, I can move on to the neck.

Below, using carbon paper, I am tracing my peghead design onto some 1/2" plywood for a template. I tend to like pegheads that are narrower at the top, because then the strings don't run into each other from the tuner post down to the nut.

I used a couple of different sized protractors I had on hand, to draw the curves at the top and bottom of the peghead.


Here's the template, with holes drilled at the tuner post positions.


Heel Dowel

Here I have bandsawed (bandsawn?) and trued up (using my little jointer) the peghead angle on the neck blank, and have cut it to size (to meet the soundbox at the 14th fret).

I have drilled a 1/2" hole for the dowel (as something for the threaded inserts to bite into) and have glued in the dowel. I will then cut it flush.


Carbon Fiber Rods

I decided to try another new thing I've never done before --- installing a couple of carbon fiber rods on both sides of my truss rod (I'm going to be using the Allied Lutherie truss rod designed by Mark Blanchard). The rods are 1/8" by 3/8". I just bought one 24" rod and cut it in half, for two 12" rods.


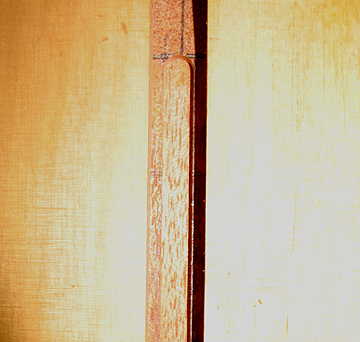
Here I have routed the slots for the rods and have epoxied them in.


After this is dried and cured, I will scrape the surface flush and will then move on to routing the channel for the truss rod.

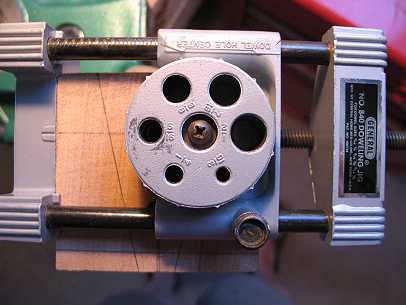
Once that is done, I will drill the holes for the threaded inserts and install those. (I like to do this before doing any bandsawing or shaping of the neck, because having the blank still square makes it very easy for me to use this dowel jig to drill the holes in their accurate positions and absolutely perpendicular to the heel face.)

After that is complete, I can finally move on to bandsawing out the neck shape and all the rest....


Saturday, March 22nd, 2014

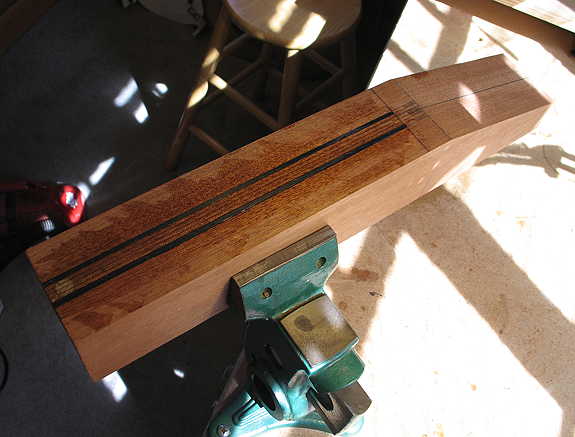
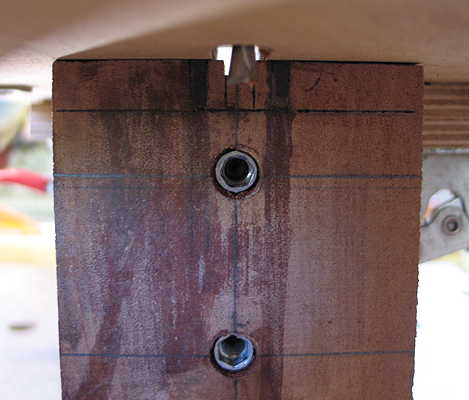
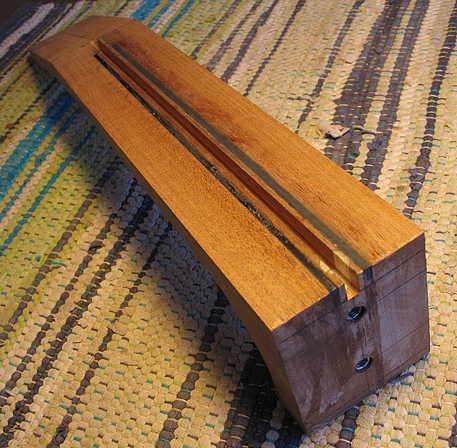
Last night, as I mentioned, I used my dowel jig to drill the 3/8" holes for the two threaded inserts. I drill the holes a little over 1/2" deep; the inserts are 1/2" long, and I want to set them in about 1/16" (to account for the fact that I will later cove out all but the outside edges of the heel, for easier fitting of the heel to the slight curve where the heel meets the soundbox). What I do after drilling the holes is to first install the inserts dry, then screw them back out and drop some superglue onto the sides of the hole. Then I reinstall the inserts.

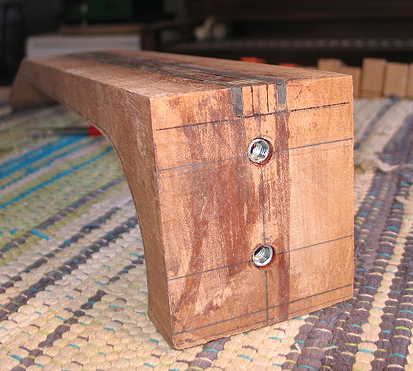
After I installed the threaded inserts, I took the blank to the bandsaw and cut out the basic neck profile, because, for routing the truss rod slot, I wanted to use this jig I've had for many, many years. (I got the idea from both John Mayes's and Jeff Traugott's sites.) It allows you to easily line up the neck for accurately routing the truss rod slot.

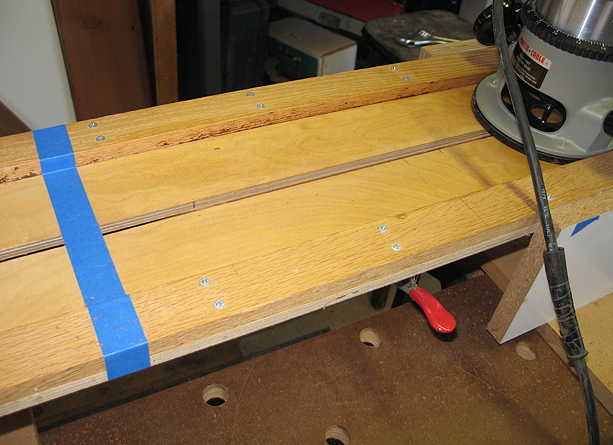
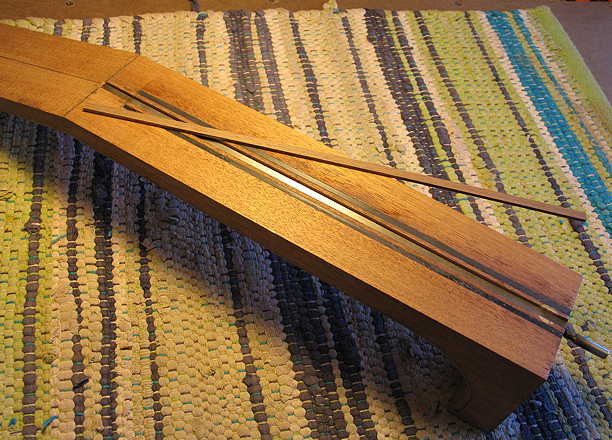
Here's the top of the jig. The router runs along the two wood strips. The router bit runs within the center slot of the jig. I put paste wax on the surfaces that the router contacts, so it will glide smoothly in the jig. The blue masking tape here tells me where I need to stop the edge of the router, so the slot stops at the nut end of the neck blank.


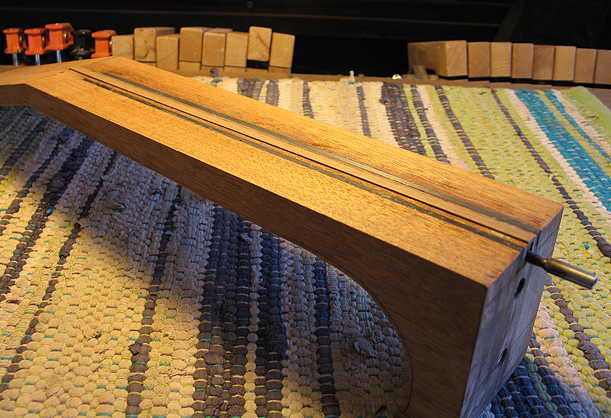
Here's the underside of the jig. The neck is held in place by three toggle clamps. I position the neck so that the truss rod slot-to-be is lined up exactly in the center of the slot in the jig.


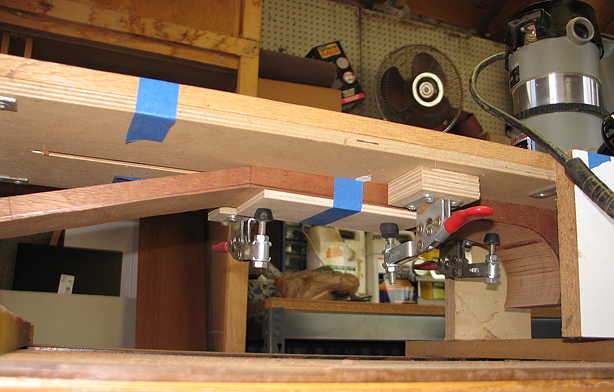
Here's the end of the jig where the heel is located. I can easily adjust the depth of the router bit by simply sighting it from this end.


Here you can see that the truss rod slot is centered in the jig's slot.


I made about four passes of the router to rout this slot. I'm using an Allied Lutherie truss rod, which needs a slot at least .040" deep (to allow for a filler strip above the rod). The rod itself is 1/4" wide by 3/8" deep.


I happened to have some hobby mahogany wood that was 3/32" thick, so I cut a strip that was 1/4" wide, to use for the filler strip.

Here the filler strip is lying atop the truss rod in the slot. What I will do later, when it comes time to actually install the truss rod, is put a very thin coat of epoxy on the bottom and sides of the filler strip, and lay that on top of the truss rod, making sure not to allow any epoxy to seep down onto the threads of the rod. (Allied Lutherie also suggests that you turn the neck upside down, as an additional safeguard against any epoxy possibly getting into the truss rod.)

Later, when it's dry, I will scrape the excess filler strip flush with the neck surface.