GS Mini 14

Wednesday, March 5th, 2014:

The Fingerboard

Because I didn't want the tediousness of having to measure for and cut my fingerboard slots by hand for this 23.5" scale guitar (not having a 23.5" scale fretting template), I purchased a pre-radiused (16" radius), pre-slotted 24.9" scale fingerboard. Then, I simply cut the fingerboard at the 1st fret, making it the 23.5" scale I needed.

(1) I have cut the taper on my ebony fingerboard, using my fingerboard taper jig on the tablesaw. My fingerboard will be 1-11/16" wide at the nut end, and 2-1/8" wide at the 12th fret. After drawing the lines for the taper, I placed four pieces of masking tape to mark the end points of the lines, making it easy to align the cutting line with the edge of the tapering jig.


(2) Next, I mark the centerpoints for the 5/32" mother of pearl position dots, using an awl.


(3) I recently bought a set of brad-point drill bits --- how easy they make it to accurately drill the cavities for the position dots!


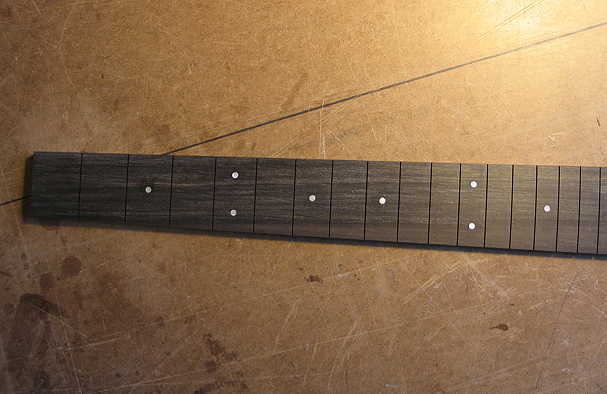
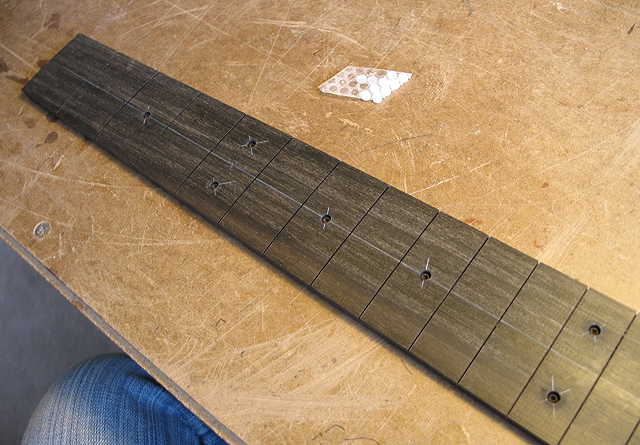
(4) Finally, I have glued in the inlay dots with superglue, filed the dots down flush with the fingerboard, and sanded it all down smooth, using a 16" radius block and 320-grit sandpaper.


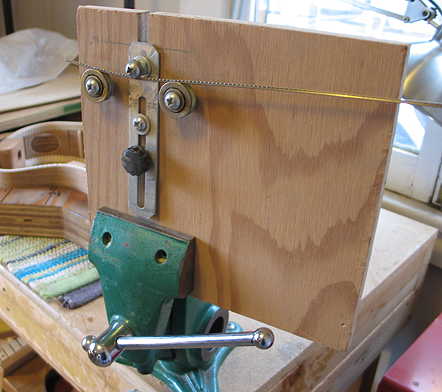
(5) Next, I use this homemade fret bender to put a slight curve in the fretwire, since my fingerboard has that 16" radius.


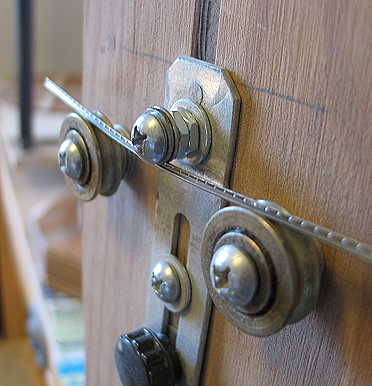
Here's a closeup of how the fretwire is forced into a curve by its passing through this contraption I've made. The fret tang runs between two closely-placed (but a little loose) washers in the center section. Since the two outer rollers (which support the fret crown) are placed lower than the middle section, the fretwire is forced into that slight curve, as I push the fretwire from right to left. If I needed a different radius curve, I would move the middle section up or down.


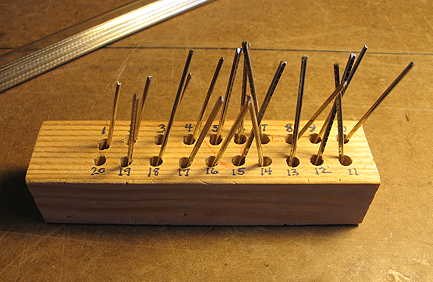
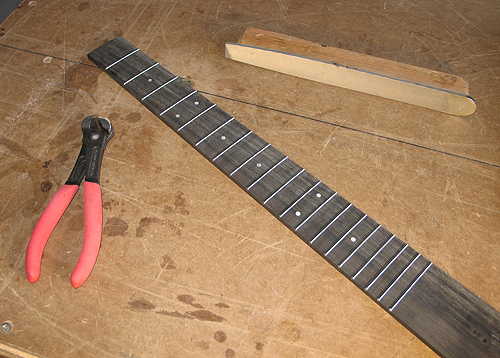
(6) After I've radiused the fretwire, I use an end nipper to cut the frets for each slot, slightly oversized.


(7) To install the frets, I first run a thin bead of Titebond glue along the fret tang, and lightly tap the fret ends into the fret slot. Then I use this fret press (just an arbor press with a radiused caul) to seat the fret firmly into the fret slot. I check to see if the fret is seated fully along the entire fret slot, and, if I need to, I use the hammer (a deadblow hammer with a brass head) to tap down any high spots.

I then clean up the glue squeeze-out with a slightly dampened rag.


Here all the frets have been installed. (Later I will clip off the overhanging fret ends.)


(8) Finally, I clamp the fingerboard down with a caul, since the fingerboard develops a very slight bow when you fret the fingerboard before it is glued to the neck.

(9) The next day, the fingerboard was straight again, and I clipped the overhanging fret ends, filed them flush with the fingerboard edge, and filed a 30-degree bevel on both ends.