GS Mini 11

Saturday, March 1st (ALREADY!!!), 2014:

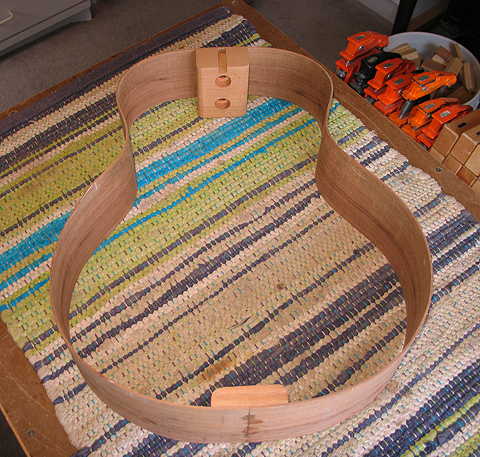
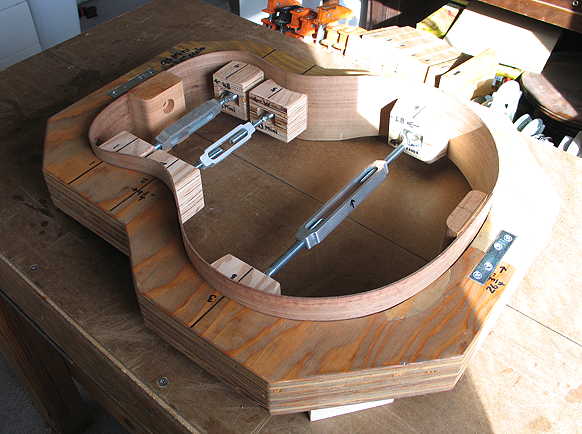
Well, here's the side set, with the blocks glued in, in the mold with the spreaders.

What I will do next is to "drive the bus" --- that is, sand the 25' and 15' radiuses (radii?) into the top and back edges of the sides. What "drive the bus" means is that I take the whole assembly (the side set in the mold), place it topside/backside down in the appropriate radius dish, and swivel it back and forth in the radius dish ("driving the bus") until the radius curve is sanded into the rims' edges. The way I can tell it is finished, is that I first mark the edges with white marker; when the white marks are all gone, I'll know I have sanded the whole thing.

After that, it's on to cutting and fitting the 1" basswood block which will support the bevel.
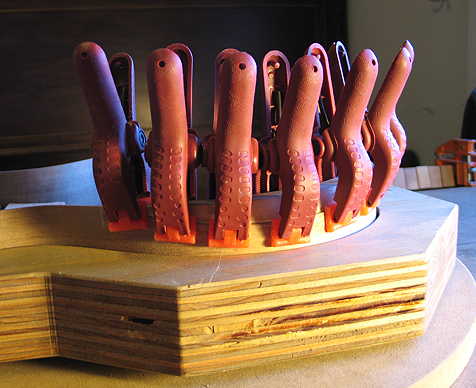
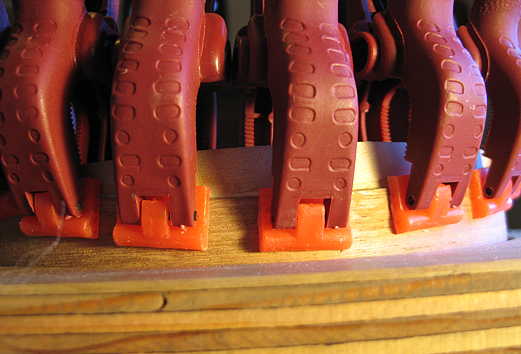


Driving the bus:

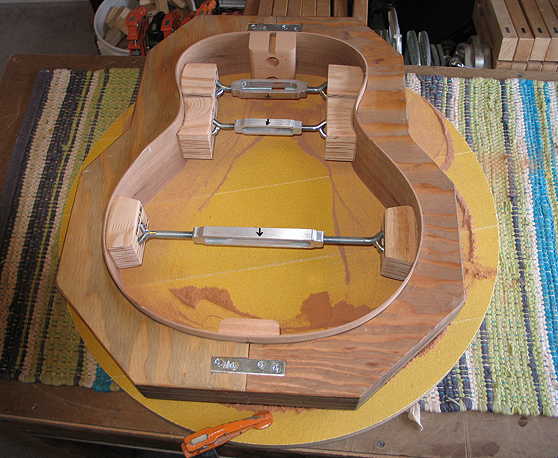
Here I am sanding the 15' radius into the back edge of the sides. I grab the middle of the mold on both sides and just swivel it all in a circle, left and right, on the 80-grit sandpaper that is stuck to the radius dish. (It's like steering a bus with its steering wheel.)

Doing both the top and the back edges took me about an hour-and-a-half. It's pretty labor-intensive, actually!


Here's the dust that is left behind, after you've sanded it down:

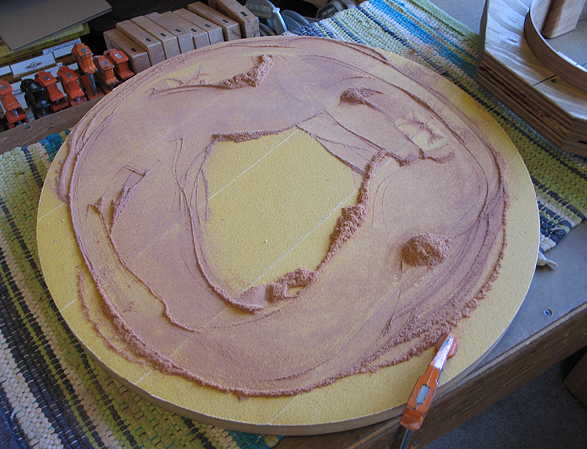
I save this dust in a ZipLok bag, in case I need some Mayan walnut dust later for filling any gaps.


A shot of the radiused side set:

Now I need to drill the two neck bolt holes, before I forget to do it.


Making the Bevel Block

Here I've traced the curve of the lower bout, where it has been cut for the bevel:


Here is the bevel block cut to fit. It is 1" tall (so, with the 3/4" cutout on the side, that will give 1/4" gluing surface for gluing the block to the side). The inner curve is cut 3/4" in; the top will be cut so that there is a 1/4" gluing surface for gluing the top to the block. I have also tapered the ends of the block down, to meet the 5/8" tall & 1/4" wide kerfing, to be glued on later.

On the outside of the lower bout, there will thus be 3/4" of the block exposed, and, when looking down at the top, there will be 1/2" of the block exposed.

Next, with the block in this position (top against the workbench), I traced the cutout curve of the side onto the outside of the bevel block.


The next thing I did was to draw a line 1/4" away from that line (towards the guitar's back) and then sand to that line. That 1/4" wide strip will be the gluing surface, where the block will be glued to the side.


I flip the mold over so that the top edge is up, and apply glue to both the block's gluing surface and the inside edge of the side cutout. Then, aligning the bevel block's line to the side cutout, I clamp the bevel block to the side.


Here is a close-up view of the block clamped to the side.

That's it for today --- it's around 4:15 p.m. and my mind is shot. I'd say it was a successful day today!

TOMORROW: Once this is dry, I need to, again, "drive that bus," so the bevel block is level with the rest. Then I can install the basswood kerfing and file down the inside corner of the bevel block (to reduce as much weight as possible). (The inside corner was not shaped before the block was glued to the side, because that would have made it much more difficult to use the clamps; non-parallel surfaces are difficult to clamp securely.)

Once the kerfing is installed and dry, I will need to "drive the bus" one final time, to make sure the top and back edges have the proper radius to accept the top and back.