Thursday, May 21st, 2015:
Discovered a potential problem yesterday, concerning the Martin "bolt-on" neck, which I hadn't known about. When I had ordered the kits, I had asked for a "bolt-on neck" kit, not realizing that the neck, as supplied by Martin, wouldn't actually provide the same kind of bolt-on neck that I've been used to.
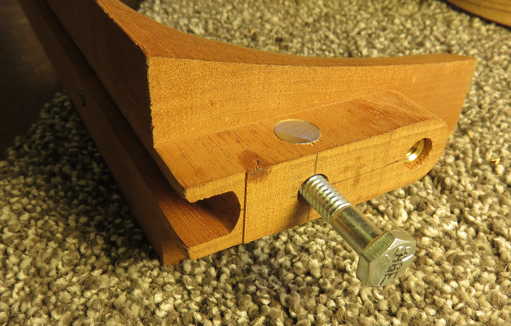
Martin provides a mortise & tenon neck joint, with a single bolt, as you can see in the photo below. However, in reading up on the joint in some building forums, I found out that Martin actually intends this tenon to be glued into the mortise, and that the bolt is only there as a clamping device.

|
|
What I had wanted was a bolt-on joint that you do not glue (thus making it easier later to remove the neck if you needed to reset it, for example). What I do, on my own guitars, is use a simple butt joint and two bolts; I don't glue the neck joint, and only glue the fingerboard extension to the top.
I had to decide whether or not to do the joint as Martin intended (glue the single-bolt joint), or add another bolt to the tenon (so I could go with a glueless joint). The problem was, I was advised by the luthier friend who had sold me the kits that he has seen those glued joints fail occasionally.
So, I decided to add another bolt to the tenon.
Now, I had to decide whether to install a threaded insert into the end of the tenon (into end grain, which is sometimes a problem), or try the other method (which I've never tried before) of installing a barrel nut (a metal dowel with a threaded hole) through the tenon's sides, and drill a hole into the end of the tenon to meet that threaded hole in the barrel nut. It's easy to do this when you haven't yet made the mortise or tenon, and the neck heel is still a big, square block of wood; it's a bit trickier to figure out how to clamp and support that fragile tenon after it's already been cut.
Well, I decided to go for the barrel nut option, and decided to try it out on my own kit first, in case I messed up, before attempting to modify Randall's neck joint. Also, by doing mine first, I could figure out how to go about it the best way.
BEFORE I DID ANY OF THIS, HOWEVER, I HAD TO DO SOME PREP WORK FIRST:
(1) I sanded the 25' radius into the kerfing on the top edge of the sides; I used my radius dish covered with sandpaper to do that. That way I would know exactly where the top of my neck block would be. (The measurements for my neck heel and neck block would depend on that.)
(2) I chiseled out the side wood that was covering the neck mortise and sanded the edges flush with the mortise. |
|
Once that was done, I could work on the tenon holes.
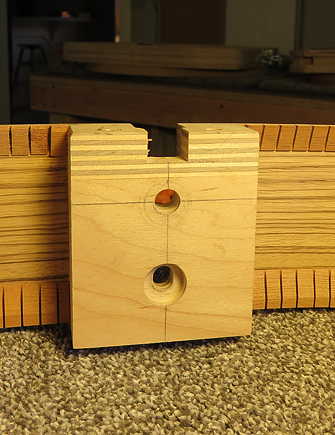
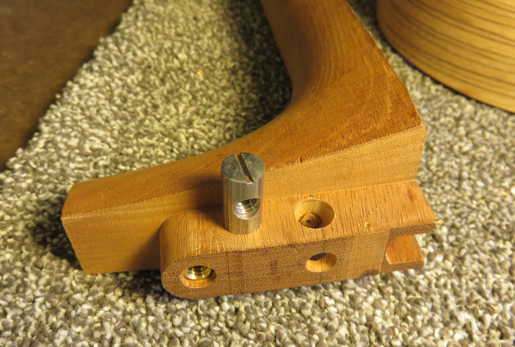
So, here's a photo of the barrel nut, and the holes I drilled for the barrel nut (25/64" diameter) and for the bolt to access the threaded hole in the barrel nut (5/16" diameter).
I drilled the holes 1-1/8" down from the top of the neck heel.
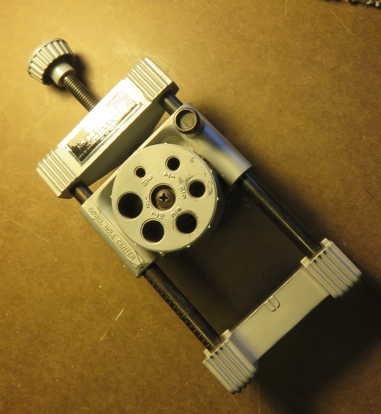
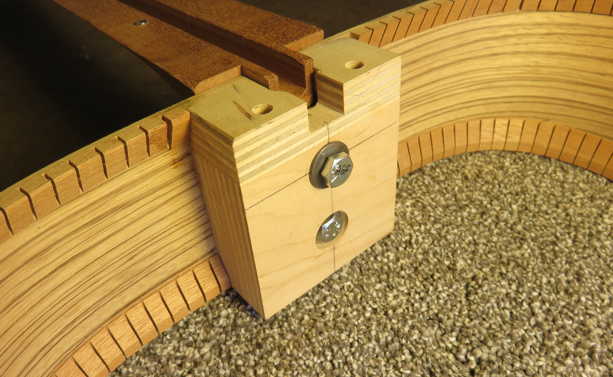
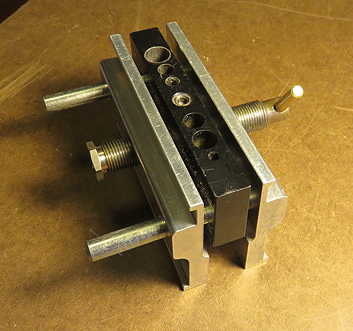
To drill the barrel nut hole, I used my drill press, supporting the tenon underneath with a strip of wood (so the hole wouldn't chip out on the bottom) and laying a few shims underneath the neck shaft so it would stay steady. To drill the 5/16" hole, I used the dowel-centering jig pictured below.
|
|
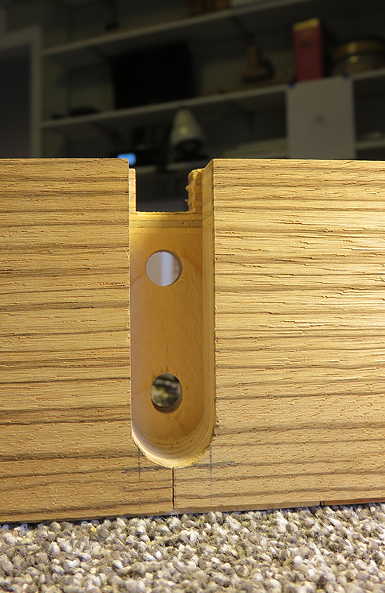
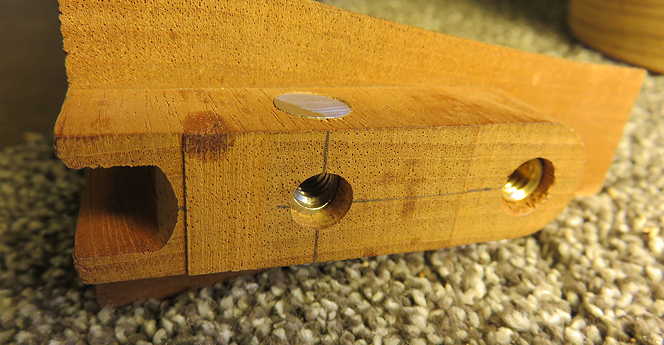
Here is the barrel nut in that hole. I had to sand the two ends of the barrel nut a bit, so they would be flush to the sides of the tenon.
|