Wednesday through Friday, June 23-25, 2004:

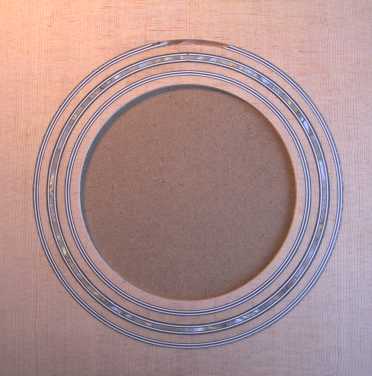
The first thing I did Thursday was sand down the rosette after I had let the abalone purfling ring cure.

I had pulled out the teflon filler strip Wednesday, sanded down the plastic purfling rings, and then used Duco cement for installing the abalone ring. I think it came out nicely!

TO THE LEFT:

Before I fit the back and top to the side set, I have to sand the rims and kerfing to match the 15' and 25' radius arches of the back and top. I used to use a long, angled sanding stick to do this. But here I tried out a way I've heard others use. I put a threaded rod into a t-nut in my workbench. I clamped the mold to the bench so that the rod is in its center. Then, as you see in the photo below to the left, I have drilled a hole in the middle of my radius dish and placed it upon the threaded rod until it sits atop the back side of the side set. Now I can simply rotate the dish and sand away!!! (I have stick-on sandpaper on the concave part of the dish.)

Below you can see the results of the sanding.


The next thing I did was to chisel out the notches in the kerfing where the back braces are let into the kerfing. Here I am checking the fit.

ABOVE you can see two toothpick locating pins drilled into the neck and tail blocks, so I can more easily adjust the back once it comes time to glue it onto the sides.

Previous Page

Next Page

Return to Pat's Dreadnought Home Page