Monday, July 19, 2005 . . . .
Sorry it's been a while....I just today totally completed the ukulele! Here's what I did since the last posting:
Sunday, July 3rd through Tuesday, July 5th: I sprayed on the Target USL waterborne finish, using my Home Depot "Husky" brand (Campbell-Hausfeld) HVLP spray gun, with my 4-gallon Campbell-Hausfeld pancake compressor. The spraying went well. I took the spray outfit out to a shaded area of my back yard (it's been really hot lately), so that helped. I sprayed about 3-4 coats a day, waiting about an hour-and-a-half to two hours between coats.
I also tried something I had read about, but had never done before --- I bought two 125-watt infrared heat lamps and put them about 20" away from the soundbox and neck after I'd sprayed a coat. That helped the coats cure a bit faster.
Another thing I did differently this time was that I put a tablespoon of denatured alcohol into a quart of the finish, to help the coats adhere to the previous coat better. It seemed to work. The spraying seemed to go on more smoothly and evenly. I had no problems this time with runs or anything (maybe my spraying technique is getting better, too). I had read about this tip in an article by John Greven, who has had lots of experience with waterborne finishes.
I sprayed a total of 12 coats, scuff and level-sanding here and there after the 3rd coat. The coats were going on so smoothly, that it was very easy this time to level the coats.
Wednesday, July 6th through Thursday, July 14th: This was the really DIFFICULT part .... the waiting, before I could wet-sand and buff out the finish!!! I HATE the waiting. But I was really disciplined and stuck it out.
Friday, July 15th: I wet-sanded the finish, using all the 9 grits of Micro-Mesh cloth sanding papers, with a few drops of dish detergent in water. After I got through with that, I used my new pedestal buffer to put a high gloss on the finish, using Menzerna fine and extra-fine compounds. I think I'm getting the hang of using the buffer, too! After all that, I use a plastic polish by Meguiar's (#10) to get the finish "squeaky-clean" (it really does squeak!).
Saturday, July 16th: I took a break (kind of -- it was 100°!!!) and went on a short hike in a local reservoir park with a friend.
Sunday, July 17th: I bolted on the neck, scribed the area in which I had to remove the finish, and glued on the fingerboard extension. I then located the bridge and glued that (after removing the finish from the top, of course). To remove the finish, the method I use is paint stripper (applied and removed VERY carefully!). I find that the easiest.
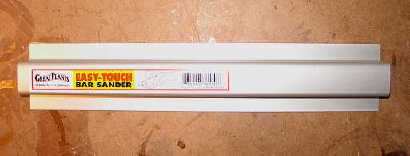
Later that evening, I leveled the frets, using a neat aluminum hand sander I found in my local hobby store. It's about 11" long, and thus pretty much spanned the entire ukulele fingerboard, making the leveling that much easier. After that, I re-crowned the frets, rounded the fret ends, sanded the fretboard, and polished the frets.

Monday, July 18th: I first worked on the bridge pin holes --- I needed to ream out the holes to fit the slotless bridge pins, then had to cut string slots in the bridge pin holes. I installed the tuners (Gotoh friction tuners), made the nut and saddles (mine is a split-saddle), slotted the nut, adjusted the saddle height, and strung it up!!!
The verdict? It sounds GOOD!!! As I found out with my teacher friend's uke, it will loosen up and sound better and better as time passes. And I just LOVE this koa ---- thanks, Hana Lima 'Ia, for the beautiful woods!!! I'm sure I will want to continue working with koa in the future....
Oh, yeah...I just have to share this link, which really shows just what can be done with a ukulele (not by me, however....at least not yet!!!):