The Peghead

 July 7th...Today I glued the ebony headplate veneer to the peghead. Before I glued it, I cut out the access hole for the truss rod adjusting nut. My veneer was narrower than I had expected, but, luckily, it was just wide enough for the size of the peghead design.

Those white lines you see are NOT the peghead design! They were just marks I made when figuring out where it would be safe to put some staples, to anchor the veneer to the peghead during gluing (so the veneer won't slide around). (What I do is use a staple gun to shoot a staple into the peghead and cut off the top of the staple with an end nipper, leaving two stubs of staple. When I have the ebony veneer all lined up, I press down on the veneer, and the staple stubs bite into the veneer. After I put glue onto the veneer, I can then easily find the right position for gluing, and the veneer stays put when I clamp it.)


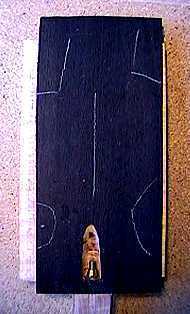
 July 9...Today I made the jig pictured below, to hold the neck level as I bandsawed the peghead shape.

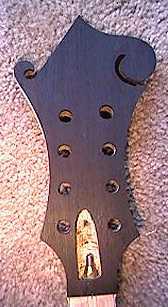
The bandsawing of the peghead went great! It was a lot easier than I thought it would be. What a difference having a good bandsaw makes! I can now follow curves accurately, without having the blade bind on me or wander off course.

Next, I drilled the holes for the tuners. Yes, I know my truss rod access hole is a little off-center, but it will be hidden by the cover, so not to worry....


Next...Inlaying the peghead

Return to Projects Home Page