ASSEMBLING THE KITS, Part Two
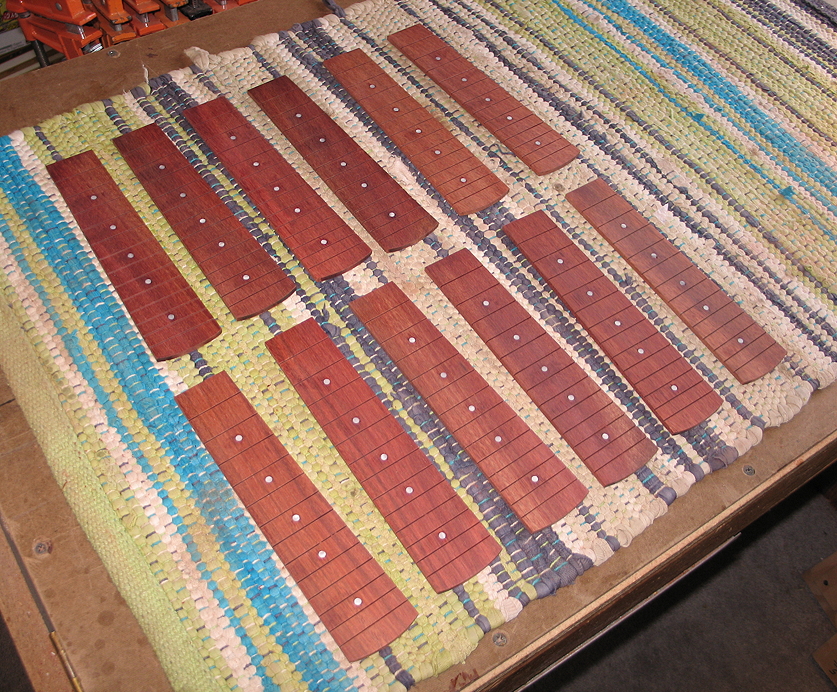
Monday, January 6th, 2014: Well, it's been a while, but I'm back to working on the uke kits! I just heard back from the woodshop teacher that he can commit to 10 kits. (I'll be making 12, so that he can work on one and I can use one for demonstration purposes.) Since my last report, I have also purchased the Ping tuners and the strings. I also have purchased cardboard boxes large enough to hold each student's materials and finished uke. These past three days I worked on the fingerboards: cutting the slots, thicknessing the slotted boards to a little over 1/8" thick, cutting the taper in the boards, inlaying (and sanding down) the mother of pearl fingerboard position dots, and filing a slight bevel on the tops of the slots (to make inserting the frets easier). I am going to have the students pound in the frets. Here are the finished fingerboards:
WHAT'S LEFT TO DO? What I need to do now is cut the kerfing strips and the fretwire (mandolin-sized wire) to the lengths needed for each kit. That will be easy to do. I figured about 28" of fretwire should do it for the fingerboards. I haven't sized out the kerfing yet. I will also need to check to see if I have enough bone nut and saddle material for all the kits. And I will need to make all the bridges (it just involves slotting and dimensioning the bridges). The final part will be doing the necks. I plan to bandsaw out the basic shape of the neck. install the threaded insert, and will drill the tuner holes. This, for 12 ukes, will take a LOT more time than what I've done so far! I'll leave it up to the students to install the frets, glue the fretboard to the neck, and do the neck shaping.
|
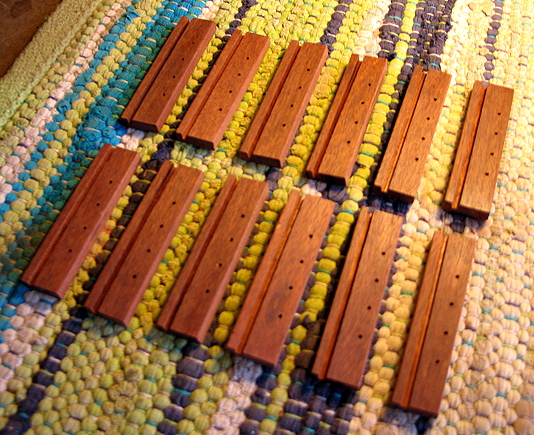
Tuesday, January 7th, 2014: Just spent a couple of hours making the 12 bridges. I started with a couple of 3" by 10" pieces of bloodwood (about 1/4" thick), and used my table saw to cut the 1/8" slot. Then I cut them to size --- 3/4" by 3". After that was done, I drilled the 4 string holes through the bridges, 1/2" apart. Later, after the students attach the necks (with fingerboard fretted), we can determine how much they might have to thin the bridge (sanding from the bottom of the bridge).
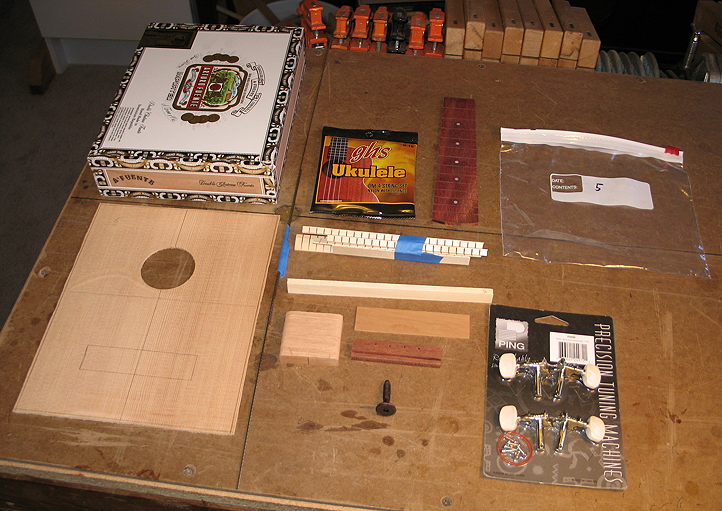
Later that day . . . Well, it's around 4:30 p.m., and I'm done for the day. After making the bridges, I gathered the kerfing strips for each kit (each kit needed different lengths of kerfing, as the cigar boxes are all different sizes); I almost had enough scrap kerfing for all the kits, except for two, which I supplied with some of that quarter-round molding. After I did that, I figured out how much fretwire I needed for each kit (28" --- that's figuring in extra for clipping a little beyond the fingerboard edge), and I cut those lengths for all 12 kits. So . . . the photo below shows what I have right now:
I just ordered lots of saddle blanks from LMI. I ordered 1/8" thick saddle blanks (15/32" tall and 3-1/4" long); this proved to be the easiest and cheapest way to go, as I can use them both for the 3" saddles and can get two nuts out of one saddle, as well. (My tablesaw slot in the bridges is just a tad under 1/8" wide, so that will make it easier for the students to sand the saddles down to the correct thickness for the slot.) LMI is pretty speedy in delivering their orders, so I should have those within a few days. I still have an order of the Ping tuners coming. They probably will arrive towards the end of this week (depending on weather conditions). All that's left to do now is to bandsaw out all those necks!!!! (This will be the toughest, most time-consuming task.) I will start tomorrow!!!
|