August 14th-15th, 2013:
Well, it's been quite a while since I finished my last instrument (my personal, French-polished Size 5). But, after having recently seen my church's worship band using a cajón, I thought, "That might be a fun little project to do!!!" So, I did a little research on the web on building a cajón. There were several YouTube videos on how to build one, and several of them included an adjustable snare. I decided I wanted to build that type, basically following the method used by Steve Ramsey ("Woodworking for Mere Mortals") shown on this video: "Make a Cajon Drum with Adjustable Snare".
At first I was going to cut all the plywood pieces myself, but, when I saw a cajón kit put together by Meinl in my local Guitar Center, I got lazy and bought the kit (not feeling like doing the sawing and routing of the plywood pieces). The kit was just for a basic, snareless cajón, but I will modify it to an adjustable snare cajón.

So, here's the kit --- basically, just a box with all the plywood pieces pre-cut and routed, with support pieces, rubber feet, and the snare wire included.
|
|
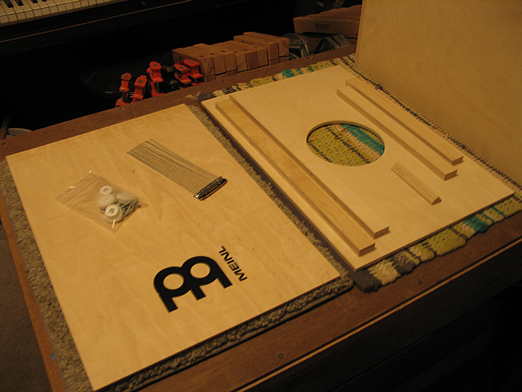
Here are the top (1/8") and back (1/4"), various supporting brace pieces, four rubber feet, and the wire snare. |
|
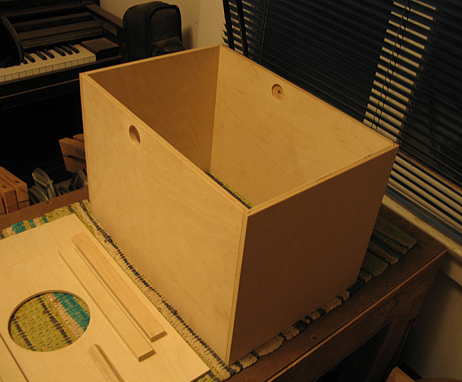
And here are the sides, base, and top piece (all 3/8"). The finished box will be 17-1/4" tall, 11-7/8" wide, and 11-7/8" deep. The two holes you see in the box are what I have drilled myself, which will hold the 1-1/4" dowel rod which will control the snare. |
|
|
|
|
|
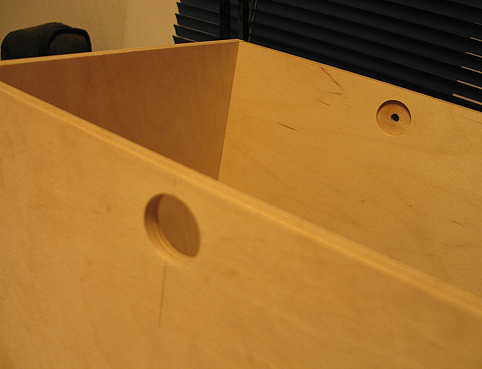
Here is a closer view of the two holes for the dowel rod. I have drilled one 1-1/4" hole all the way through the left-hand side. On the other side, I have only drilled half-way through, with a 5/16" hole through the middle. |
|
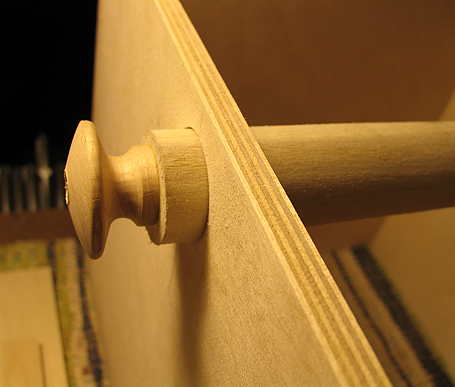
Here I have glued and screwed a little wooden knob onto this end of the rod. This knob will be used to turn the rod to adjust the snare (to turn it on and off).
|
|
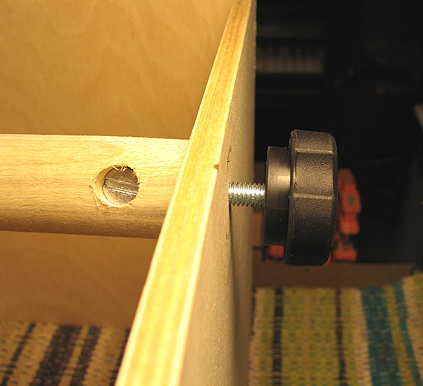
On this other end of the rod, I have drilled a 5/16" hole about two inches down through the center of the rod, and a 3/8" hole horizontally, for a dowel nut to slip through. The dowel is stopped halfway through the side, and is tightened by screwing the black-handled clamping knob into the dowel nut and against the side. This way I can clamp the rod tightly after I've turned the snare on or off.
|
| |
|
|
|
|
|
|
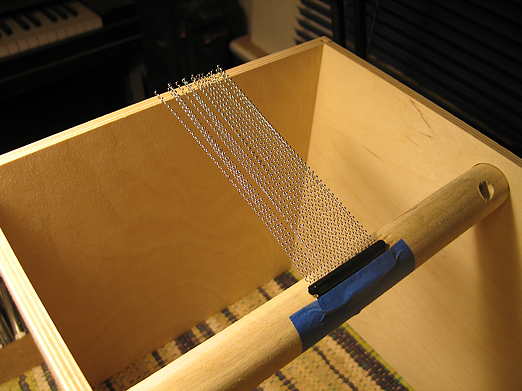
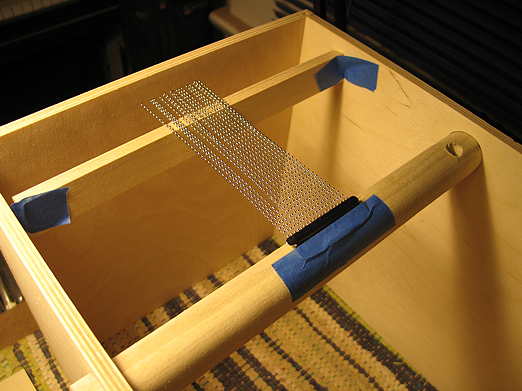
TO THE LEFT: Here is how the snare-adjusting rod will work. (I have just taped the snare to the rod temporarily here; later, after I have glued, stained, and finished the box --- except for the top --- I will actually insert the dowel rod and then screw the snare to the rod.)
When the dowel rod is turned clockwise and tightened in this position, the wire snares will rest against the top (or "tapa"), and the snares will thus rattle against the top as you thump it.
TO THE RIGHT: When I don't want to use the snare, I will just loosen the clamping knob and turn the dowel rod counter-clockwise, and then tighten it up again. The snares will then just rest against a wood strip which I will attach a little bit into the box; I will probably line the strip with some felt. Thus, the snare wire will be away from the top, and will also be kept from rattling around freely.
|
|
 |
|