 |
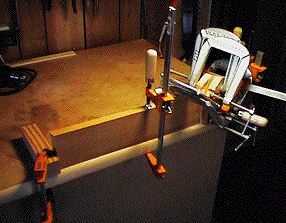
| To the left, I have clamped the neck , after sawing the 3" mahogany board at a 15° angle, flipping the peghead piece over, and gluing it to the neck shaft board. Above is the neck after the glue has set. I have also thinned the peghead, so it will accommodate the tuners, by using the Safety Planer (described on my "Tools of the Trade" page) to plane away wood from the underside of the peghead. |
|
|
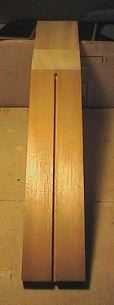
This is the neck after I have routed the channel for the double-action truss rod. The truss rod nut will be accessible through the soundhole.
|
 |
|
Above are two views of the neck, after I have glued on the heel block (a stack of four 4" long boards) and the rosewood veneer face plate. After that, I cut the shape of the peghead and drilled the tuner holes.
|
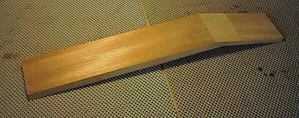
Here is the neck after I have roughly shaped the heel with the bandsaw. I have also used the bandsaw to trim the sides of the neck close to their final width. I use a flat butt joint on the neck. The neck is connected to the body with two hex bolts, running through the neck block, into two threaded inserts in the heel. The only thing that is glued is the fingerboard extension. |
 |
 |
|
Above is the final carved neck, after the fingerboard has been attached, fitted against the body.
The heel end will soon be covered with an ebony heel cap.
 |
|
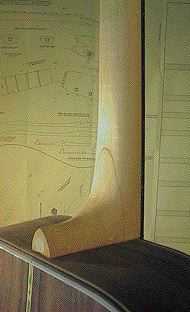
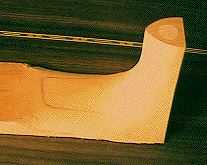
Using the mini-drawknife (described on my "Tools of the Trade" page), round files, rasps, and sandpaper, I have shaped the heel to its almost-final shape. That circle you see at the heelcap site is the end of a dowel running all the way through the heel, perpendicular to the neck shaft. It is there so that the two threaded inserts I will install will bite into something other than end grain. |
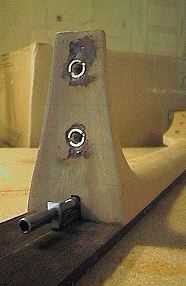
Here is the neck, with the fingerboard glued, the trussrod inserted. The two threaded inserts are epoxied into the heel (biting into the dowel). After setting the neck angle (an easy thing to do, as it just involves sanding one surface), and before installing the threaded inserts, I have sanded the heel surface into a slightly concave shape, being careful not to touch the heel edges. This ensures a tight fit to the body.
Return to "The Building Process"Page